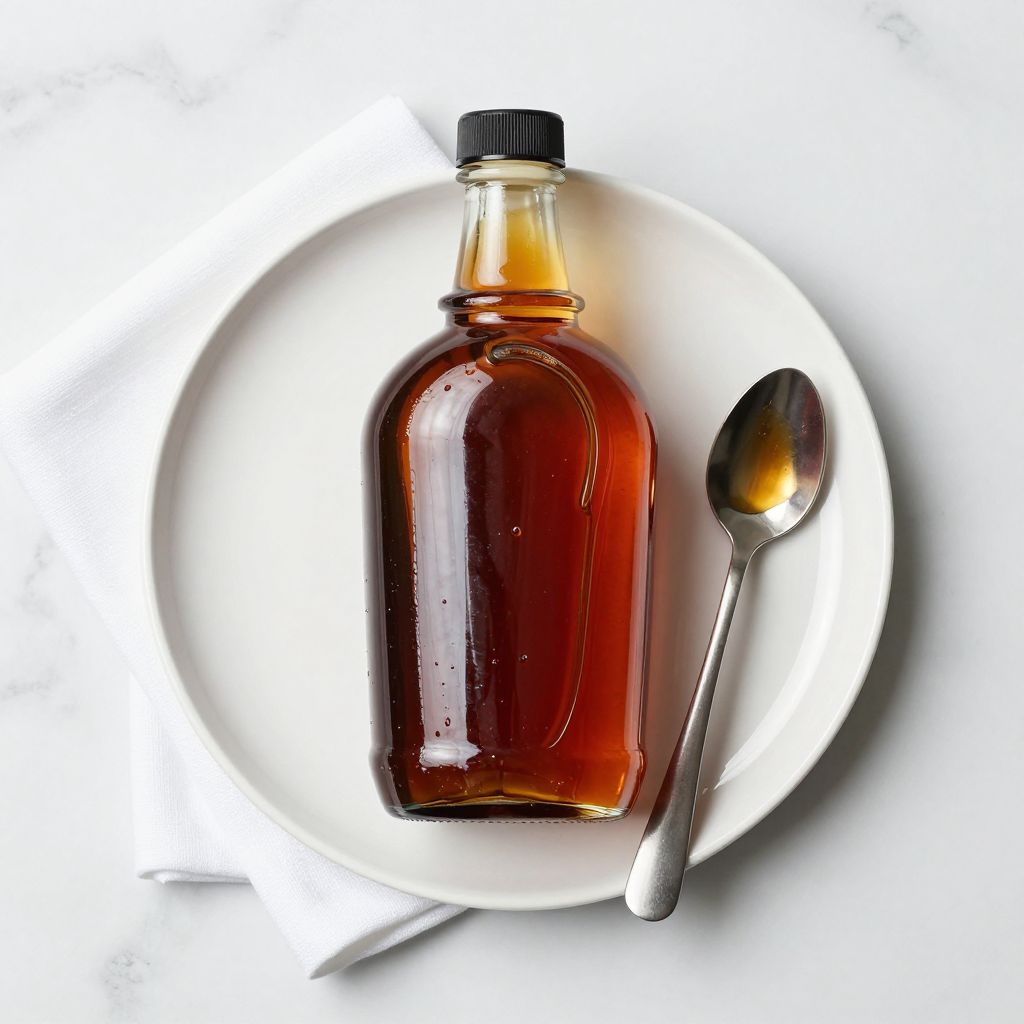
Brown sugar syrup is a rich, caramelized sweetener that transforms everything from coffee and cocktails to pancakes and desserts with its deep molasses flavor. This simple two-ingredient recipe takes less than 10 minutes and delivers a silky syrup that beats any store-bought version.
Once you make your own brown sugar syrup, you’ll wonder why you ever bothered with plain simple syrup. Let’s get into how to make this versatile kitchen staple that belongs in every home cook’s refrigerator.
Why You’ll Love This Recipe
This brown sugar syrup is absurdly easy to make and adds instant depth to drinks and desserts. You probably already have both ingredients sitting in your pantry right now.
- Ready in under 10 minutes with just two ingredients
- Rich molasses and caramel notes that plain sugar can’t match
- Perfect consistency for drizzling, mixing, or sweetening without graininess
- Stores for up to a month in the fridge
- Costs a fraction of specialty syrups from coffee shops
My Experience Making This Recipe
I started making brown sugar syrup after spending way too much money on flavored coffee syrups that tasted artificial. The first time I stirred brown sugar into simmering water and watched it melt into liquid gold, I felt a little ridiculous for not trying this sooner.
The syrup smells like warm caramel as it cooks, and it has this beautiful amber color that catches the light. I’ve served it in iced lattes to friends who assumed I’d bought some fancy artisan product.
My biggest surprise was how much better homemade tastes compared to commercial versions. There’s a genuine molasses complexity that you just can’t fake with added flavors.
Recipe Overview
- Recipe Name: Brown Sugar Syrup
- Servings: 16 (about 2 cups)
- Prep Time: 2 minutes
- Cook Time: 5 minutes
- Total Time: 7 minutes
- Course: Condiment
- Cuisine: American
- Calories per Serving: 52
Equipment You Will Need
- Medium saucepan
- Wooden spoon or heat-resistant silicone spatula
- Measuring cups
- Glass jar or bottle with lid for storage
- Funnel (optional but helpful for transferring)
Ingredients for Brown Sugar Syrup Recipe
- 1 cup brown sugar (light or dark, packed)
- 1 cup water (filtered for best flavor)
Ingredient Notes and Substitutions
- Brown sugar: Provides the signature molasses flavor and creates a syrup with complexity beyond plain sugar. You can substitute with coconut sugar for a slight caramel taste, though the flavor will be milder and the color lighter.
- Water: Dissolves the sugar and creates the right consistency for a pourable syrup. You can use coconut water for a tropical twist, but expect a slightly different flavor profile and reduced shelf life.
How to Make Brown Sugar Syrup Recipe
Step 1: Combine Ingredients in Saucepan
Add the brown sugar and water to a medium saucepan. Stir briefly to start incorporating the sugar into the water, though it won’t fully dissolve yet.
Starting with both ingredients at room temperature helps them combine more evenly. Breaking up any large clumps of brown sugar before adding makes the dissolving process faster.
Step 2: Heat Over Medium Heat
Place the saucepan over medium heat and begin warming the mixture. Medium heat prevents scorching while still moving things along quickly.
Avoid high heat, which can cause the sugar to caramelize unevenly or burn at the edges. You want a gentle dissolve, not a rapid boil.
Step 3: Stir Until Sugar Dissolves
Stir the mixture continuously as it heats, scraping the bottom and sides of the pan. You’ll see the brown sugar gradually melt into the water, turning from grainy to smooth.
Continuous stirring prevents hot spots that could burn the sugar. The mixture should look completely uniform with no visible sugar crystals remaining.
Step 4: Bring to a Gentle Simmer
Once the sugar has dissolved completely, allow the mixture to come to a gentle simmer. Small bubbles should break the surface, but you don’t want a vigorous rolling boil.
Simmering for 2-3 minutes helps the flavors meld and creates a slightly thicker consistency. This step also ensures any remaining sugar crystals have fully dissolved.
Step 5: Check Consistency
Dip your spoon into the syrup and lift it up to observe how it drips off. The syrup should flow smoothly and coat the back of the spoon lightly without being too thick or watery.
Remember that the syrup will thicken slightly as it cools. If it seems a touch thin while hot, it will likely be perfect at room temperature.
Step 6: Remove from Heat
Take the saucepan off the burner once you’ve achieved the right consistency. The syrup will continue cooking from residual heat if you leave it on the stove, potentially becoming too thick.
Let the syrup sit in the pan for 2-3 minutes to stop bubbling before transferring. This brief rest also allows the temperature to drop slightly, making it safer to handle.
Step 7: Cool Slightly Before Transferring
Allow the syrup to cool for about 5 minutes in the saucepan. Pouring boiling-hot syrup into a glass container risks cracking the glass from thermal shock.
The syrup should still be warm enough to pour easily but not so hot that it’s dangerous. Waiting just a few minutes makes all the difference for safe handling.
Step 8: Transfer to Storage Container
Pour the cooled syrup into a clean glass jar or bottle using a funnel if you have one. Glass containers are ideal because they don’t absorb flavors or odors and are easy to sterilize.
Leave about an inch of headspace at the top of the container to allow for any expansion. Seal tightly once the syrup has cooled to room temperature completely.
Pro Tip: Make a double batch and store it in a squeeze bottle for easy drizzling over pancakes, yogurt, or into coffee drinks. The syrup stays perfectly pourable straight from the fridge and saves you precious time on busy mornings.
Tips for the Best Brown Sugar Syrup Recipe
- Use dark brown sugar instead of light for a more intense molasses flavor that stands up beautifully in strong coffee or bourbon cocktails.
- Stir constantly while heating to prevent sugar from settling and scorching on the bottom of the pan, which creates bitter flavors.
- Add a pinch of salt to the mixture for a salted caramel effect that balances sweetness and adds complexity.
- Sterilize your storage jar with boiling water before filling to extend shelf life and prevent bacterial growth.
- Make sure every sugar crystal has dissolved before removing from heat, as undissolved crystals can cause the entire batch to crystallize during storage.
- Let the syrup cool completely before sealing the container to prevent condensation inside the lid, which can dilute the syrup over time.
Common Mistakes to Avoid
- Using high heat causes the sugar to caramelize instead of simply dissolving, creating a different flavor profile and darker color than intended.
- Stopping before the sugar fully dissolves leaves grainy texture in your syrup and creates crystallization issues later.
- Skipping the cooling period before bottling can crack glass containers and creates dangerous steam burns when handling.
- Storing the syrup while still warm promotes condensation that waters down your carefully balanced ratio.
- Using a container that isn’t completely clean introduces bacteria that spoil the syrup within days instead of weeks.
Serving Suggestions
Brown sugar syrup works beautifully anywhere you’d use simple syrup but want more depth. The molasses notes pair especially well with coffee, tea, and spirit-forward cocktails.
- Drizzle over pancakes, waffles, or French toast for a richer alternative to maple syrup
- Stir into iced coffee or lattes for a smooth caramel sweetness without granulated sugar settling at the bottom
- Mix into Old Fashioneds or whiskey sours for cocktails with serious character
- Pour over vanilla ice cream or Greek yogurt with toasted pecans for an instant dessert
- Brush onto ham or pork chops during the last few minutes of cooking for a glossy, caramelized glaze
Variations to Try
- Vanilla brown sugar syrup: Add a split vanilla bean or 1 teaspoon of vanilla extract after removing from heat for a warm, bakery-sweet flavor that’s perfect in hot chocolate.
- Cinnamon brown sugar syrup: Simmer with 2 cinnamon sticks during cooking and remove before storing for a fall-spiced version ideal in chai or apple cider.
- Ginger brown sugar syrup: Add 2 tablespoons of freshly grated ginger while cooking and strain before bottling for a spicy kick that brightens cocktails and lemonade.
- Bourbon brown sugar syrup: Stir in 2 tablespoons of bourbon after cooling for a boozy syrup that takes coffee and desserts to another level.
- Orange brown sugar syrup: Add the zest of one orange during simmering and strain out before storing for a citrus-forward syrup that’s brilliant in tea and marinades.
Dietary Adaptations
- Gluten-free: This recipe is naturally gluten-free as written, containing no wheat or grain products.
- Dairy-free: This syrup contains no dairy products and works perfectly for anyone avoiding milk or lactose.
- Vegan: Brown sugar is sometimes processed with bone char, so choose organic or certified vegan brown sugar to keep this recipe plant-based.
- Low-carb/Keto: Replace brown sugar with a brown sugar substitute made from erythritol or allulose, though the flavor will be less complex and the color lighter.
Storage and Reheating
Refrigerator
Store brown sugar syrup in an airtight glass container in the refrigerator for up to one month. The cold temperature slows any bacterial growth and keeps the syrup fresh.
- Always use a clean spoon when scooping out syrup to prevent contamination
- Check for any cloudiness or off smells before using older syrup
- Keep the container tightly sealed between uses to maintain consistency
Freezer
Brown sugar syrup can be frozen for up to three months in freezer-safe containers. Leave extra headspace because the syrup will expand as it freezes.
- Freeze in ice cube trays for pre-portioned amounts perfect for single drinks
- Thaw overnight in the refrigerator rather than at room temperature
- Stir well after thawing to reincorporate any separated liquid
Reheating
Brown sugar syrup typically doesn’t need reheating since it stays pourable when cold. If it does thicken too much in the fridge, gentle warming brings it back to life.
- Place the sealed jar in a bowl of warm water for 5-10 minutes
- Microwave in 10-second bursts if you need it quickly
- Avoid boiling again, which concentrates the syrup and changes the consistency
Nutrition Information
| Nutrient | Amount |
|---|---|
| Calories | 52 |
| Total Fat | 0g |
| Saturated Fat | 0g |
| Carbohydrates | 13g |
| Fiber | 0g |
| Sugar | 13g |
| Protein | 0g |
| Sodium | 3mg |
| Cholesterol | 0mg |
Nutritional values are estimates based on a 2-tablespoon serving and may vary depending on the specific brown sugar brand used. This syrup is pure sugar and water, so use it as you would any sweetener in moderation.
Frequently Asked Questions
Can I use white sugar instead of brown sugar?
You can, but you’ll lose the molasses flavor that makes this syrup special. The result will be basic simple syrup without the caramel notes and amber color.
How long does brown sugar syrup last in the refrigerator?
Properly stored in a clean, airtight container, brown sugar syrup keeps for up to one month in the fridge. Always check for signs of mold or fermentation before using older batches.
Why did my syrup crystallize in the jar?
Crystallization happens when sugar molecules reconnect, usually from undissolved crystals or temperature fluctuations. Make sure all sugar dissolves completely during cooking and store the syrup at a consistent cool temperature.
Can I make this syrup ahead of time for a party?
Absolutely, and you should since it needs to cool completely before use anyway. Make it up to a week ahead and store it in the fridge for perfectly chilled syrup ready to mix into cold drinks.
What’s the ratio if I want to make a larger batch?
Keep the 1:1 ratio of brown sugar to water no matter how much you make. Double, triple, or quadruple both ingredients equally for larger quantities.
Can I reduce the amount of sugar for a less sweet syrup?
You can adjust to a 1:2 ratio of sugar to water for a thinner, less sweet syrup. Just know it won’t be as shelf-stable and should be used within two weeks.
Final Thoughts
Brown sugar syrup is one of those recipes that seems almost too simple to bother with until you taste the difference homemade makes. The depth of flavor and silky texture blow away anything you’d find on a store shelf.
Keep a jar in your fridge and you’ll find yourself reaching for it constantly, from morning coffee to evening cocktails. Give this recipe a try and see how something so basic can make everything just a little bit better.
Brown Sugar Syrup
Ingredients
Equipment
Method
- Add the brown sugar and water to a medium saucepan. Stir briefly to start incorporating the sugar into the water, though it won't fully dissolve yet. Break up any large clumps of brown sugar before adding to make the dissolving process faster.
- Place the saucepan over medium heat and begin warming the mixture. Avoid high heat, which can cause the sugar to caramelize unevenly or burn at the edges.
- Stir the mixture continuously as it heats, scraping the bottom and sides of the pan. Continue stirring until the brown sugar gradually melts into the water, turning from grainy to smooth with no visible sugar crystals remaining.
- Once the sugar has dissolved completely, allow the mixture to come to a gentle simmer with small bubbles breaking the surface. Simmer for 2-3 minutes to help the flavors meld and create a slightly thicker consistency.
- Check consistency by dipping your spoon into the syrup and lifting it up. The syrup should flow smoothly and coat the back of the spoon lightly. Remember that the syrup will thicken slightly as it cools.
- Remove the saucepan from the burner once you've achieved the right consistency. Let the syrup sit in the pan for 2-3 minutes to stop bubbling before transferring.
- Allow the syrup to cool for about 5 minutes in the saucepan. The syrup should still be warm enough to pour easily but not so hot that it's dangerous to handle.
- Pour the cooled syrup into a clean glass jar or bottle using a funnel if you have one. Leave about an inch of headspace at the top of the container. Seal tightly once the syrup has cooled to room temperature completely.