
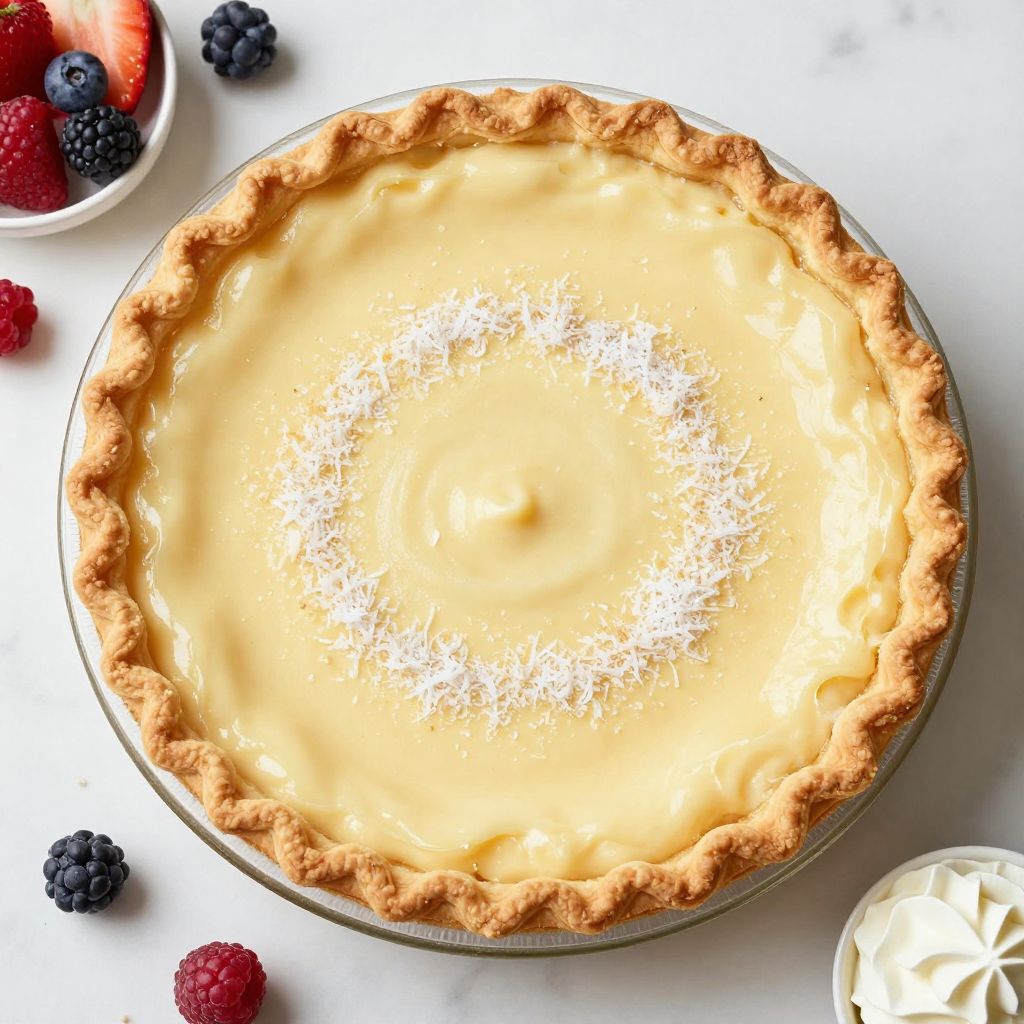
There’s something utterly captivating about a pie that looks like it was crafted by a magician rather than a home cook. The Transparent Pie is a delightful blend of creamy, dreamy filling and a perfectly flaky crust that will have your guests guessing how you did it. This recipe is a family favorite, perfect for gatherings or cozy nights in, and it boasts a unique appearance that adds a touch of elegance to any table. With its sweet, balanced flavors and a texture that melts in your mouth, this pie is not just a dessert, it’s a conversation starter. Let’s roll up our sleeves and get started on this delightful treat!
Why You’ll Love This Recipe
This recipe is guaranteed to impress everyone around the table. Here’s why you need to make it:
- Unique appearance that’s sure to wow guests.
- Deliciously creamy filling with a hint of sweetness.
- Easy to prepare with simple ingredients.
- Perfect for any occasion, be it a holiday or a casual get-together.
- Can be made ahead of time for convenience.
My Experience Making This Recipe
Making the Transparent Pie was an adventure in the kitchen. As I mixed the ingredients, the sweet aroma filled my home and made it feel cozy.
When I finally cut into the pie, the layers revealed themselves beautifully. Watching my family’s eyes light up as they took their first bites was the best reward.
Recipe Overview
- Recipe Name: Transparent Pie
- Servings: 8
- Prep Time: 20 minutes
- Cook Time: 45 minutes
- Total Time: 1 hour 5 minutes
- Course: Dessert
- Cuisine: American
- Calories per Serving: 250
Equipment You Will Need
- Pie dish (9-inch)
- Mixing bowls
- Whisk
- Measuring cups and spoons
- Rolling pin
- Oven
Ingredients for Transparent Pie
- 1 pre-made pie crust (9-inch)
- 1 cup sugar
- 1 cup milk
- 2 tablespoons cornstarch
- 4 large egg yolks
- 2 teaspoons vanilla extract
- 1/4 teaspoon salt
- 1 tablespoon butter
Ingredient Notes and Substitutions
- Pie crust: It’s used for its flaky texture and ease of use. You can substitute with a homemade crust if desired.
- Milk: Adds creaminess to the filling. Any non-dairy milk can work as a substitute, just watch for flavor differences.
- Cornstarch: Thickens the filling. You can use arrowroot powder or tapioca starch as alternatives.
- Egg yolks: Provide richness and color. Egg substitutes can be used, but the texture may differ.
- Butter: Adds flavor and richness. You can use margarine or a plant-based butter for a dairy-free option.
How to Make Transparent Pie
Step 1: Preheat the Oven
Start by preheating your oven to 350°F (175°C). This ensures that the pie cooks evenly and the crust becomes golden brown.
Step 2: Prepare the Pie Crust
Place the pre-made pie crust into your pie dish. Press it gently to fit the shape, ensuring there are no air pockets.
Step 3: Mix the Dry Ingredients
In a mixing bowl, combine sugar, cornstarch, and salt. This helps evenly distribute the sweet and thickening agents throughout the filling.
Step 4: Whisk the Wet Ingredients
In another bowl, whisk together milk, egg yolks, and vanilla extract until well combined. This creates a creamy base for your filling.
Step 5: Combine the Mixtures
Gradually add the wet mixture to the dry mixture, whisking continuously. This prevents lumps from forming and ensures a smooth filling.
Step 6: Cook the Filling
Transfer the mixture to a saucepan over medium heat, stirring constantly until it thickens. This step is crucial for achieving that perfect creamy consistency.
Step 7: Pour into the Crust
Once thickened, remove from heat and stir in the butter. Pour the filling into the prepared pie crust, smoothing the top with a spatula.
Step 8: Bake the Pie
Bake the pie in the preheated oven for 30 to 45 minutes. It’s done when the filling is set and the top is slightly golden.
Pro Tip: Let the pie cool completely before slicing to ensure clean cuts and a beautiful presentation.
Tips for the Best Transparent Pie
- Make sure to whisk continuously while cooking the filling to avoid lumps.
- For an extra touch, sprinkle some grated coconut on top before serving.
- Chill the pie in the refrigerator for a few hours for better flavor development.
- Use fresh vanilla extract for a richer flavor.
- Consider adding a layer of fruit on the bottom of the crust for added flavor.
Common Mistakes to Avoid
- Not pre-baking the crust can lead to a soggy bottom. Always bake it first to ensure crispness.
- Skipping the cooling step may result in messy slices. Patience is key!
- Overcooking the filling can lead to a rubbery texture. Keep an eye on it as it thickens.
- Using cold ingredients can affect how the filling sets. Make sure they are at room temperature.
Serving Suggestions
This Transparent Pie pairs beautifully with various sides. Consider these delightful options:
- Fresh whipped cream for added richness.
- Seasonal fruits like berries or peaches for a refreshing contrast.
- A scoop of vanilla ice cream for a classic twist.
- Drizzle of chocolate sauce for chocolate lovers.
Variations to Try
- Add lemon zest to the filling for a zesty flavor boost.
- Incorporate cocoa powder for a chocolate version of the pie.
- Experiment with flavored extracts, like almond or coconut, for a unique twist.
- Top with a layer of meringue for a fluffy finish.
Dietary Adaptations
- Gluten-free: Use a gluten-free pie crust for a suitable option.
- Dairy-free: Substitute milk with almond or oat milk.
- Vegan: Use flax eggs in place of egg yolks and a plant-based butter.
- Low-carb/Keto: Consider using a low-carb crust and sugar substitutes.
Storage and Reheating
Refrigerator
Store leftover pie in an airtight container in the refrigerator. It will keep fresh for up to three days.
- Cover the pie with plastic wrap to prevent drying out.
- Slice the pie for easier access when serving.
Freezer
The pie can be frozen for longer storage. Wrap it tightly in plastic wrap and aluminum foil.
- Freeze for up to two months for the best quality.
- Thaw in the refrigerator before serving.
Reheating
Reheat slices in the microwave for a few seconds or in the oven at 350°F (175°C) for about 10 minutes. This brings back its creamy texture.
- Cover with foil in the oven to prevent over-browning.
- Check frequently to avoid overheating.
Nutrition Information
| Nutrient | Amount |
|---|---|
| Calories | 250 |
| Total Fat | 10g |
| Saturated Fat | 5g |
| Carbohydrates | 36g |
| Fiber | 1g |
| Sugar | 20g |
| Protein | 3g |
| Sodium | 100mg |
| Cholesterol | 100mg |
This is an estimate and can vary based on specific ingredients used.
Frequently Asked Questions
Can I make this pie ahead of time?
Absolutely! This pie stores well in the refrigerator for up to three days.
What can I use instead of cornstarch?
Arrowroot powder or tapioca starch can be used as alternatives without affecting the texture much.
How do I store leftover pie?
Store in an airtight container in the refrigerator, ensuring it stays fresh and delicious.
Why is my filling not thickening?
It may need more heat or time to properly thicken, so keep stirring until it reaches the desired consistency.
Can I freeze this pie?
Yes, you can freeze it! Just wrap it tightly and it will keep for up to two months.
Final Thoughts
Making a Transparent Pie is truly a rewarding experience that brings a touch of magic to your dessert table. I encourage you to gather the ingredients and give this pie a try; you won’t regret it!
For more delightful recipes, check out my Millionaire Pie Recipe or explore this Strawberry Pie Recipe with Jello for more delicious options!
Transparent Pie
Ingredients
Equipment
Method
- Preheat your oven to 350°F (175°C).
- Place the pre-made pie crust into your pie dish, pressing gently to fit.
- In a mixing bowl, combine sugar, cornstarch, and salt.
- In another bowl, whisk together milk, egg yolks, and vanilla extract until well combined.
- Gradually add the wet mixture to the dry mixture, whisking continuously.
- Transfer the mixture to a saucepan over medium heat, stirring constantly until it thickens.
- Remove from heat, stir in the butter, and pour the filling into the prepared pie crust.
- Bake the pie in the preheated oven for 30 to 45 minutes.
- Let the pie cool completely before slicing.