Chili oil recipe lovers, this one is for you. This fiery, aromatic condiment transforms ordinary dishes into something extraordinary with just a drizzle.
Whether you’re topping dumplings, swirling it into noodles, or adding punch to your morning eggs, homemade chili oil beats store-bought versions every single time. The secret lies in blooming dried chilies in hot oil, releasing their complex flavors and gorgeous red color.
Once you master this simple technique, you’ll wonder why you ever bought the bottled stuff. Let’s get into everything you need to know to make restaurant-quality chili oil at home.
Why You’ll Love This Recipe
This homemade chili oil delivers bold flavor with minimal effort. You control the heat level, the aromatics, and the freshness.
- Ready in under 30 minutes with mostly hands-off cooking time
- Completely customizable heat level to suit your spice tolerance
- Lasts for months in the refrigerator, so you always have it on hand
- Costs a fraction of premium store-bought versions
- Makes an impressive homemade gift for the food lovers in your life
My Experience Making This Recipe
I’ve made countless batches of chili oil over the years, and the kitchen always smells incredible during the process. That moment when the hot oil hits the chili flakes and everything sizzles and blooms is genuinely satisfying.
My family now expects a jar of this stuff at every meal. My partner drizzles it on pizza, my kids (the brave ones) add it to their ramen, and I’ve caught myself putting it on things that probably didn’t need it.
The first batch I ever made was too mild because I was nervous about the heat. Now I’ve dialed in the perfect ratio that delivers warmth without setting anyone’s mouth on fire.
Recipe Overview
- Recipe Name: Homemade Chili Oil
- Servings: Makes approximately 2 cups
- Prep Time: 10 minutes
- Cook Time: 15 minutes
- Total Time: 25 minutes
- Course: Condiment
- Cuisine: Chinese, Asian
- Calories per Serving: 120 calories per tablespoon
Equipment You Will Need
- Small heavy-bottomed saucepan or pot
- Heat-safe glass jar or container with lid
- Fine mesh strainer
- Instant-read thermometer (highly recommended)
- Heat-safe mixing bowl
- Wooden spoon or heat-safe spatula
- Measuring cups and spoons
Ingredients for Chili Oil
For the Chili Base
- 1/2 cup crushed red chili flakes (gochugaru or Sichuan chili flakes work best)
- 2 tablespoons sesame seeds
- 1 teaspoon salt
- 1/2 teaspoon sugar
For the Aromatic Oil
- 1 1/2 cups neutral oil (vegetable, canola, or peanut oil)
- 3 whole star anise
- 1 cinnamon stick
- 2 bay leaves
- 5 whole Sichuan peppercorns (optional, for numbing heat)
- 3 cloves garlic, smashed
- 2 green onion whites
- 3 slices fresh ginger
Ingredient Notes and Substitutions
- Chili flakes: Gochugaru (Korean chili flakes) provides fruity heat and vibrant color. Substitute with Aleppo pepper for milder heat or cayenne for more intensity.
- Neutral oil: Vegetable or canola oil lets the chili flavor shine through. Avoid olive oil as its flavor competes with the aromatics.
- Star anise: Adds a subtle licorice note that balances the heat. Skip it if you dislike anise flavor, though the oil will taste less complex.
- Sichuan peppercorns: These create the signature numbing sensation. Leave them out for pure heat without the tingle.
- Sesame seeds: They add texture and nutty flavor. Toast them first for even more depth.
How to Make Chili Oil
Step 1: Prepare the Chili Base
Add your chili flakes, sesame seeds, salt, and sugar to a large heat-safe bowl. Give everything a good stir to combine evenly.
Using a heat-safe bowl is critical here because you’ll be pouring extremely hot oil directly onto these ingredients. Glass or metal works perfectly.
Step 2: Combine Oil and Aromatics
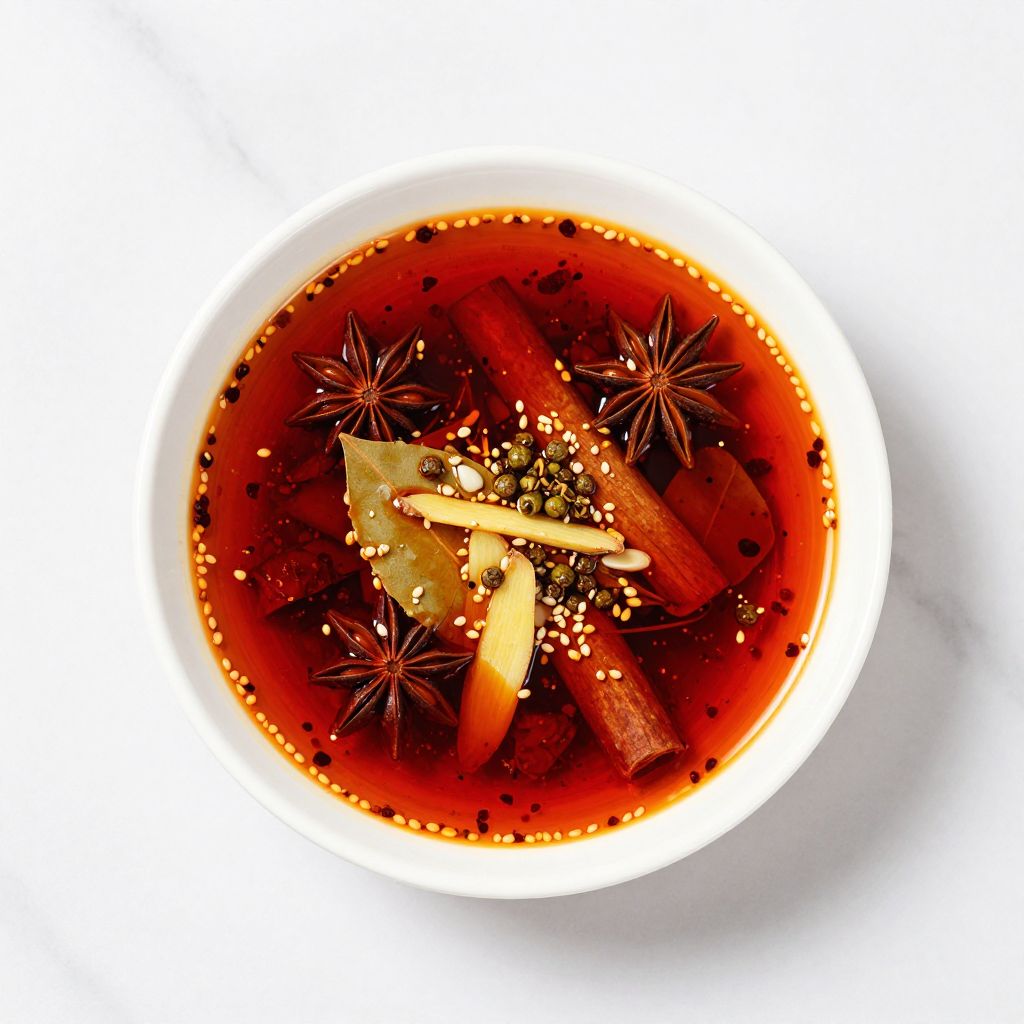
Pour the neutral oil into your saucepan and add the star anise, cinnamon stick, bay leaves, and Sichuan peppercorns. The aromatics need to start in cold oil so they infuse gradually without burning.
Step 3: Add Fresh Aromatics
Toss in the smashed garlic, green onion whites, and ginger slices. These fresh ingredients release their flavors quickly and add depth that dried spices alone cannot provide.
Step 4: Heat the Oil Slowly
Place the saucepan over medium-low heat and let the oil warm gradually. Rushing this step with high heat will burn your aromatics before they release their flavors.
You want the aromatics to gently sizzle, not aggressively fry. This slow infusion takes about 10 to 12 minutes.
Step 5: Monitor the Temperature
Use your thermometer to track the oil temperature as it heats. You’re aiming for the oil to reach between 275 and 300 degrees Fahrenheit.
Temperature matters enormously here. Too cool and the chili flakes won’t bloom properly. Too hot and they’ll burn instantly, turning bitter.
Step 6: Strain Out the Aromatics
Once fragrant and at temperature, remove the saucepan from heat. Use your fine mesh strainer to remove all the solid aromatics from the oil.
Leaving the aromatics in would cause them to continue cooking and potentially turn bitter over time. A clean oil base stores much better.
Step 7: Pour Oil Over Chili Base
Now for the exciting part. Carefully pour about one-third of the hot oil over the chili flake mixture.
You’ll hear an incredibly satisfying sizzle as the oil hits the chilies. This is the magic moment when color and flavor explode. Stir gently, then add another third and repeat.
Step 8: Add Remaining Oil and Cool
Pour in the final portion of oil and stir everything together thoroughly. The layered pouring method ensures even toasting of the chili flakes without burning any.
Let the chili oil cool completely at room temperature. This takes about an hour, during which the flavors continue developing.
Step 9: Transfer and Store
Once cooled, carefully transfer your chili oil to a clean glass jar with a tight-fitting lid. Make sure to get all those delicious sediments from the bottom of the bowl.
The chili oil improves after resting overnight as the flavors meld together. Patience pays off here.
Pro Tip: Always pour the hot oil in stages rather than all at once. This prevents burning and ensures the chili flakes toast evenly, giving you better color and more complex flavor.
Tips for the Best Chili Oil
- Use a thermometer until you can judge temperature by sight and smell. Guessing leads to burnt or underdeveloped chili oil.
- Toast your sesame seeds in a dry pan before adding them to the chili base for extra nutty flavor.
- Let the finished oil rest for at least 24 hours before using. The flavor deepens significantly.
- Shake or stir the jar before each use to redistribute the sediment and chili flakes.
- Make a double batch because you’ll use it faster than you expect. Trust me on this one.
- Store in a dark cabinet if you want to preserve that gorgeous red color longer.
Common Mistakes to Avoid
- Overheating the oil: Oil above 325 degrees Fahrenheit will instantly burn your chili flakes, creating bitter, acrid flavors.
- Using extra virgin olive oil: Its strong flavor and low smoke point make it completely wrong for this application.
- Skipping the straining step: Leaving aromatics in the oil causes off-flavors to develop during storage.
- Pouring all the oil at once: This creates uneven toasting, with some flakes burnt and others underdeveloped.
- Using a plastic container: Hot oil can melt plastic and absorb unwanted chemicals. Always use glass or metal.
Serving Suggestions
Chili oil works as a finishing condiment rather than a cooking oil. A little goes a long way, so start with a teaspoon and add more to taste.
- Drizzle over steamed dumplings, potstickers, or wontons
- Swirl into ramen, pho, or any noodle soup
- Toss with cold sesame noodles or dan dan noodles
- Spoon over fried eggs or avocado toast
- Mix into mayo for a spicy sandwich spread
Variations to Try
- Garlic lover’s version: Double the garlic and add minced fresh garlic to the chili base for intense garlic punch.
- Crispy shallot chili oil: Fry thinly sliced shallots in the oil until crispy before straining. Add them back to the finished oil for crunch.
- Fermented black bean chili oil: Stir in two tablespoons of fermented black beans for umami depth.
- Smoky chipotle version: Replace half the chili flakes with ground chipotle for a smoky Mexican-inspired twist.
- Extra numbing Sichuan style: Triple the Sichuan peppercorns and add ground Sichuan pepper to the chili base.
Dietary Adaptations
- Gluten-free: This recipe is naturally gluten-free as written. Just verify your chili flakes have no additives.
- Dairy-free: Already dairy-free. No modifications needed.
- Vegan: Completely vegan as written. Perfect for plant-based cooking.
- Low-carb/Keto: With minimal sugar and no carb-heavy ingredients, this fits perfectly into keto eating plans.
Storage and Reheating
Refrigerator
Refrigeration extends shelf life significantly and keeps the oil fresh tasting.
- Store in an airtight glass jar for up to 6 months
- The oil may solidify slightly when cold but liquefies at room temperature
- Always use a clean, dry spoon to prevent contamination
Freezer
Freezing works well for long-term storage, though it’s rarely necessary given the long refrigerator life.
- Freeze in ice cube trays for portioned amounts
- Transfer frozen cubes to a freezer bag for up to one year
- Thaw in the refrigerator overnight before using
Reheating
Chili oil doesn’t require reheating since it’s used as a room-temperature condiment.
- Simply let refrigerated oil sit at room temperature for 10 minutes
- Never microwave the glass jar
- If you prefer it slightly warm, set the jar in warm water briefly
Nutrition Information
| Nutrient | Amount |
|---|---|
| Calories | 120 |
| Total Fat | 14g |
| Saturated Fat | 1g |
| Carbohydrates | 1g |
| Fiber | 0.5g |
| Sugar | 0g |
| Protein | 0g |
| Sodium | 75mg |
| Cholesterol | 0mg |
Nutritional values are estimates based on a one-tablespoon serving. Actual values may vary based on specific ingredients used.
Frequently Asked Questions
Can I use olive oil instead of neutral oil?
I strongly advise against it. Olive oil has a low smoke point and strong flavor that clashes with the delicate chili and aromatic notes you’re building.
How long does homemade chili oil last?
Stored properly in the refrigerator, your chili oil will stay fresh for up to six months. At room temperature, use it within one month for best quality.
Why did my chili oil turn out bitter?
Bitterness comes from burnt chili flakes, which happens when the oil is too hot. Use a thermometer and keep the temperature between 275 and 300 degrees Fahrenheit.
Can I make this ahead for gifts?
Absolutely, and it makes a fantastic gift. Prepare it at least two days before gifting so the flavors have time to develop fully.
Why is my chili oil not red enough?
Color depends on your chili flakes. Korean gochugaru produces the most vibrant red. Adding a tablespoon of paprika boosts color without affecting flavor much.
Final Thoughts
Making your own chili oil at home is one of those small kitchen projects that pays massive dividends. Once you have a jar in your refrigerator, you’ll find yourself reaching for it constantly.
Give this recipe a try this weekend and taste the difference homemade makes. Your dumplings, noodles, and eggs will thank you.

Homemade Chili Oil
Ingredients
Method
- In a large heat-safe bowl, combine the crushed chili flakes, sesame seeds, salt, and sugar; stir to mix evenly.
- Place a small heavy-bottomed saucepan over medium-low heat and add the neutral oil, star anise, cinnamon stick, bay leaves, and Sichuan peppercorns.
- Add the smashed garlic cloves, green onion whites, and ginger slices to the cool oil.
- Warm the oil slowly, letting the aromatics gently sizzle for 10–12 minutes until the temperature reaches 275–300°F (135–150°C); avoid exceeding 300°F to prevent burning.
- Remove the saucepan from heat and strain out all solid aromatics using a fine-mesh strainer, leaving clear, flavored oil.
- Carefully pour one-third of the hot oil over the chili base; it should sizzle vigorously. Stir gently to bloom the spices.
- Pour the second third of the oil over the mixture, stir again, then add the remaining oil and mix until the chili flakes are evenly toasted.
- Let the chili oil cool completely at room temperature for about 60 minutes, allowing flavors to develop.
- Transfer the cooled chili oil, including the flavorful sediment, to a clean glass jar with a tight-fitting lid. Store in the refrigerator for up to 6 months and shake before each use.