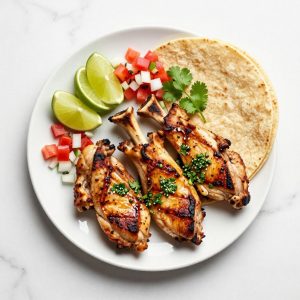
Chicken cutlet recipe lovers, this one’s for you. Crispy on the outside, juicy on the inside, and ready in under 30 minutes, these golden beauties make weeknight dinners feel special without the fuss.
Whether you’re feeding picky kids or impressing dinner guests, chicken cutlets deliver every single time. They’re versatile, budget friendly, and honestly impossible to mess up once you know the technique.
Let’s get that perfect crunch together.
Why You’ll Love This Recipe
This chicken cutlet recipe checks every box for a reliable dinner option. Here’s what makes it a keeper in your recipe rotation.
- Ready from start to plate in under 30 minutes
- Uses simple pantry staples you probably already have
- Incredibly versatile for salads, sandwiches, or standalone mains
- Kid approved with that irresistible golden crunch
- Leftovers reheat beautifully for meal prep wins
My Experience Making This Recipe
I’ve made these chicken cutlets more times than I can count, and they never disappoint. The sizzle when that breaded chicken hits the hot oil? Pure kitchen therapy.
My family fights over the crispiest pieces, which honestly feels like the highest compliment. The aroma fills the entire house and brings everyone to the table before I even call them.
Last week I served these over a simple arugula salad with lemon, and my teenager actually asked for seconds of salad. Miracles do happen when crispy chicken is involved.
Recipe Overview
- Recipe Name: Classic Crispy Chicken Cutlets
- Servings: 4 servings
- Prep Time: 15 minutes
- Cook Time: 12 minutes
- Total Time: 27 minutes
- Course: Main Dish
- Cuisine: American, Italian American
- Calories per Serving: 385 calories
Equipment You Will Need
- Large cast iron or stainless steel skillet
- Meat mallet or rolling pin
- Three shallow dishes or bowls for breading station
- Wire cooling rack set over a baking sheet
- Instant read thermometer
- Tongs
- Plastic wrap or parchment paper
- Paper towels
Ingredients for Chicken Cutlets
For the Chicken
- 2 pounds boneless skinless chicken breasts, about 4 large pieces
- 1 cup all purpose flour
- 3 large eggs
- 2 cups panko breadcrumbs
- 1/2 cup grated Parmesan cheese
- 1 teaspoon garlic powder
- 1 teaspoon paprika
- 1 teaspoon salt
- 1/2 teaspoon black pepper
- 1/2 cup vegetable oil for frying
For Serving
- 1 lemon, cut into wedges
- Fresh parsley, chopped for garnish
- Flaky sea salt for finishing
Ingredient Notes and Substitutions
- Chicken breasts: Boneless skinless breasts give you the best surface area for that crispy coating. Chicken thighs work but require slightly longer cooking time.
- Panko breadcrumbs: These Japanese style crumbs create superior crunch compared to regular breadcrumbs. Regular breadcrumbs will work but yield a denser coating.
- Parmesan cheese: Adds savory depth and helps the coating brown beautifully. Pecorino Romano or nutritional yeast for dairy free options.
- Vegetable oil: A neutral high heat oil is essential for proper frying. Avocado oil, canola, or light olive oil all work perfectly.
- Eggs: Create the glue that holds your breading in place. Buttermilk or a mixture of mayonnaise and milk substitutes well for egg allergies.
How to Make Chicken Cutlets
Step 1: Prepare Your Chicken Breasts
Place each chicken breast on a cutting board and slice horizontally through the middle to create two thinner pieces. If your chicken breasts are particularly thick, this step ensures even cooking throughout.
Step 2: Pound the Cutlets Thin
Place chicken pieces between two sheets of plastic wrap or parchment paper. Use a meat mallet to pound each piece to an even 1/4 inch thickness, working from the center outward.
This step matters because uneven thickness means some parts overcook while others stay raw. Even cutlets cook uniformly and give you that perfect tender bite.
Step 3: Set Up Your Breading Station
Arrange three shallow dishes in a row. First dish gets flour seasoned with half the salt and pepper, second dish gets beaten eggs, third dish gets panko mixed with Parmesan, garlic powder, paprika, and remaining seasonings.
This assembly line approach keeps one hand dry and one hand wet, preventing clumpy breading disasters. Trust me, the organization pays off.
Step 4: Season the Chicken
Pat your pounded cutlets completely dry with paper towels. Season both sides lightly with salt and pepper before breading.
Dry chicken ensures the flour actually sticks. Wet chicken creates steam pockets that make your breading fall off during cooking.
Step 5: Bread Each Cutlet
Dredge each cutlet in flour, shaking off excess. Dip into beaten eggs, letting extra drip away, then press firmly into the panko mixture, coating both sides completely.
Use one hand for dry ingredients and one for wet to keep the process clean. Press the panko in firmly so it adheres and creates that satisfying crunch.
Step 6: Rest the Breaded Cutlets
Place breaded cutlets on a wire rack and let them rest for 5 to 10 minutes. This resting period helps the coating set and adhere better during frying.
Skip this step and your beautiful breading might slide right off in the pan. Patience here equals crunch later.
Step 7: Heat Your Oil
Add vegetable oil to your skillet until it reaches about 1/4 inch depth. Heat over medium high until the oil shimmers and a breadcrumb sizzles immediately when dropped in, around 350F.
Oil temperature is everything. Too cool and your cutlets absorb grease, too hot and the outside burns before the inside cooks.
Step 8: Fry the Cutlets
Carefully place 1 to 2 cutlets in the hot oil without crowding the pan. Fry for 3 to 4 minutes per side until deeply golden brown and the internal temperature reaches 165F.
Resist the urge to move them around constantly. Let them develop a crust before flipping once.
Step 9: Drain and Rest
Transfer cooked cutlets to a wire rack set over a baking sheet to drain. Season immediately with a pinch of flaky salt while the oil is still glistening.
Wire racks keep the bottom crispy instead of getting soggy from trapped steam. This is the secret restaurants use.
Step 10: Serve Immediately
Garnish with fresh parsley and serve with lemon wedges alongside. The acid from the lemon brightens every bite and cuts through the richness perfectly.
Pro Tip: For extra crispy results, refrigerate your breaded cutlets uncovered for 30 minutes before frying. The dry air helps set the coating and creates an even crunchier exterior that stays crisp longer.
Tips for the Best Chicken Cutlets
- Pound your chicken to uniform thickness so every bite cooks at the same rate
- Keep your oil temperature steady between 325F and 350F for optimal crispiness
- Never crowd the pan or the temperature drops and you get soggy results
- Season your flour, eggs, and breadcrumbs separately for flavor in every layer
- Use a thermometer to verify 165F internal temperature for food safety
- Let cutlets rest 2 minutes after frying before cutting to keep juices inside
Common Mistakes to Avoid
- Skipping the pounding step: Uneven chicken cooks unevenly, leaving you with dry edges and undercooked centers
- Using cold chicken: Straight from fridge chicken drops oil temperature dramatically and results in greasy coating
- Crowding the pan: Too many cutlets at once lowers heat and creates steam instead of crispy frying
- Flipping too early: Moving the cutlets before they develop a crust causes breading to fall off
- Draining on paper towels: Steam gets trapped underneath and makes the bottom soggy within seconds
Serving Suggestions
Chicken cutlets play well with almost anything, making them the ultimate blank canvas for your dinner creativity. Here are my favorite ways to serve them.
- Over fresh arugula with shaved Parmesan and lemon vinaigrette
- On a crusty roll with marinara and melted mozzarella for chicken Parm sandwiches
- Alongside creamy mashed potatoes and roasted vegetables
- Sliced over Caesar salad for a protein packed lunch
- With pasta tossed in garlic butter and fresh herbs
Variations to Try
- Italian Style: Add dried oregano and basil to your breadcrumbs, serve topped with marinara and fresh mozzarella
- Spicy Nashville Hot: Brush cooked cutlets with cayenne butter and serve on white bread with pickles
- Japanese Katsu: Use traditional panko and serve with tonkatsu sauce and shredded cabbage
- Herb Crusted: Mix fresh rosemary, thyme, and sage into your breadcrumbs for an earthy flavor
- Everything Bagel: Replace half the panko with everything bagel seasoning for a fun twist
Dietary Adaptations
- Gluten Free: Use certified gluten free flour and gluten free panko or crushed rice cereal with slightly less crunch
- Dairy Free: Simply omit the Parmesan or use nutritional yeast for similar savory depth
- Low Carb/Keto: Replace flour with almond flour and breadcrumbs with crushed pork rinds for zero carbs
- Egg Free: Use a mixture of mayonnaise thinned with milk or a flax egg as your binding agent
Storage and Reheating
Refrigerator
Store cooked cutlets in an airtight container for up to 4 days. Place parchment paper between layers to prevent sticking.
- Cool completely before storing
- Keep coating intact by not stacking directly
Freezer
Freeze cooked or uncooked breaded cutlets for up to 3 months. Flash freeze on a baking sheet before transferring to freezer bags.
- Label with date and contents
- Thaw overnight in refrigerator before reheating
Reheating
The oven method preserves crispiness far better than the microwave. Never microwave unless you enjoy chewy disappointment.
- Bake at 400F for 10 to 12 minutes until heated through and crispy
- Air fryer at 375F for 5 to 6 minutes works brilliantly
- Avoid microwaving as it makes the coating soggy
Nutrition Information
| Nutrient | Amount |
|---|---|
| Calories | 385 kcal |
| Total Fat | 18g |
| Saturated Fat | 4g |
| Carbohydrates | 22g |
| Fiber | 1g |
| Sugar | 1g |
| Protein | 38g |
| Sodium | 580mg |
| Cholesterol | 165mg |
Nutritional values are estimates based on standard ingredients and may vary based on specific products used and portion sizes.
Frequently Asked Questions
Can I bake chicken cutlets instead of frying them?
Yes, bake at 425F for 15 to 18 minutes, flipping halfway through. Spray with cooking oil before baking for better browning, though they won’t be quite as crispy as fried.
Can I bread the cutlets ahead of time?
Absolutely, bread them up to 24 hours in advance and refrigerate uncovered on a wire rack. This actually improves crispiness by drying out the coating.
Why is my breading falling off during cooking?
The chicken was likely too wet or the oil wasn’t hot enough. Always pat dry thoroughly and ensure oil reaches 350F before adding cutlets.
How do I know when the chicken is fully cooked?
Use an instant read thermometer and check that the thickest part reaches 165F. Golden color alone isn’t a reliable indicator of doneness.
Can I use chicken thighs instead of breasts?
Chicken thighs work wonderfully and stay juicier due to higher fat content. Pound them evenly and add 1 to 2 minutes to cooking time per side.
Final Thoughts
This chicken cutlet recipe proves that simple techniques create the most satisfying meals. Once you master the pound, bread, and fry method, you’ll have a reliable dinner solution for any night of the week.
So grab those chicken breasts and get pounding. Your family is going to love you for it, and honestly, you deserve that crispy, golden goodness too.
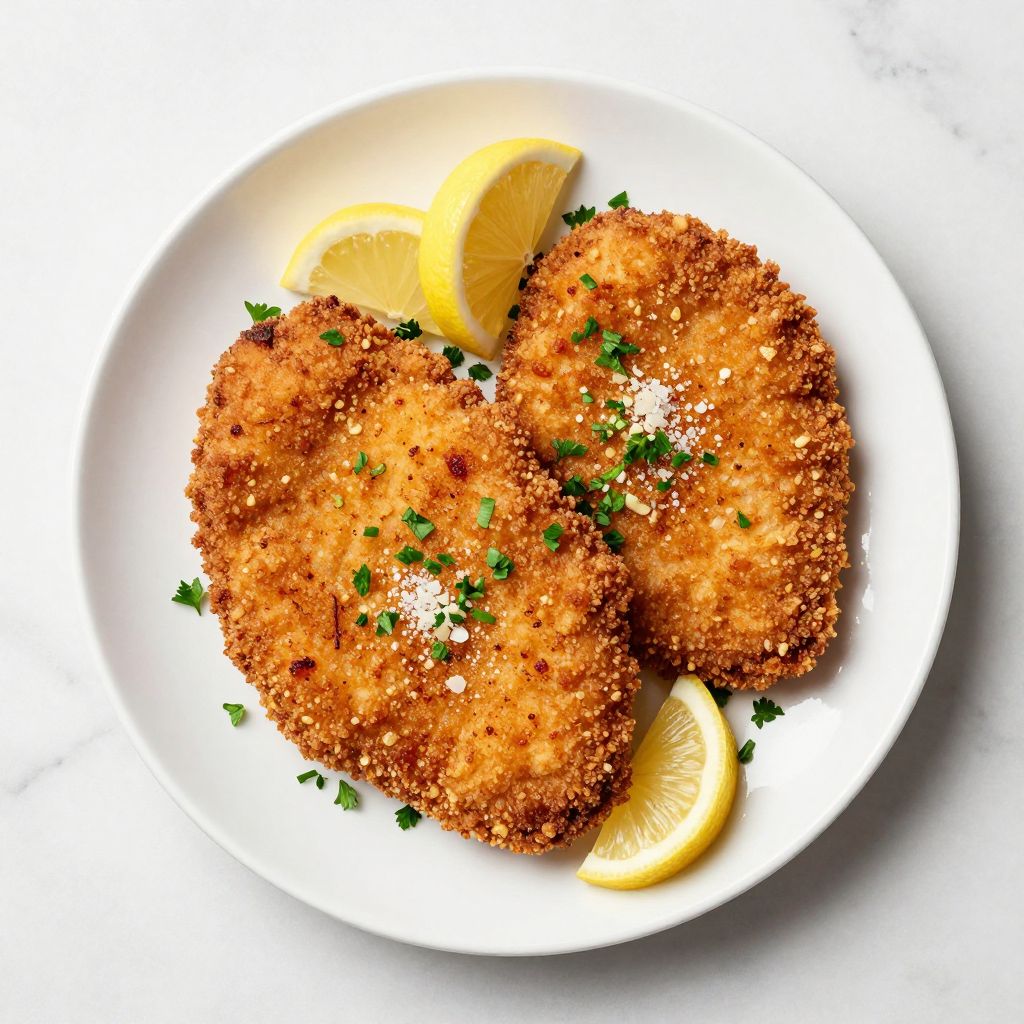
Classic Crispy Chicken Cutlets
Ingredients
Method
- Slice each chicken breast horizontally to create two thinner pieces, then place between plastic wrap and pound to 1/4-inch thickness.
- Set up three shallow dishes: 1) flour mixed with half the salt and pepper, 2) beaten eggs, 3) panko, Parmesan, garlic powder, paprika, and remaining salt and pepper.
- Pat chicken dry with paper towels and season lightly with salt and pepper.
- Dredge each cutlet in seasoned flour, shake off excess, coat in egg, then press firmly into the panko mixture to cover completely.
- Transfer breaded cutlets to a wire rack and let rest 5–10 minutes to help the coating adhere.
- Pour vegetable oil into a large skillet to 1/4-inch depth and heat over medium-high until oil reaches 350°F (about 3 minutes); a breadcrumb should sizzle on contact.
- Fry 1–2 cutlets at a time for 3–4 minutes per side until deep golden brown and an instant-read thermometer inserted in the thickest part reads 165°F.
- Place cooked cutlets on a clean wire rack to drain and immediately sprinkle with flaky sea salt.
- Garnish with chopped parsley and serve hot with lemon wedges alongside.