
There’s something nostalgic about Banana Pudding that takes me back to family gatherings, where the sweet aroma filled the air. This classic dessert is a crowd-pleaser, blending creamy custard, fresh bananas, and crunchy vanilla wafers into a delightful treat that’s both comforting and indulgent.
Why You’ll Love This Recipe
This Banana Pudding recipe is a must-try for anyone seeking a delicious and easy dessert. It stands out with its rich flavors and smooth textures.
- Quick to prepare and perfect for any occasion.
- Layers of creamy custard and fresh bananas create a delightful contrast.
- Can be made ahead of time for stress-free entertaining.
- Customizable with different toppings and flavors.
My Experience Making This Recipe
Making this Banana Pudding always brings a smile to my face. The moment I layer the bananas and wafers, I can almost hear the happy chatter of family around the table.
The first bite is always a winner; the creamy custard mingling perfectly with the ripe bananas transports me back to those cherished moments. Every time I serve it, I can count on a chorus of “Yum!” from friends and family alike.
Recipe Overview
- Recipe Name: Banana Pudding
- Servings: 8
- Prep Time: 20 minutes
- Cook Time: 10 minutes
- Total Time: 30 minutes
- Course: Dessert
- Cuisine: American
- Calories per Serving: 320
Equipment You Will Need
- Medium saucepan
- Whisk
- Mixing bowl
- Serving dish or trifle bowl
- Measuring cups and spoons
Ingredients for Banana Pudding
- 2 cups whole milk
- 1/2 cup granulated sugar
- 1/3 cup cornstarch
- 1/4 teaspoon salt
- 1 teaspoon vanilla extract
- 3 ripe bananas, sliced
- 1 box (11 oz) vanilla wafers
- 1 cup whipped cream (optional for topping)
Ingredient Notes and Substitutions
- Whole Milk: Provides richness and creaminess. You can use 2% milk for a lighter option.
- Granulated Sugar: Sweetens the custard. Brown sugar can add a deeper flavor.
- Cornstarch: Thickens the pudding. Arrowroot powder is a good alternative.
- Vanilla Extract: Adds flavor. Vanilla bean paste can enhance the taste even more.
How to Make Banana Pudding
Step 1: Combine Dry Ingredients
In a medium saucepan, whisk together the sugar, cornstarch, and salt. This ensures even distribution and prevents lumps in your pudding.
Step 2: Add Milk
Gradually whisk in the milk until smooth. This creates a base for your creamy pudding.
Step 3: Cook the Mixture
Over medium heat, cook the mixture while stirring constantly until it thickens and starts to bubble. This takes about 8-10 minutes, and patience is key here.
Step 4: Stir in Vanilla
Once thickened, remove the saucepan from heat and stir in the vanilla extract. This adds a lovely aroma to your pudding.
Step 5: Cool the Pudding
Transfer the pudding to a bowl and let it cool for about 10 minutes. Cover the surface with plastic wrap to prevent a skin from forming.
Step 6: Layer the Ingredients
In a serving dish, layer the vanilla wafers, banana slices, and pudding. Start with wafers, then bananas, and top with pudding.
Step 7: Repeat Layers
Continue layering until all ingredients are used, finishing with pudding on top. This creates a beautiful presentation.
Step 8: Chill and Serve
Refrigerate for at least 2 hours before serving. This allows the flavors to meld together for a better taste.
Pro Tip: For extra flavor, add a sprinkle of cinnamon or nutmeg between the layers.
Tips for the Best Banana Pudding
- Use ripe bananas for the best flavor and sweetness.
- Let the pudding cool completely for a smoother consistency.
- Assemble right before serving if you want crispy wafers.
- Try homemade whipped cream for an extra touch of indulgence.
- Experiment with adding layers of chocolate or peanut butter for a twist.
Common Mistakes to Avoid
- Not whisking the custard constantly can lead to lumps. Stirring is crucial for a smooth texture.
- Using overripe bananas can cause your pudding to become mushy too quickly.
- Assembling too early can make the wafers soggy. Timing is everything.
- Skipping the cooling step means you miss out on the creamy thickness.
Serving Suggestions
This delightful dessert pairs well with a variety of options to enhance your meal experience.
- Serve with a side of fresh berries for a fruity contrast.
- Pair with a scoop of vanilla ice cream for extra creaminess.
- Top with toasted coconut for a tropical twist.
- Complement with a drizzle of chocolate sauce for a decadent touch.
Variations to Try
- Add crushed pineapple for a tropical flavor burst.
- Use chocolate pudding instead of vanilla for a chocolate banana pudding.
- Incorporate caramel sauce between the layers for added richness.
- Mix in peanut butter for a delightful twist on flavor.
Dietary Adaptations
- Gluten-Free: Use gluten-free wafers to make this dessert suitable.
- Dairy-Free: Substitute almond or coconut milk and use a dairy-free whipped topping.
- Vegan: Replace milk with a plant-based option and use a vegan whipped cream.
- Low-Carb/Keto: Use sugar substitutes and low-carb cookies for a keto version.
Storage and Reheating
Refrigerator
Store leftover banana pudding in an airtight container in the refrigerator.
- It will keep well for up to 3 days.
- Cover the surface with plastic wrap to maintain freshness.
Freezer
While it’s best enjoyed fresh, you can freeze it for up to a month.
- Layer in a freezer-safe container but leave out the wafers until serving.
- Thaw in the refrigerator overnight before consuming.
Reheating
Banana pudding is served cold, but if you freeze it, allow it to thaw completely before serving.
- Do not microwave as it can alter the texture.
Nutrition Information
| Nutrient | Amount |
|---|---|
| Calories | 320 |
| Total Fat | 10g |
| Saturated Fat | 5g |
| Carbohydrates | 53g |
| Fiber | 2g |
| Sugar | 28g |
| Protein | 5g |
| Sodium | 150mg |
| Cholesterol | 30mg |
This nutritional information is an estimate and will vary based on specific ingredients used.
Frequently Asked Questions
Can I substitute the bananas?
Yes, you can use other fruits like peaches or strawberries, but the flavor will change.
Can I make this ahead of time?
Absolutely! You can prepare it a day in advance for convenience.
How do I store leftovers?
Keep it in an airtight container in the fridge for up to three days.
What if my pudding is too thin?
If it’s too thin, it may not have cooked long enough; make sure to cook until bubbling.
Can I use instant pudding mix?
Yes, instant pudding can be used for a quick version, but the texture will differ.
Final Thoughts
This Banana Pudding will surely become a favorite in your home, bringing smiles with each bite. I encourage you to try making this classic dessert and share it with loved ones.
For more delicious ideas, check out Not Your Mama’s Banana Pudding and Biscoff Banana Pudding. Happy baking!
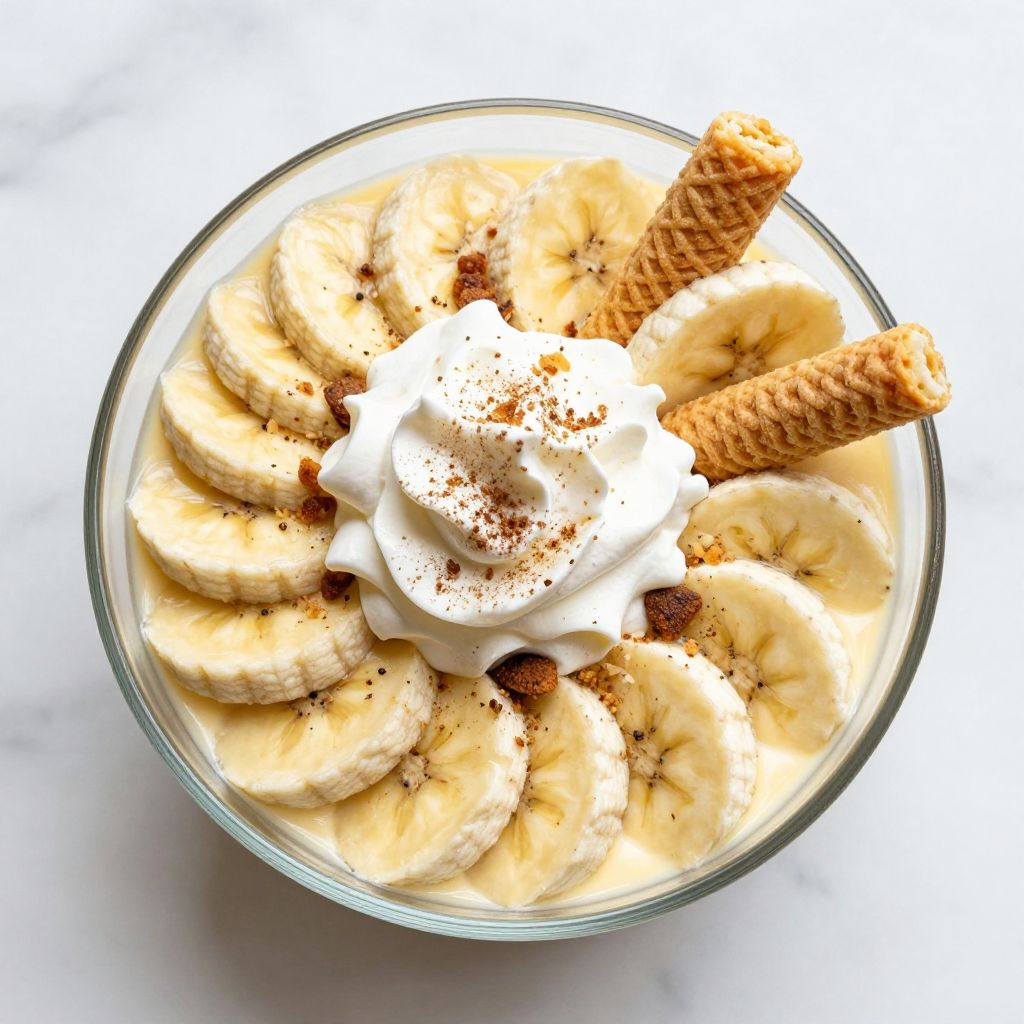
Banana Pudding
Ingredients
Equipment
Method
- In a medium saucepan, whisk together the granulated sugar, cornstarch, and salt.
- Gradually whisk in the whole milk until smooth.
- Over medium heat, cook the mixture while stirring constantly until it thickens and starts to bubble, about 8-10 minutes.
- Once thickened, remove the saucepan from heat and stir in the vanilla extract.
- Transfer the pudding to a bowl and let it cool for about 10 minutes, covering the surface with plastic wrap.
- In a serving dish, layer the vanilla wafers, banana slices, and pudding, starting with the wafers.
- Continue layering until all ingredients are used, finishing with pudding on top.
- Refrigerate for at least 2 hours before serving.