
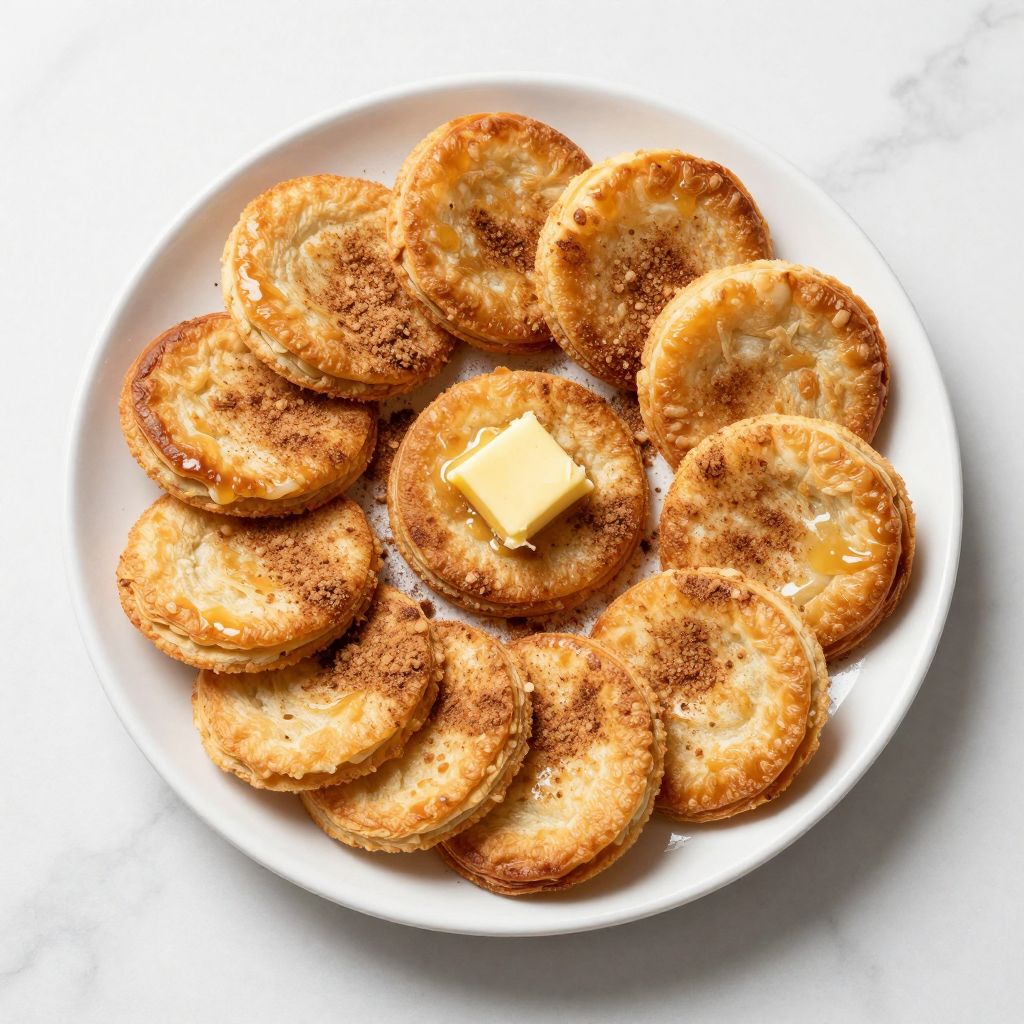
There’s something magical about biting into a warm pan sobao fresh from the oven, when the butter is still melting into every flaky layer and the cinnamon sugar catches on your fingers in the best possible way.
This Cuban-inspired pastry is a delightful combination of crispy, buttery dough and sweet cinnamon filling that tastes far more impressive than its simple ingredient list suggests. The beauty of pan sobao lies in how approachable it is for home bakers, yet how restaurant-quality the results turn out when you follow a few key techniques.
Whether you’re making these for a weekend breakfast, bringing them to a gathering, or simply craving something that feels both indulgent and homemade, this recipe delivers consistent, stunning results every single time.
Why You’ll Love This Recipe
Pan sobao checks every box for a weekend baking project that actually fits into a realistic schedule. The dough comes together quickly, the filling is literally three ingredients, and the payoff is absolutely worth the minimal effort required.
- Flaky, buttery layers that shatter when you bite into them
- Sweet cinnamon sugar filling that’s perfectly balanced, not cloyingly sweet
- Ready in under two hours from start to finish
- Freezer-friendly, so you can bake ahead for busy mornings
- Impresses guests and tastes like you spent way more time than you actually did
My Experience Making This Recipe
I first made pan sobao at my abuela’s suggestion, armed with minimal instructions and a lot of hope. Within twenty minutes of pulling the first batch from the oven, three neighbors had knocked on my door asking what smelled so incredible, and I became a firm believer in the power of cinnamon and butter.
What struck me most was how forgiving this recipe truly is. I’ve made it on mornings when I oversleep, afternoons when I’m impatient, and evenings when I’m experimenting with different filling combinations. The pastries consistently turn out golden, flaky, and absolutely delicious regardless of my approach.
My kids now request these instead of store-bought pastries, which tells you everything you need to know about the quality and taste. Watching them demolish a warm pan sobao with a glass of milk is honestly one of my favorite kitchen moments.
Recipe Overview
- Recipe Name: Pan Sobao
- Servings: 12 pastries
- Prep Time: 30 minutes
- Cook Time: 20 minutes
- Total Time: 50 minutes plus 30 minutes rising time
- Course: Breakfast, Dessert, Snack
- Cuisine: Cuban
- Calories per Serving: 185
Equipment You Will Need
- Large mixing bowl
- Medium mixing bowl
- Stand mixer with dough hook, or your hands for kneading
- Measuring cups and spoons
- Kitchen scale (optional but helpful)
- Rolling pin
- Sharp knife or pastry cutter
- Baking sheets
- Parchment paper
- Pastry brush
- Wire cooling rack
Ingredients for Pan Sobao
For the Dough
- All-purpose flour: 3 cups
- Warm water: 1 cup
- Salt: 1.5 teaspoons
- Vegetable oil: 2 tablespoons
- Instant yeast: 1.5 teaspoons
For the Filling
- Butter: 4 tablespoons, softened
- Cinnamon sugar: 1/2 cup (1/4 cup sugar mixed with 1 tablespoon ground cinnamon)
For Assembly
- Butter: 2 tablespoons, melted for brushing
Ingredient Notes and Substitutions
- All-purpose flour: This is your base structure and creates the tender, flaky crumb. You can substitute bread flour if you want extra chew, but all-purpose yields the most authentic texture.
- Instant yeast: This activates the dough and creates the slight rise that makes pan sobao lighter than a simple pastry. Active dry yeast works fine as a one-to-one swap.
- Butter: Essential for the signature flaky layers and rich flavor. Margarine will work but produces noticeably different texture and taste.
- Warm water: Must be between 105 and 110 degrees Fahrenheit to activate yeast properly. Too hot kills the yeast, too cold leaves it dormant.
- Ground cinnamon: Use high-quality cinnamon if possible, as it’s the star ingredient here. Vietnamese cinnamon offers a slightly sweeter profile than cassia cinnamon.
How to Make Pan Sobao
Step 1: Combine the Dry Ingredients
In a large mixing bowl, whisk together 3 cups of all-purpose flour, 1.5 teaspoons of salt, and 1.5 teaspoons of instant yeast. Mixing the yeast with the flour first ensures even distribution throughout the dough, which means consistent rising and better texture.
Step 2: Add the Wet Ingredients
Pour 1 cup of warm water and 2 tablespoons of vegetable oil into the flour mixture. Mix with a stand mixer fitted with a dough hook on medium speed for about 5 minutes, or knead by hand for about 8 minutes until the dough comes together into a shaggy ball.
The dough should be slightly sticky but not overly wet. If it’s too dry, add a tablespoon of water at a time until you reach the right consistency.
Step 3: Knead the Dough
Continue kneading for another 3 to 5 minutes until the dough becomes smooth and elastic. You should be able to stretch a small piece without it tearing immediately, which signals proper gluten development.
This step is critical because proper kneading creates the structure that holds those beautiful flaky layers you’re after.
Step 4: Prepare for Rising
Shape the dough into a ball and place it in a lightly oiled bowl. Cover with a damp kitchen towel and let it rise at room temperature for about 30 minutes, until it increases in size by roughly one and a half times.
A warm spot in your kitchen, like near a sunny window or on top of your refrigerator, speeds up rising. You’re not looking for a full double rise here, just a gentle puff that indicates the yeast is active.
Step 5: Divide and Flatten the Dough
Turn the risen dough out onto a lightly floured work surface. Divide it into 12 equal pieces by cutting it into quarters first, then cutting each quarter into thirds.
Flatten each piece into a thin circle about the size of your palm, roughly 4 inches in diameter. Work gently to avoid degassing the dough too much, which keeps your pastries light and airy.
Step 6: Add the Cinnamon Filling
Mix 1/4 cup sugar with 1 tablespoon ground cinnamon in a small bowl. Spread about 1 teaspoon of softened butter onto each flattened dough circle, then sprinkle a generous pinch of the cinnamon sugar mixture on top.
Don’t skip the butter under the cinnamon sugar. It acts as both a flavor base and helps the cinnamon mixture stick to the dough rather than falling off during baking.
Step 7: Roll and Shape
Starting from one edge, tightly roll each circle into a ball, making sure to keep the cinnamon sugar inside. Gently stretch and fold the edges toward the center, creating a sealed package that traps the filling within.
Think of this like making a dumpling or empanada. The goal is a tightly sealed ball that won’t burst open during baking and will keep those precious cinnamon-sugar layers intact.
Step 8: Place on Baking Sheets
Arrange the rolled balls seam-side down on parchment-lined baking sheets, spacing them about 2 inches apart. Allow them to rest for about 10 minutes before baking.
This brief rest helps the dough relax and rise slightly, which contributes to that tender crumb when baked. Don’t skip this step, even if you’re in a hurry.
Step 9: Flatten Before Baking
Using the palm of your hand or a glass, gently flatten each ball into a thick disk about 1/2 inch high. This step is what differentiates pan sobao from a simple cinnamon roll and creates those signature flat, crispy edges.
Don’t flatten too aggressively or you’ll squeeze out all the air that yeast worked to create. Use gentle, firm pressure that flattens without demolishing the structure.
Step 10: Bake Until Golden
Preheat your oven to 400 degrees Fahrenheit. Bake the pan sobao for 18 to 22 minutes until the tops are light golden brown and the edges are deeply golden.
Oven temperatures vary, so keep a close eye after the 15-minute mark. You want golden, not burnt, and the pastries should feel hollow when you tap them gently.
Step 11: Brush with Butter
Remove the baking sheets from the oven and immediately brush each warm pastry with melted butter. This adds shine, extra richness, and helps any remaining cinnamon sugar stick to the surface.
Work quickly while they’re hot so the butter melts into the pastry rather than sitting on top.
Step 12: Cool Slightly Before Serving
Transfer the pan sobao to a wire rack and let them cool for about 5 to 10 minutes. This resting period allows the structure to set slightly while they’re still warm and soft inside.
They’re best enjoyed while still warm, when the butter is melted and the cinnamon sugar is at its most vibrant.
Pro Tip: Don’t skip the gentle flattening step before baking. This is what transforms your dough into a proper pan sobao with crispy exterior edges while keeping the interior tender and slightly chewy.
Tips for the Best Pan Sobao
- Use softened butter for the filling, not melted, so it spreads evenly and doesn’t soak into the dough too quickly. Cold butter won’t spread, and overly hot butter will make the dough greasy.
- Don’t rush the rising time. Even though yeast activation is relatively quick, letting the dough rest fully ensures proper fermentation and better flavor development.
- Measure your cinnamon by weight if possible, as it compacts differently in measuring cups depending on how firmly you pack it. A scale removes this guesswork.
- Keep your work surface lightly floured but not dusty. Too much flour prevents proper sealing when you roll the dough into balls, and too little causes sticking.
- Rotate your baking sheets halfway through cooking if your oven has hot spots, which creates more even browning across all pastries.
- Serve warm with a cup of strong coffee or hot chocolate. Cold pan sobao is still delicious but lacks that magical butter-melting experience that makes it special.
Common Mistakes to Avoid
- Using water that’s too hot for the yeast, which kills it and results in dense, heavy pastries that won’t rise. Test the water temperature on your wrist like you would for a baby’s bottle.
- Overfilling with cinnamon sugar, which leaks out during baking and creates a mess on your sheet pan. A light sprinkle is more than enough.
- Not sealing the dough properly when rolling into balls, which allows the filling to escape and leaves you with dry pastries. Take an extra few seconds to pinch and fold the edges securely.
- Skipping the butter brush after baking, which leaves the pastries looking dull and losing a layer of richness. This takes thirty seconds and makes a real difference.
- Baking at too low a temperature, which produces pale, soft pastries instead of the desired golden, crispy texture. Four hundred degrees is essential for proper browning.
Serving Suggestions
Pan sobao shines as a standalone breakfast pastry but becomes even more special when paired thoughtfully with complementary flavors. These little pastries are humble enough for casual mornings yet elegant enough for brunch gatherings.
- Serve warm with strong Cuban coffee for an authentic pairing that lets the cinnamon shine
- Pair with creamy hot chocolate and a pinch of sea salt for a cozy afternoon treat
- Offer alongside fresh fruit, like sliced mango or papaya, to balance the richness
- Enjoy with a dollop of sour cream or crema for a sweet-savory contrast
- Bundle several together and serve as part of a breakfast spread with fresh juice and scrambled eggs
Variations to Try
- Brown Sugar and Nutmeg Pan Sobao: Replace half the cinnamon with nutmeg and use brown sugar instead of white sugar for a deeper, warmer spice profile and richer molasses notes.
- Chocolate-Filled Pan Sobao: Add a small piece of dark chocolate along with the cinnamon sugar filling for a pastry-meets-chocolate moment that works beautifully for dessert.
- Guava and Cheese Pan Sobao: Spread a thin layer of cream cheese and a small dollop of guava paste instead of cinnamon sugar for a Caribbean twist that’s tart, sweet, and creamy.
- Orange-Cinnamon Pan Sobao: Add 1/2 teaspoon of finely grated orange zest to the cinnamon sugar mixture for bright citrus notes that play well with warm spices.
- Maple and Pecan Pan Sobao: Replace cinnamon sugar with a mixture of finely chopped pecans, brown sugar, and a drizzle of maple syrup for an autumn-inspired version.
Dietary Adaptations
- Gluten-Free: Substitute an equal amount of quality gluten-free all-purpose flour blend for regular flour, though the texture will be slightly less flaky and more tender. Add an extra 1/4 teaspoon of xanthan gum if your blend doesn’t already contain it.
- Dairy-Free: Replace butter with vegan butter in both the filling and brushing step, maintaining the same quantities. The results are nearly identical, though dairy-free butter sometimes browns slightly differently.
- Vegan: Use vegan butter and ensure your yeast is labeled vegan, as some contain additives derived from animal sources. Everything else remains exactly the same.
- Low-Carb and Keto: Substitute all-purpose flour with almond flour and add 1 tablespoon of psyllium husk to create structure, then replace sugar with erythritol. Expect denser texture and results that are good but noticeably different from the original.
Storage and Reheating
Refrigerator
Store cooled pan sobao in an airtight container for up to 4 days. They lose some crispiness over time as moisture reabsorbs into the pastry, but flavor remains excellent.
- Keep them in a single layer if possible to prevent crushing
- Separate each pastry with parchment paper to prevent sticking
Freezer
Freeze baked pan sobao in an airtight container for up to 3 months, or freeze unbaked dough balls for up to 2 months. Frozen pastries thaw faster and reheat better than frozen dough.
- Flash-freeze on a baking sheet before transferring to freezer containers to prevent clumping
- Thaw baked pastries at room temperature for about 20 minutes before reheating
Reheating
Reheat stored pan sobao at 350 degrees Fahrenheit for 5 to 8 minutes to restore crispiness and melt the filling. Don’t use the microwave, which makes them rubbery and destroys the texture you worked hard to achieve.
- Cover loosely with foil if they’re browning too quickly
- Brush lightly with melted butter before reheating for extra richness
Nutrition Information
| Nutrient | Amount |
|---|---|
| Calories | 185 |
| Total Fat | 8g |
| Saturated Fat | 5g |
| Carbohydrates | 24g |
| Fiber | 1g |
| Sugar | 8g |
| Protein | 3g |
| Sodium | 280mg |
| Cholesterol | 20mg |
These values are approximate and calculated using standard ingredient databases. Variations occur based on specific brands used and actual portion sizes.
Frequently Asked Questions
Can I make the dough the night before and bake in the morning?
Absolutely. Prepare the dough through step 4, then refrigerate overnight in an oiled bowl covered with plastic wrap. The next morning, remove it from the fridge and let it come to room temperature for about 15 minutes before continuing with shaping and baking.
Why did my pastries turn out dense instead of flaky?
This usually happens when the dough wasn’t kneaded enough, the yeast was dead from hot water, or the rising time was cut short. Dense pastries also result from pressing out too much air when flattening before baking.
Can I use instant yeast and active dry yeast interchangeably?
Yes, they work identically in this recipe and can be swapped in equal amounts. Instant yeast particles are slightly smaller, but the difference is negligible in home baking.
What if my cinnamon sugar keeps falling off the pastries during baking?
The butter isn’t spreading evenly across the dough, or you’re not pressing the cinnamon mixture into the butter firmly enough. Make sure the butter is softened, not melted, and really press the cinnamon sugar so it sticks.
How do I know when the pan sobao are perfectly baked?
The tops should be light golden brown and the edges should be a deeper golden color. Gently tap the bottom of one pastry, and it should sound slightly hollow, indicating a crispy exterior.
Can I double this recipe?
Yes, simply double all ingredients and follow the exact same instructions. Baking time remains the same since you’re baking the same thickness, just more pastries across multiple sheets.
Final Thoughts
Making pan sobao at home transforms these humble pastries into something truly special. You’re not just baking, you’re creating a little moment of joy with your own hands, and that counts for something real.
Give this recipe a try on your next weekend morning and watch how quickly these pastries disappear. Your kitchen will smell incredible, and you’ll understand why pan sobao holds such a cherished place in Cuban culinary tradition.
If you’re looking to expand your homemade bread collection, consider trying our Cuban bread recipe, which pairs beautifully with pan sobao for a complete breakfast spread. You might also enjoy exploring our Navajo fry bread recipe for another fried dough variation that’s equally satisfying and unique.
Pan Sobao
Ingredients
Equipment
Method
- In a large mixing bowl, whisk together 3 cups all-purpose flour, 1.5 teaspoons salt, and 1.5 teaspoons instant yeast.
- Pour 1 cup warm water and 2 tablespoons vegetable oil into the flour mixture and mix with a stand mixer fitted with a dough hook on medium speed for about 5 minutes or knead by hand for about 8 minutes until a shaggy dough forms.
- Continue kneading for another 3 to 5 minutes until the dough becomes smooth and elastic.
- Shape the dough into a ball, place it in a lightly oiled bowl, cover with a damp towel, and let it rise at room temperature for about 30 minutes until it has puffed slightly.
- Turn the dough out onto a lightly floured surface, divide into 12 equal pieces, and flatten each into a 4-inch circle.
- Mix 1/4 cup sugar with 1 tablespoon ground cinnamon, spread about 1 teaspoon softened butter on each circle, and sprinkle with the cinnamon sugar mixture.
- Roll each circle tightly into a sealed ball, pinching edges to trap the filling.
- Place the rolls seam-side down on parchment-lined baking sheets spaced about 2 inches apart and let rest for 10 minutes.
- Gently flatten each ball into a 1/2-inch-thick disk using your palm or a glass.
- Preheat the oven to 400°F (200°C) and bake the pan sobao for 18 to 22 minutes until the tops are light golden brown and the edges are deeply golden.
- Remove from the oven and immediately brush each pastry with 2 tablespoons melted butter.
- Transfer to a wire rack and let cool for 5 to 10 minutes before serving.