
Nothing beats the smell of a big pot of chili simmering on the stove, especially one that’s been perfected by pitmasters who know their way around bold flavors and meat.
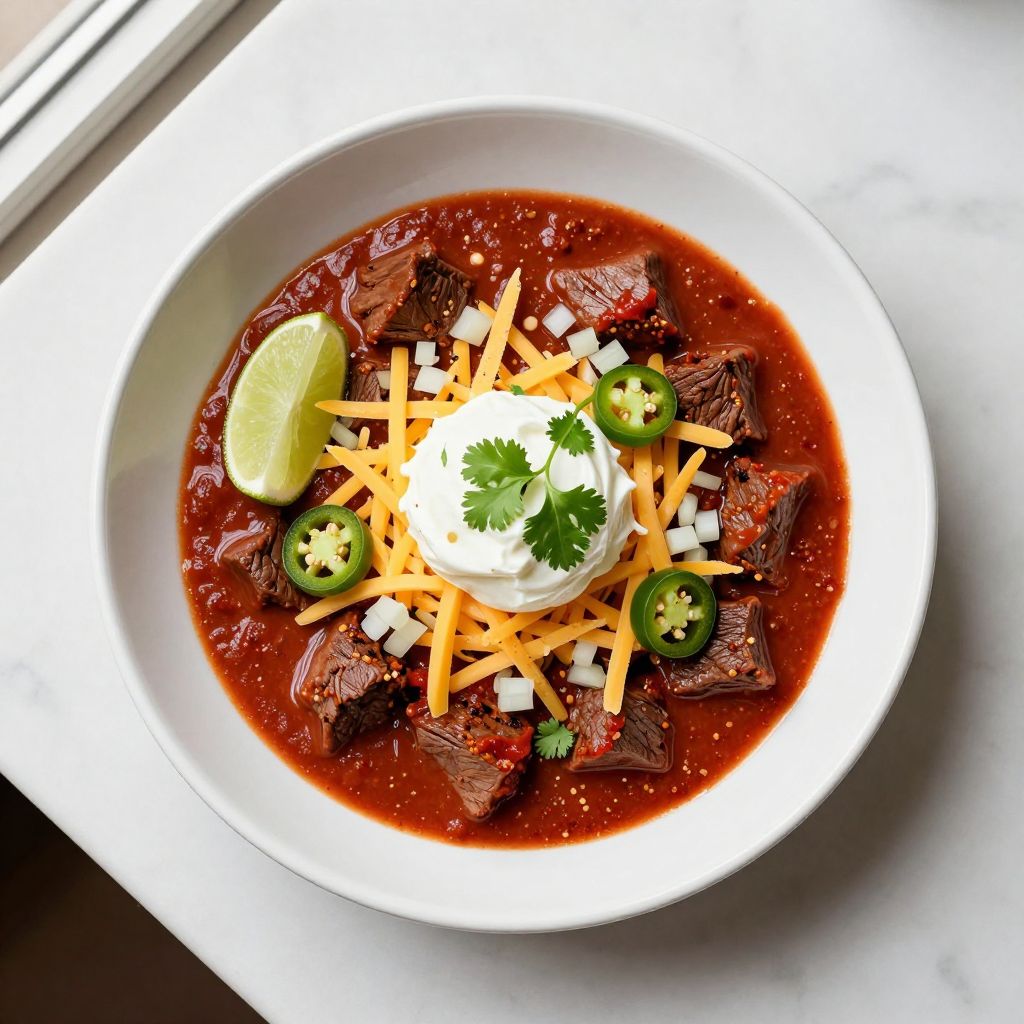
Meat Church Chili is a competition-style chili that strips away the beans and filler to focus on what matters: tender chunks of beef, a rich sauce, and spices that hit every note on your palate.
This recipe delivers restaurant-quality results at home without the fuss, making it perfect for game day, feeding a crowd, or simply satisfying a serious chili craving.
Why You’ll Love This Recipe
This chili stands out because it respects the meat and lets the flavors speak for themselves.
- No beans means a pure, savory sauce that clings to tender beef chunks
- Builds deep, complex flavor through layering spices rather than relying on tomato paste alone
- Scales easily from a weeknight dinner for four to feeding twenty people at a tailgate
- Tastes better the next day, making it ideal for meal prep
- Comes together in under three hours with minimal hands-on time
My Experience Making This Recipe
The first time I made Meat Church Chili, I was skeptical about skipping the beans, but that first spoonful changed my mind instantly. The beef was impossibly tender, and the sauce had a depth I’d never achieved with my usual recipe.
My family devoured two bowls each, and my partner asked if I’d started a secret restaurant in our kitchen. The house smelled incredible for hours afterward, and leftovers disappeared faster than I could store them.
What surprised me most was how forgiving the recipe is; I’ve made it with slightly different chili powders and spice ratios based on what I had on hand, and it’s never disappointed. Once you understand the method, you’ll find yourself tweaking it to match your own heat level and flavor preferences.
Recipe Overview
- Recipe Name: Meat Church Chili
- Servings: 8 to 10
- Prep Time: 20 minutes
- Cook Time: 2 hours 30 minutes
- Total Time: 2 hours 50 minutes
- Course: Main Dish
- Cuisine: American
- Calories per Serving: 380
Equipment You Will Need
- Large heavy-bottomed pot or Dutch oven
- Sharp chef’s knife and cutting board
- Wooden spoon or silicone spatula
- Measuring spoons and cups
- Meat thermometer
- Paper towels for patting meat dry
- Small bowl for mixing spices
Ingredients for Meat Church Chili
- Beef chuck roast: 4 pounds, cut into 3/4-inch cubes
- Beef broth: 4 cups
- Tomato paste: 6 ounces
- Crushed tomatoes: 14.5 ounces (one can)
- Onion: 1 large, diced
- Garlic: 6 cloves, minced
- Chili powder: 1/4 cup
- Cumin: 2 tablespoons
- Paprika: 1 tablespoon
- Cayenne pepper: 1 to 2 teaspoons
- Oregano: 1 tablespoon dried
- Black pepper: 1 teaspoon
- Salt: 2 teaspoons, plus more to taste
- Vegetable oil: 2 tablespoons
- Worcestershire sauce: 1 tablespoon
- Hot sauce (optional): 1 teaspoon for extra kick
Ingredient Notes and Substitutions
- Beef chuck roast: Chuck has the right fat-to-meat ratio for tender, flavorful chili after long cooking. You can substitute sirloin tip or brisket, though they may cook slightly faster or slower.
- Chili powder: This forms the backbone of the flavor profile and should be fresh and high quality. If yours is older than six months, replace it with a new jar for better depth.
- Tomato paste: Provides body and umami without excess liquid. Substitute with an equal amount of crushed tomatoes if needed, though you’ll need to simmer longer to reduce liquid.
- Cumin: Adds earthiness and warmth to the spice blend. You can reduce to 1 tablespoon if you prefer a milder cumin flavor.
- Worcestershire sauce: Brings savory depth and subtle tang. Soy sauce works in a pinch, though the flavor profile shifts slightly.
How to Make Meat Church Chili
Step 1: Prepare and Sear the Beef
Cut the beef chuck roast into 3/4-inch cubes and pat them dry with paper towels. Dry beef browns better because moisture prevents a proper crust from forming, which locks in flavor and juice.
Heat the vegetable oil in a large pot over medium-high heat until it shimmers. Working in batches to avoid crowding the pot, sear the beef for 3 to 4 minutes per side until deeply browned, then transfer to a plate.
Step 2: Sauté the Aromatics
Reduce the heat to medium and add the diced onion to the pot, stirring occasionally for 5 minutes until softened and golden. This builds a flavor foundation that rounds out the spices.
Add the minced garlic and cook for 1 minute, stirring constantly to prevent burning. You’ll smell the garlic become fragrant and sweet.
Step 3: Bloom the Spices
Add the chili powder, cumin, paprika, oregano, and black pepper to the pot and stir constantly for 1 to 2 minutes. Blooming the spices in the hot fat releases their essential oils and deepens their flavor.
This step is critical; don’t skip it or rush it, or your chili will taste flat and one-dimensional.
Step 4: Add Tomato Paste
Stir in the tomato paste and cook for 2 minutes, stirring often. This further blooms the paste and removes any raw, tinny taste it might have.
Step 5: Deglaze and Build the Sauce
Pour in the beef broth, scraping the bottom of the pot with a wooden spoon to lift up all the browned bits stuck to the surface. Those bits are pure flavor and should never be discarded.
Add the crushed tomatoes, Worcestershire sauce, and optional hot sauce, stirring well to combine all ingredients evenly.
Step 6: Return Beef and Bring to Simmer
Return all the browned beef to the pot and stir until everything is combined. The liquid should mostly cover the beef.
Increase the heat to medium-high and bring the chili to a gentle boil, then reduce to low heat so it maintains a slow, steady simmer with just a few bubbles breaking the surface. A rolling boil will toughen the meat and cause excessive liquid loss.
Step 7: Simmer Low and Slow
Cover the pot partially with a lid and simmer for 2 to 2.5 hours, stirring every 20 to 30 minutes. The beef should become fork-tender and the sauce should thicken and deepen in color.
As the chili cooks, the meat releases gelatin into the sauce, creating a rich, silky texture without any added thickener.
Step 8: Adjust Seasoning
Taste the chili and add more salt, pepper, or cayenne as needed. If the sauce seems too thin, leave the lid off for the final 15 minutes to allow some liquid to evaporate.
If it’s too thick or concentrated, stir in a bit more beef broth. The consistency should coat the back of a spoon but still have a sauce consistency, not be dry.
Step 9: Rest Before Serving
Remove from heat and let the chili rest for 10 minutes uncovered. This allows flavors to settle and makes the chili easier to serve.
Pro Tip: Make this chili a full day ahead and refrigerate overnight; the flavors meld and intensify dramatically, and reheating is faster than cooking from scratch.
Tips for the Best Meat Church Chili
- Buy whole chili pods and toast them before grinding if you want the deepest, freshest flavor, though quality chili powder works well for a simpler approach.
- Don’t skip the searing step; it creates a fond that adds serious depth to the final sauce.
- Stir occasionally but not constantly; you want the chili to simmer gently, not bubble aggressively.
- Taste as you go, especially with spices and salt, so you don’t overseasoned a batch that can’t be fixed.
- If you prefer a brothier chili, add an extra cup of beef broth; if you like it thick, reduce the broth by half a cup.
- Fresh cilantro scattered on top just before serving adds brightness that complements the deep spices beautifully.
Common Mistakes to Avoid
- Using pre-cut stew meat from the grocery store instead of chuck roast: pre-cut beef is often from multiple muscles and cooks inconsistently. Cut your own chuck roast for uniform pieces that cook evenly.
- Adding the spices all at once without blooming them: this results in a dusty, bitter flavor instead of a smooth, integrated spice profile.
- Letting the chili boil hard instead of simmering gently: high heat toughens the meat and causes excess liquid to evaporate, concentrating the flavors unevenly.
- Underseasoning because you’re worried about salt: taste and adjust throughout cooking, starting with less and adding more as needed.
- Skipping the resting period: chili needs a few minutes for the sauce to thicken slightly and flavors to settle before serving.
Serving Suggestions
Serve Meat Church Chili hot in bowls or mugs, with toppings on the side so everyone can customize their bowl.
- Diced white onion and fresh jalapeños for bright crunch and heat
- Shredded cheddar cheese and sour cream for richness and tang
- Cornbread or crackers for scooping and added texture
- Lime wedges for a squeeze of acid that brightens the deep spices
- Fresh cilantro and sliced avocado for freshness and creaminess
Variations to Try
- Three-Alarm Chili: Increase the cayenne to 3 teaspoons and add 1 teaspoon of chipotle powder for smoky heat that builds on the palate.
- Coffee-Rubbed Chili: Add 1 tablespoon of brewed espresso or instant coffee to the pot during the simmer; it amplifies the beef flavor without tasting like coffee.
- Beer Chili: Replace 2 cups of beef broth with a dark beer like porter or stout for malty depth and body.
- Spicy Bean Chili: Add 2 cans of kidney or black beans in the final 20 minutes of cooking if you prefer beans, but don’t add them earlier or they’ll fall apart.
- Ancho and Guajillo Chili: Replace half the chili powder with ground ancho and guajillo peppers for a fruitier, more complex heat.
Dietary Adaptations
- Gluten-Free: This recipe is naturally gluten-free as long as you use tamari or gluten-free Worcestershire sauce instead of regular Worcestershire.
- Dairy-Free: Skip the cheese and sour cream toppings and use dairy-free alternatives, or simply top with avocado and cilantro instead.
- Vegetarian: Replace beef with 4 pounds of mushrooms (cremini, portobello, and oyster mixed) cut into chunks and increase cooking time to 90 minutes; add 2 extra tablespoons of tomato paste for depth.
- Low-Carb or Keto: This chili is naturally low-carb; just watch added sugar in your brand of chili powder and tomato paste, and serve without cornbread.
Storage and Reheating
Refrigerator
Store leftover chili in an airtight container for up to 4 days. The flavors actually improve as it sits, making day-two chili taste even better.
- Cool to room temperature before storing to prevent condensation buildup
- Transfer to individual containers for easy grab-and-go portions
Freezer
Freeze chili in airtight containers or freezer bags for up to 3 months. Leave a bit of headspace for expansion.
- Flat freezer bags take up less space and thaw faster than rigid containers
- Label with the date so you know what you have on hand
Reheating
Thaw frozen chili in the refrigerator overnight, then reheat gently over low heat on the stovetop, stirring occasionally and adding a splash of beef broth if it seems dry. Never use high heat or microwave, which can toughen the meat.
- Stovetop reheating takes about 15 to 20 minutes and delivers the best texture
- For a quick weeknight meal, thaw and reheat in a slow cooker on low for 2 to 3 hours
Nutrition Information
| Nutrient | Amount |
|---|---|
| Calories | 380 |
| Total Fat | 18 g |
| Saturated Fat | 7 g |
| Carbohydrates | 12 g |
| Fiber | 3 g |
| Sugar | 6 g |
| Protein | 48 g |
| Sodium | 820 mg |
| Cholesterol | 110 mg |
Nutrition values are estimates based on standard USDA data and may vary depending on specific brands and portion sizes used.
Frequently Asked Questions
Can I use ground beef instead of chunks?
You can, but the texture will be completely different; the chili will be more like a meat sauce than the hearty, chunky chili this recipe delivers. If you do use ground beef, brown it first, then simmer for only 45 minutes to 1 hour.
How far ahead can I make this chili?
Make it up to 2 days ahead and store in the refrigerator, which gives flavors even more time to develop. You can also freeze it for up to 3 months and thaw overnight before reheating.
What if my chili is too thin?
Leave the lid off for the final 15 to 20 minutes of cooking to allow excess liquid to evaporate. If you’re in a hurry, mix 1 tablespoon of cornstarch with 2 tablespoons of cold water, stir it in, and simmer for 5 more minutes.
Can I make this in a slow cooker?
Yes, sear the beef and sauté the aromatics on the stovetop as directed, then transfer everything to a slow cooker on low for 6 to 8 hours. The cook time is longer, but hands-on time is minimal.
Why does my chili taste bitter?
This usually happens from burning the spices, boiling the chili too hard, or using old, stale spices. Always bloom spices gently over medium heat and simmer the chili low and slow.
Can I add beans to this recipe?
Absolutely; add 2 cans of rinsed kidney or black beans in the final 20 minutes of cooking so they warm through without falling apart. Adding them earlier will break them down into mush.
Final Thoughts
Meat Church Chili proves that sometimes the best recipes are the ones that know what they are and execute with confidence. This is chili stripped down to its essence: quality beef, balanced spices, and a sauce that tastes like it simmered for days.
Make it this weekend, adjust the spices to match your taste, and watch it become your go-to recipe for feeding a crowd, impressing a dinner guest, or simply treating yourself to something genuinely delicious. Your kitchen will smell incredible, and your dinner table will feel a lot fuller.
If you love bold, savory flavors, you might also enjoy our cowboy chili recipe for a different take on this classic comfort food. For even more control over your spice blend, try making your own chili seasoning recipe to customize the flavors exactly how you like them.
Meat Church Chili
Ingredients
Equipment
Method
- Pat beef cubes dry with paper towels to ensure proper browning.
- Heat 2 tablespoons vegetable oil in a large Dutch oven over medium-high heat until shimmering.
- Working in batches, sear beef cubes for 3 to 4 minutes per side until deeply browned; transfer to a plate.
- Reduce heat to medium and add diced onion; sauté for 5 minutes until softened and golden.
- Add minced garlic and cook for 1 minute until fragrant.
- Stir in chili powder, cumin, paprika, oregano, and black pepper; cook for 1 to 2 minutes to bloom spices.
- Add tomato paste and cook for 2 minutes, stirring frequently.
- Pour in beef broth and scrape up browned bits from the bottom of the pot.
- Stir in crushed tomatoes, Worcestershire sauce, and hot sauce if using.
- Return seared beef to the pot and bring to a gentle boil over medium-high heat.
- Reduce heat to low, partially cover, and simmer for 2 to 2.5 hours, stirring every 20 to 30 minutes.
- Taste and adjust salt, pepper, or cayenne as needed; simmer uncovered for final 15 minutes to thicken if desired.
- Remove from heat and let chili rest uncovered for 10 minutes before serving.