Ingredients
Equipment
Method
- Fill your large stockpot or water bath canner with water and bring it to a simmer. Wash your jars, lids, and bands in hot soapy water, then keep the jars warm in the simmering water until ready to fill.
- Rinse the okra pods under cold running water and gently scrub away any dirt or fuzz. Trim the stem ends, but leave the caps intact so the brine stays outside the pods.
- Combine the vinegar, water, pickling salt, and sugar in your medium saucepan. Bring the mixture to a rolling boil over high heat, stirring until the salt and sugar fully dissolve.
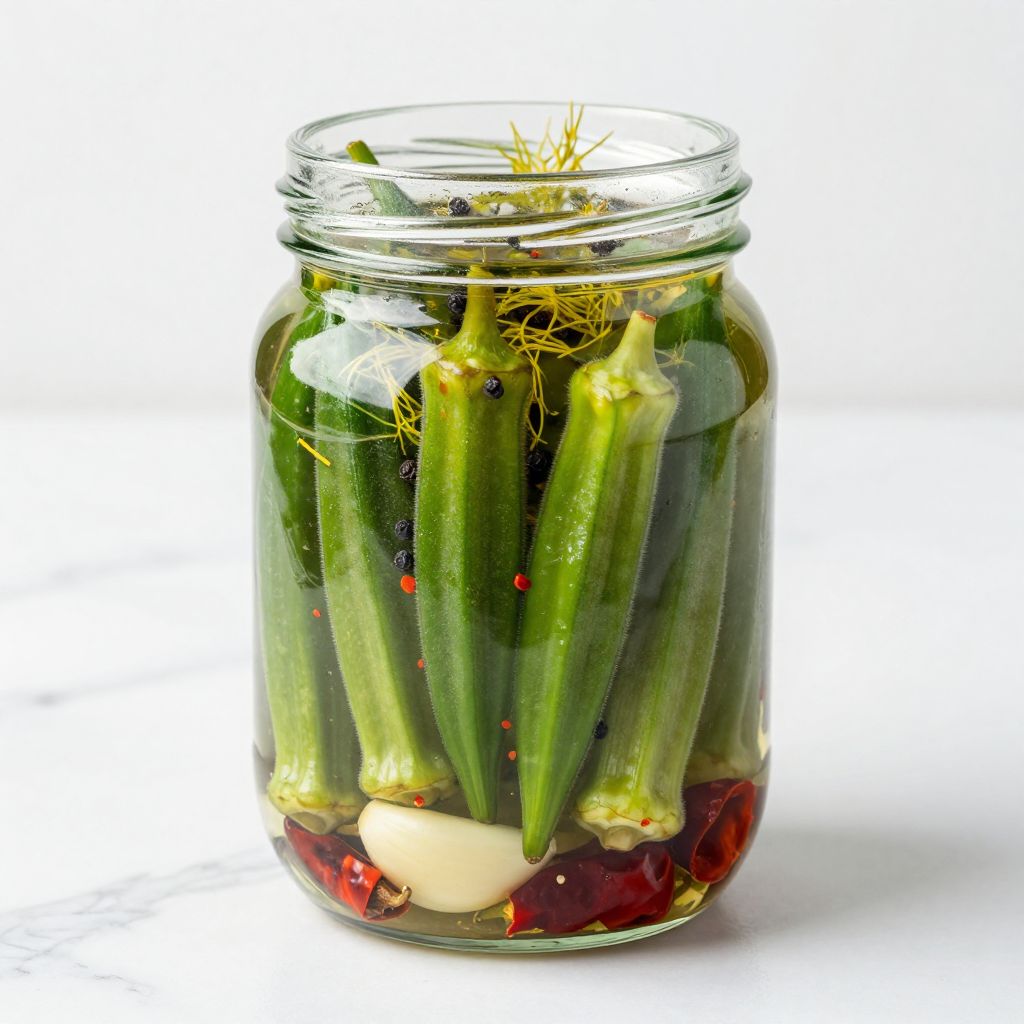
- Remove the warm jars from the water bath using your jar lifter. Place 1 garlic clove, 1 dill head, a pinch of peppercorns, and red pepper flakes into each jar. Add a dried chile to any jars you want extra spicy.
- Stand the okra pods upright in each jar, alternating stem end up and stem end down to fit as many as possible. Pack them snugly but avoid crushing the pods. Leave about half an inch of headspace at the top of each jar.
- Ladle the boiling brine into each packed jar, covering the okra completely. Use a chopstick or bubble remover to release any trapped air pockets along the sides. Maintain half inch headspace after adding brine.
- Wipe the jar rims with a clean, damp cloth to remove any residue. Center a lid on each jar and screw on the band until fingertip tight.
- Lower the jars into the boiling water bath, ensuring at least 1 inch of water covers the tops. Process pint jars for 10 minutes, starting your timer once the water returns to a full boil.
- Carefully remove the jars using your jar lifter and place them on a towel lined surface. Allow them to cool undisturbed for 12 to 24 hours. Press the center of each cooled lid to confirm it does not flex up and down.
- Label your sealed jars with the date and store them in a cool, dark place. Wait at least 2 weeks before opening to allow flavors to develop fully.
Notes
Refrigerate your okra for at least 2 hours before packing into jars for crunchiest results. Add a grape leaf, oak leaf, or a pinch of calcium chloride to each jar for extra crispness. Properly sealed jars last 12 to 18 months stored in a cool, dark place. Once opened, store refrigerated for 2 to 3 months.