
There’s something almost magical about homemade garlic mayo: the moment you crack open a jar of store-bought stuff and compare it to what you’ve just made in your own kitchen, you understand why restaurant chefs guard their aioli recipes like family heirlooms.
Garlic mayo is one of those deceptively simple recipes that transforms everything it touches.
Mix it into sandwiches, dollop it on fries, or swirl it into soups, and you’ll taste the difference between pale, lifeless condiments and something vibrant and alive.
What makes this recipe special is how quickly you can whip it together, how long it keeps in your fridge, and how impossibly versatile it becomes once you master the basic technique.
Ready to stop buying mediocre mayo and start making your own?
Why You’ll Love This Recipe
Homemade garlic mayo beats store-bought in every category: flavor, freshness, and the satisfaction of knowing exactly what went into it.
- Takes just 5 minutes to make with a food processor or blender.
- Costs a fraction of what you’d pay for premium store versions.
- Lasts three weeks in the fridge, ready whenever you need it.
- The bold garlic punch makes every dish taste restaurant-quality.
- Pairs with everything from burgers to roasted vegetables to grilled fish.
My Experience Making This Recipe
The first time I made this, I was convinced I’d messed up because it came together so fast I thought something was missing.
Turns out, simplicity is the whole point: four ingredients, one minute of emulsifying, and you’re done.
My kids started requesting it on everything within days, and I stopped buying mayo altogether.
The smell alone when you open a fresh jar of homemade garlic mayo is enough to make you feel like a proper cook, even if you’ve never made an emulsion in your life.
Recipe Overview
- Recipe Name: Homemade Garlic Mayo
- Servings: Makes about 1 cup (16 servings of 1 tablespoon each)
- Prep Time: 5 minutes
- Cook Time: 0 minutes
- Total Time: 5 minutes
- Course: Condiment
- Cuisine: French-inspired
- Calories per Serving: 95
Equipment You Will Need
- Food processor or blender
- Measuring spoons and cups
- Garlic press or microplane
- Glass jar with a lid for storage
- Rubber spatula for scraping
- Whisk (optional, for hand-mixing)
Ingredients for Garlic Mayo
- 1 large egg yolk, room temperature
- 1 cup neutral oil (vegetable, canola, or light olive oil), room temperature
- 4 to 6 garlic cloves, minced or pressed
- 1 tablespoon fresh lemon juice or white vinegar
- 1/2 teaspoon salt
- 1/4 teaspoon white pepper (or black pepper)
- 1/4 teaspoon Dijon mustard (optional but recommended)
Ingredient Notes and Substitutions
- Egg yolk: The yolk emulsifies the oil into a creamy sauce and provides richness. If you’re concerned about raw eggs, use pasteurized eggs from your grocery store.
- Neutral oil: Light, flavorless oils work best here so the garlic shines; avoid olive oil or coconut oil, which compete for attention. You can use a blend of half light olive oil and half canola if you want subtle richness.
- Garlic: Fresh garlic gives the brightest flavor, but roasted garlic creates a sweeter, milder mayo. Use 3 to 4 cloves of roasted garlic if you prefer subtlety.
- Lemon juice: Adds tang and helps prevent spoilage through its acidity. White vinegar or even a splash of white wine vinegar works just as well if you’re out of lemon.
- Dijon mustard: Acts as a secondary emulsifier and adds subtle complexity. Skip it if you’re keeping things pure, but it really does help stabilize the mayo.
How to Make Garlic Mayo
Step 1: Prepare Your Ingredients
Bring your egg yolk and oil to room temperature by setting them out for 15 to 20 minutes before you start. Cold ingredients fight emulsification and can cause your mayo to break, so don’t skip this step even though it feels unnecessary.
Step 2: Combine the Base
Add the room-temperature egg yolk, lemon juice, mustard, salt, and pepper to your food processor. Give it a brief pulse to combine everything, but don’t blend yet.
Step 3: Start the Emulsion
With the food processor running, add the oil just a few drops at a time for the first 30 seconds. This slow addition is where the magic happens: the yolk absorbs the oil and transforms into a creamy base.
Rush this step and you’ll end up with broken, separated mayo that looks more like pancake batter.
Step 4: Add Oil in a Steady Stream
Once the mixture becomes thick and pale (after about 1/4 cup of oil), you can increase to a slow, steady stream while the processor runs. The emulsion should thicken noticeably as you pour.
If at any point it looks like it’s breaking or separating, stop and add another egg yolk to rescue it.
Step 5: Pour in the Remaining Oil
Continue streaming the rest of the oil into the processor until all of it is incorporated and the mixture is thick, creamy, and pale yellow. This takes about 2 to 3 minutes total from start to finish.
Step 6: Add the Garlic
Stop the processor and add your minced or pressed garlic cloves. Pulse a few times to distribute the garlic evenly throughout the mayo.
If you add garlic at the beginning, the blade will pulverize it too aggressively and release harsh, bitter compounds; adding it at the end preserves the fresh, bright garlic flavor.
Step 7: Taste and Adjust
Pulse once more and then taste a small spoonful. Add more salt, lemon juice, or garlic depending on your preference.
Remember that flavors mellow slightly as the mayo sits in the fridge, so err on the side of slightly bolder seasoning now.
Step 8: Transfer and Store
Scrape the garlic mayo into a clean glass jar with a lid. Cover tightly and refrigerate until you’re ready to use it.
Homemade mayo keeps for up to three weeks in the fridge, assuming your eggs were fresh and everything was handled cleanly.
Pro Tip: If your mayo breaks or separates while blending, don’t panic: start with a fresh egg yolk in a clean processor bowl, add the broken mayo slowly while the processor runs, and it will re-emulsify perfectly.
Tips for the Best Garlic Mayo
- Use the freshest eggs you can find, and if raw eggs worry you, buy pasteurized eggs from the grocery store. They work just as well and eliminate the risk.
- Room temperature is non-negotiable for both the egg and the oil. Cold ingredients refuse to emulsify smoothly, so plan ahead.
- A food processor is faster and more reliable than a blender, but either works. A whisk and elbow grease will get you there too, though it takes longer.
- Roasted garlic creates a milder, sweeter mayo that works beautifully on sandwiches and roasted vegetables. Swap half your fresh garlic for roasted garlic for a nuanced version.
- Strain your minced garlic through a fine-mesh sieve if you want a smoother texture without visible garlic flecks. Most people skip this, but it’s a restaurant-quality touch.
Common Mistakes to Avoid
- Using cold ingredients: Cold eggs and oil don’t emulsify well, leading to broken mayo that separates within hours. Always bring everything to room temperature first.
- Pouring oil too fast at the start: This is the number one cause of broken mayo. Go slow for the first quarter-cup, then you can speed up.
- Adding garlic too early: Raw garlic blended at high speed becomes harsh and bitter. Save it for the final step when you just pulse it in.
- Using strongly flavored oil: Olive oil, coconut oil, or truffle oil overpowers the delicate emulsion and the garlic. Stick with neutral oils.
- Skipping the lemon juice or vinegar: The acidity stabilizes the mayo and extends its shelf life. Don’t leave it out just because you want pure garlic flavor.
Serving Suggestions
Garlic mayo is a condiment that makes everything better, from humble sandwiches to elegant appetizers. Use it anywhere you’d normally reach for plain mayo, and watch your food taste infinitely more interesting.
- Spread it thick on burgers, sandwiches, and wraps instead of plain mayo.
- Dollop a spoonful on grilled fish, roasted chicken, or steamed vegetables.
- Mix it into tuna salad, egg salad, or potato salad for extra depth.
- Serve it as a dipping sauce alongside crispy fries, roasted potatoes, or vegetable crudites.
- Stir a tablespoon into soups like tomato bisque or butternut squash for richness.
Variations to Try
- Roasted Garlic Mayo: Roast a whole head of garlic in the oven until soft and golden, then squeeze the cloves into your mayo. The flavor becomes sweet, mellow, and almost buttery, perfect for those who find raw garlic too sharp.
- Smoked Paprika Garlic Mayo: Stir in 1/2 teaspoon of smoked paprika after the garlic for a warm, smoky depth that pairs beautifully with grilled meats and vegetables.
- Herb-Infused Garlic Mayo: Fold in 2 tablespoons of fresh chopped herbs (dill, tarragon, parsley, or chives) after blending for a fresher, lighter version that shines on fish and salads.
- Spicy Garlic Mayo: Add a pinch of cayenne pepper or 1/2 teaspoon of hot sauce while blending for a kick that transforms sandwiches and burgers into something memorable.
- Truffle Garlic Mayo: Whisk in a few drops of truffle oil at the very end for an elegant, luxurious condiment that elevates simple roasted vegetables or steak fries.
Dietary Adaptations
- Gluten-free: This recipe is naturally gluten-free. Just verify that your Dijon mustard is certified gluten-free, as some brands add thickeners containing gluten.
- Dairy-free: This recipe contains no dairy, so it’s already dairy-free and suitable for anyone avoiding milk products.
- Vegan: Replace the egg yolk with 2 tablespoons of aquafaba (the liquid from a can of chickpeas) and add 1/4 teaspoon of cornstarch. Blend as instructed; the emulsion works surprisingly well.
- Low-carb and keto: This recipe is naturally low-carb and keto-friendly, with almost all calories coming from fat and virtually no carbohydrates.
Storage and Reheating
Refrigerator
Transfer your garlic mayo to a clean glass jar, seal it tightly, and store it in the coldest part of your fridge. It will keep safely for up to three weeks, though the flavor is brightest in the first two weeks.
- Use a clean spoon every time you scoop to prevent contamination.
- If any discoloration, off-smell, or mold appears, discard it immediately.
- The mayo may separate slightly as it sits; just stir to recombine.
Freezer
Freezing garlic mayo is possible but not ideal, as the emulsion can break when thawed. If you must freeze it, use an ice cube tray and freeze individual portions.
- Thaw cubes in the refrigerator overnight for best results.
- Do not thaw at room temperature, as this encourages bacterial growth.
- Frozen mayo keeps for up to one month.
Reheating
Garlic mayo is a cold condiment and doesn’t require reheating. Simply pull it from the fridge when you need it, and use it straight from the jar.
- If the mayo has solidified slightly, let it sit at room temperature for 10 minutes to soften.
- Never microwave or heat garlic mayo, as high heat will damage the emulsion.
Nutrition Information
| Nutrient | Amount |
|---|---|
| Calories | 95 |
| Total Fat | 10.5g |
| Saturated Fat | 0.8g |
| Carbohydrates | 0.1g |
| Fiber | 0g |
| Sugar | 0g |
| Protein | 0.1g |
| Sodium | 75mg |
| Cholesterol | 27mg |
These values are approximate and based on standard USDA data for the ingredients listed. Actual nutrition will vary slightly depending on the specific brands and oils you use.
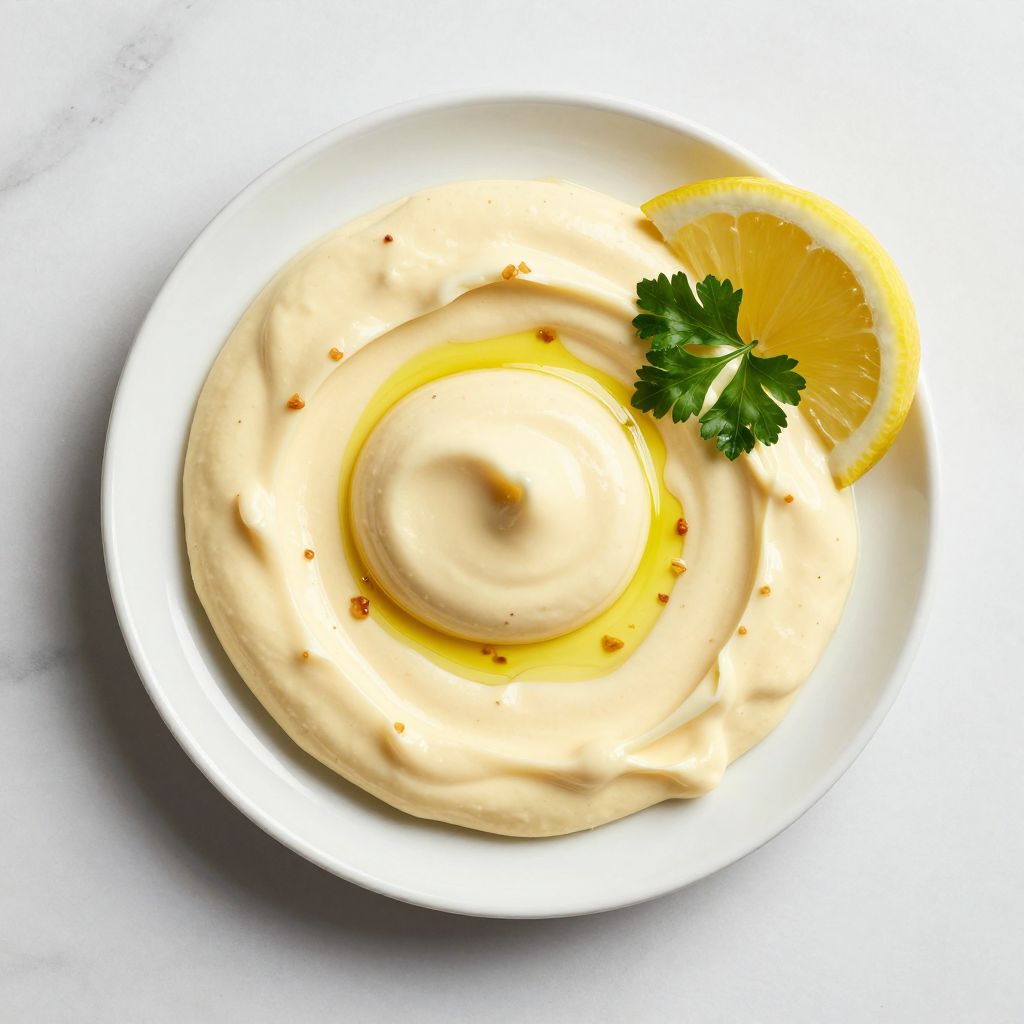
Homemade Garlic Mayo
Ingredients
Equipment
Method
- Bring the egg yolk and oil to room temperature by letting them sit for 15 to 20 minutes before starting.
- In the bowl of a food processor, combine the room-temperature egg yolk, lemon juice, Dijon mustard, salt, and pepper; pulse briefly to mix.
- With the processor running, add the oil drop by drop for the first 30 seconds to start the emulsion.
- Once the mixture becomes thick and pale (after about 1/4 cup of oil), pour the remaining oil in a slow, steady stream while continuing to process for 2 to 3 minutes until fully incorporated.
- Stop the processor and add the minced garlic; pulse 3 to 4 times to distribute evenly.
- Taste the garlic mayo and adjust seasoning by adding more salt, lemon juice, or garlic as needed.
- Scrape the garlic mayo into a clean glass jar, seal with a lid, and refrigerate for at least 30 minutes before serving.
- Store in the refrigerator for up to three weeks, stirring to recombine if any separation occurs.
Notes
If you loved this recipe, explore more homemade condiments and sauces on our site. Try our mayo chicken recipe for a restaurant-quality main dish, or level up your dipping game with our chipotle aioli recipe for something with extra kick and smokiness.