
Picture yourself biting into a warm, fluffy doughnut fresh from the kitchen, grease glistening on your fingertips as the soft crumb melts on your tongue. These easy doughnuts without yeast skip all the waiting and fussing that traditional recipes demand, giving you bakery-quality results in under an hour.
What makes this recipe special is the simplicity and speed: no yeast rising, no overnight proofing, just straightforward mixing and frying that even beginners nail on the first try. You’ll love the tender, cake-like texture and how quickly you can get hot doughnuts on the table for breakfast, dessert, or an afternoon snack.
Why You’ll Love This Recipe
This recipe delivers soft, pillowy doughnuts without any of the complicated timing that yeast-based recipes require. Your kitchen smells incredible within minutes, and you can have these treats ready faster than most drive-thru runs.
- No yeast needed: skip the rising time and temperature monitoring.
- Takes less than 45 minutes from start to finish.
- Tender, cake-like crumb that stays soft for hours.
- Customizable with endless glazes, toppings, and fillings.
- Perfect for busy weeknights or last-minute entertaining.
My Experience Making This Recipe
The first time I made these, I was skeptical that skipping yeast would produce anything worth eating. After one bite of the still-warm doughnut coated in cinnamon sugar, I was completely won over by how tender and fluffy they turned out.
My kids devoured half a dozen before they cooled, and I loved that the whole process took less time than a typical grocery run. Since then, this recipe has become my go-to when I need a quick homemade treat that tastes way better than anything store-bought.
The best part? Even my non-baker friends have made these successfully, which tells you everything about how forgiving and reliable this recipe truly is.
Recipe Overview
- Recipe Name: Easy Doughnuts Without Yeast
- Servings: 12 doughnuts
- Prep Time: 15 minutes
- Cook Time: 20 minutes
- Total Time: 35 minutes
- Course: Breakfast or Dessert
- Cuisine: American
- Calories per Serving: 210
Equipment You Will Need
- Two mixing bowls
- Whisk
- Measuring cups and spoons
- Doughnut cutter (or a 3-inch round cutter and a 1-inch round cutter)
- Deep skillet or Dutch oven
- Candy thermometer
- Slotted spoon or tongs
- Paper towels
- Shallow bowls for glazes and toppings
Ingredients for Easy Doughnuts Without Yeast
- All-purpose flour, 2 cups
- Granulated sugar, 1/2 cup
- Baking powder, 2 teaspoons
- Salt, 1/4 teaspoon
- Ground nutmeg, 1/4 teaspoon
- Whole milk, 3/4 cup
- Egg, 1 large
- Vanilla extract, 1 teaspoon
- Vegetable oil, 2 quarts for frying, plus 2 tablespoons for the dough
For the Glaze
- Powdered sugar, 2 cups
- Milk, 3 tablespoons
- Vanilla extract, 1/2 teaspoon
- Butter, 2 tablespoons, melted
Ingredient Notes and Substitutions
- All-purpose flour: Provides structure and helps the doughnuts rise evenly without yeast. Substitute with cake flour for an even more tender crumb, though you may need to add one extra tablespoon of flour since cake flour is lower in protein.
- Baking powder: Creates lift and airiness in the dough, replacing the role yeast would normally play. Use aluminum-free baking powder if you prefer to avoid any metallic aftertaste.
- Whole milk: Creates a tender, moist dough with a slightly richer flavor than water. Buttermilk works beautifully too and adds subtle tang that deepens the flavor profile.
- Vegetable oil: Neutral-flavored oil with a high smoke point works best for frying. Peanut oil or canola oil are equally good choices and won’t impart unwanted flavors.
- Nutmeg: Adds warm spice depth that makes these doughnuts taste homemade and special. Leave it out if you prefer a more neutral vanilla doughnut, or swap it for 1/4 teaspoon cinnamon.
How to Make Easy Doughnuts Without Yeast
Step 1: Combine Your Dry Ingredients
Whisk together the flour, baking powder, salt, and nutmeg in a large bowl until well blended. Taking 30 seconds to mix these thoroughly ensures even distribution of the leavening agent, which means every doughnut rises and cooks uniformly.
Step 2: Mix Your Wet Ingredients
In a separate bowl, whisk the milk, egg, vanilla extract, and 2 tablespoons of oil until completely smooth. Whisking this mixture well helps the egg incorporate fully, which creates a more tender crumb in the finished doughnut.
Step 3: Combine Wet and Dry
Pour the wet ingredients into the dry ingredients and stir gently with a whisk until just combined. Do not overmix, as overworking the dough toughens the gluten and produces dense, chewy doughnuts instead of light, fluffy ones.
Step 4: Chill the Dough
Cover the bowl with plastic wrap and refrigerate for 15 minutes while you heat your oil. Chilling makes the dough easier to handle and cut, and it prevents the doughnuts from spreading or absorbing too much oil during frying.
Step 5: Heat Your Oil to the Right Temperature
Pour 2 quarts of oil into your deep skillet or Dutch oven and heat it to 350 degrees Fahrenheit, using a candy thermometer to monitor. Maintaining the correct temperature is crucial: too hot and the outside burns while the inside stays raw, too cool and the doughnuts absorb grease and become heavy.
Step 6: Cut Your Doughnuts
Lightly flour your work surface and transfer the chilled dough to it, patting it to about 1/2 inch thick. Use your doughnut cutter to cut out rings, working quickly so the dough doesn’t warm up too much, and place both the rings and holes on a piece of parchment paper.
Step 7: Fry the Doughnuts
Carefully slide 3 to 4 doughnut rings into the hot oil and fry for 1 to 1.5 minutes per side until golden brown. Use a slotted spoon to flip them gently, and avoid overcrowding the pan, which drops the oil temperature and results in greasy doughnuts.
Step 8: Drain and Cool
Transfer the fried doughnuts to a paper towel-lined plate to drain excess oil and cool slightly for 2 to 3 minutes. Repeat with the remaining dough and the doughnut holes, which fry for about 45 seconds per side.
Step 9: Make Your Glaze
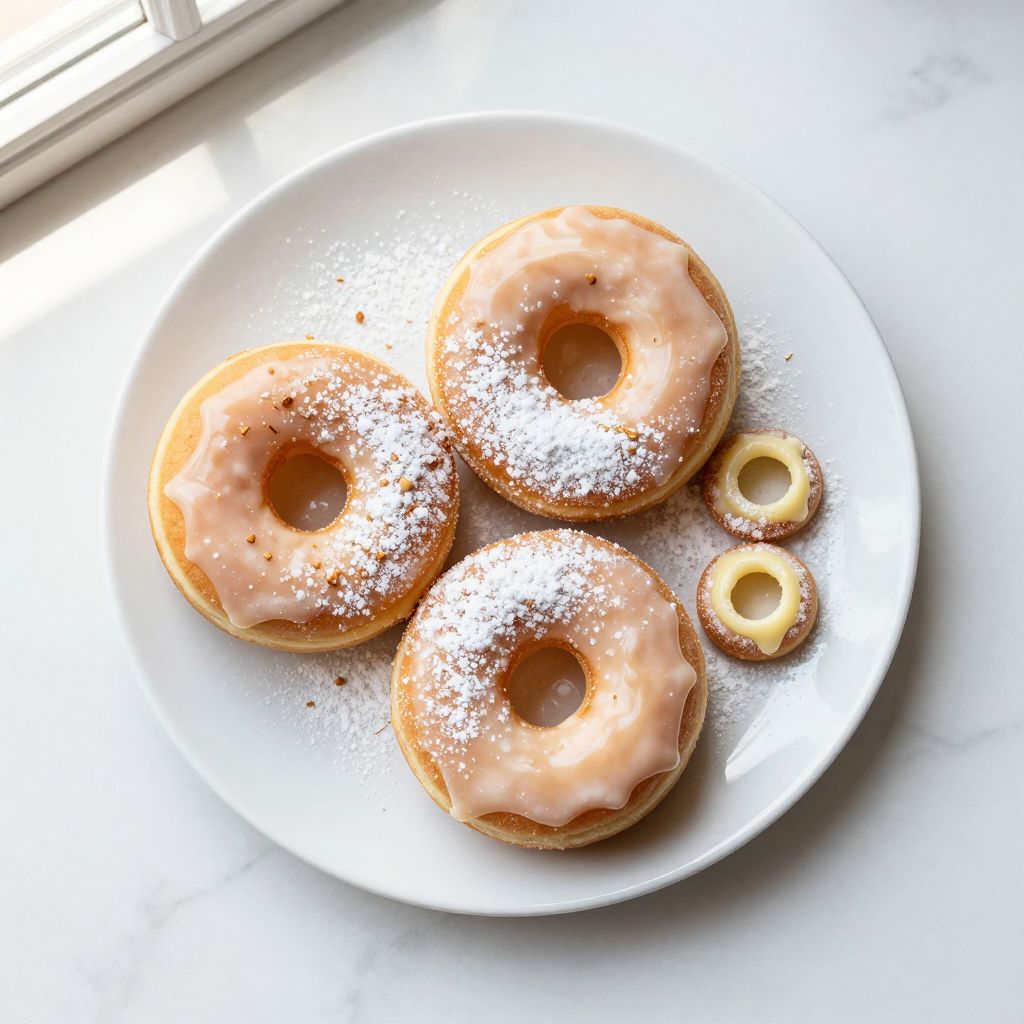
Whisk together the powdered sugar, milk, vanilla, and melted butter until smooth and pourable. If the glaze is too thick, add milk one teaspoon at a time until you reach the right consistency.
Step 10: Glaze Your Doughnuts
While the doughnuts are still warm, dip the top of each one into the glaze, twisting slightly so it coats evenly. Place them on a wire rack set over a baking sheet to allow any excess glaze to drip off.
Pro Tip: Keep your oil temperature consistent by checking it with a thermometer between batches; if it drops below 340 degrees, wait a minute or two before frying the next batch.
Tips for the Best Easy Doughnuts Without Yeast
- Use a candy thermometer to monitor oil temperature precisely; even 10 degrees makes a noticeable difference in how the doughnuts cook.
- Chill the dough as directed, which prevents it from becoming too sticky and warm to cut properly.
- Don’t skip the nutmeg; it adds a subtle warmth that makes these taste bakery-quality without being obvious.
- Fry the doughnut holes alongside the rings to use every bit of dough and give everyone a bonus treat.
- Glaze the doughnuts while they’re still slightly warm so the glaze flows smoothly and adheres well.
- If you want cinnamon sugar doughnuts instead, skip the glaze and toss them in a mixture of granulated sugar and ground cinnamon while still warm.
Common Mistakes to Avoid
- Overmixing the dough: Stirring too vigorously develops the gluten, which results in tough, dense doughnuts instead of tender, fluffy ones.
- Oil that is too cool: If your oil temperature drops below 340 degrees, the doughnuts absorb excess oil and taste greasy.
- Frying too many at once: Crowding the pan drops the oil temperature and prevents even cooking and browning.
- Not draining properly: Leaving the doughnuts on a wet surface instead of paper towels traps steam and makes them soggy.
- Skipping the chill time: Warm dough is harder to cut and produces doughnuts that spread during frying rather than hold their shape.
Serving Suggestions
Serve these warm doughnuts fresh from the oil with your favorite beverages or alongside breakfast classics for a memorable morning treat. They’re equally delicious as an afternoon pick-me-up or a simple dessert after dinner.
- With a tall glass of cold milk or hot coffee for the perfect pairing.
- Alongside fresh fruit like berries or sliced peaches for balance.
- With a spread of jam or Nutella for dunking.
- As part of a breakfast spread with eggs and bacon.
- Dusted with powdered sugar for an elegant presentation at gatherings.
Variations to Try
- Chocolate glaze: Whisk 1/4 cup cocoa powder into your powdered sugar glaze and reduce the milk to 2 tablespoons for a rich chocolate coating that complements the tender crumb beautifully.
- Filled doughnuts: Use a small paring knife to create a pocket in the side of each warm doughnut and pipe in your favorite filling like jam, pastry cream, or chocolate ganache.
- Maple glazed: Replace the vanilla with 1/2 teaspoon maple extract and add a pinch of cinnamon to the glaze for a cozy fall twist.
- Old-fashioned style: Skip the glaze entirely and toss the warm doughnuts in a mixture of cinnamon and granulated sugar for a classic cake doughnut experience.
- Sprinkled toppings: While the glaze is still wet, immediately sprinkle your favorite toppings like rainbow sprinkles, crushed candies, chopped nuts, or shredded coconut.
Dietary Adaptations
- Gluten-free: Swap the all-purpose flour for a one-to-one gluten-free baking flour blend; the texture will be slightly less tender but still enjoyable and fully gluten-free.
- Dairy-free: Use unsweetened almond or oat milk in place of whole milk, and swap the butter for dairy-free butter in the glaze.
- Vegan: Replace the egg with 3 tablespoons of aquafaba or a flax egg, use plant-based milk, and substitute dairy-free butter in the glaze.
- Lower sugar: Reduce the sugar in the dough to 1/4 cup and use monk fruit or erythritol in the glaze instead of all powdered sugar to cut sweetness significantly.
Storage and Reheating
Refrigerator
Store cooled doughnuts in an airtight container or covered cake box for up to 3 days. They stay fresh and moist thanks to their cake-like structure and the oils absorbed during frying.
- Stack them on parchment paper to prevent sticking.
- Do not refrigerate in a plastic bag, which traps moisture and makes them soggy.
Freezer
Freeze cooled, unglazed doughnuts in a freezer bag or airtight container for up to 2 months. Glazing them before freezing can make the glaze crack during thawing, so save that step for after reheating.
- Separate layers with parchment paper to prevent sticking.
- Label with the date so you remember when you made them.
Reheating
Thaw frozen doughnuts at room temperature for 30 minutes, then warm them in a 300-degree oven for 5 to 8 minutes until softened. Microwaving for 20 to 30 seconds works in a pinch, though the texture won’t be quite as tender.
- Add glaze after reheating for the best appearance and taste.
- Doughnuts taste best eaten fresh or within the first day.
Nutrition Information
| Nutrient | Amount |
|---|---|
| Calories | 210 |
| Total Fat | 12g |
| Saturated Fat | 2g |
| Carbohydrates | 24g |
| Fiber | 0g |
| Sugar | 16g |
| Protein | 2g |
| Sodium | 150mg |
| Cholesterol | 15mg |
These values are approximate and based on a standard serving of one glazed doughnut using the ingredients listed above. Actual nutrition varies depending on the specific brands and types of ingredients you use.
Frequently Asked Questions
Can I make these doughnuts ahead of time?
Yes, you can prepare the dough the evening before, refrigerate it overnight, and fry them fresh the next morning. The flavor actually deepens slightly after a few hours, making them even better than freshly mixed dough.
Why are my doughnuts greasy?
Your oil temperature is likely too low, causing them to absorb excess grease. Maintain 350 degrees using a thermometer, and allow the oil to reach temperature again between batches.
Can I bake these instead of frying?
Baking them produces a different texture that’s more cake-like than fried doughnuts. If you try baking at 350 degrees for 8 to 10 minutes, expect a denser, less indulgent result, though they’ll still taste good.
What’s the difference between a doughnut and a donut?
Both spellings refer to the same treat, though “doughnut” is more traditional and “donut” is increasingly common in modern usage. Use whichever spelling you prefer in your kitchen.
Can I double this recipe?
Absolutely, just multiply all ingredients by two and prepare them in batches. You’ll need more oil to maintain the correct temperature throughout frying, so use at least 3 quarts instead of 2.
How do I prevent the holes from falling into the oil while frying?
Use a slotted spoon or spider strainer to gently transfer them to the oil rather than dropping them in, which keeps them intact. If a few break apart, don’t worry; they still taste delicious.
Final Thoughts
These easy doughnuts without yeast prove that you don’t need fancy techniques or hours of planning to create bakery-quality treats at home. The simplicity of this recipe is its greatest strength, delivering tender, delicious doughnuts in less than an hour with ingredients you likely already have on hand.
Make a batch this weekend and watch how quickly they disappear from the kitchen. Your friends and family will be amazed that you made them from scratch, and you’ll love knowing exactly what goes into every bite.
Ready to explore more quick and delicious recipes for your breakfast or dessert table? Check out this easy pancake recipe with just 3 ingredients for another speedy morning favorite, or try an easy icing recipe to frost your next batch of baked goods with homemade goodness.
Easy Doughnuts Without Yeast
Ingredients
Equipment
Method
- Whisk together 2 cups all-purpose flour, 2 teaspoons baking powder, 1/4 teaspoon salt, and 1/4 teaspoon ground nutmeg in a large bowl until evenly combined.
- In another bowl, whisk 3/4 cup whole milk, 1 large egg, 1 teaspoon vanilla extract, and 2 tablespoons vegetable oil until smooth.
- Pour the wet ingredients into the dry ingredients and stir gently with a whisk until just combined, taking care not to overmix.
- Cover the bowl with plastic wrap and refrigerate the dough for 15 minutes to chill and firm up.
- Heat 2 quarts of vegetable oil in a deep skillet or Dutch oven to 350°F, monitoring with a candy thermometer.
- Lightly flour a work surface and roll or pat the chilled dough to 1/2-inch thickness, then cut out doughnut rings and holes with a doughnut cutter.
- Carefully fry 3 to 4 doughnut rings at a time in the hot oil for 1 to 1½ minutes per side, until golden brown; fry holes for about 45 seconds per side.
- Use a slotted spoon to transfer fried doughnuts and holes to a paper towel-lined plate to drain excess oil and cool for 2 to 3 minutes.
- While doughnuts cool slightly, whisk together 2 cups powdered sugar, 3 tablespoons milk, 1/2 teaspoon vanilla extract, and 2 tablespoons melted butter until smooth.
- Dip the tops of slightly warm doughnuts into the glaze, twisting to coat evenly, then place on a wire rack over a baking sheet to let excess drip off.