
There’s something magical about the sound of a chicken breast sizzling in a hot pan, especially when you’ve butterflied it just right and it cooks through in minutes instead of forever.
Split chicken breast is one of those techniques that feels fancy but is genuinely simple, and it transforms an ordinary weeknight dinner into something that tastes like you’ve been cooking all day.
This method cuts your cooking time in half, lets the meat cook evenly, and creates more surface area for browning and flavor.
Whether you’re feeding a hungry family or prepping meals for the week ahead, split chicken breast delivers tender, juicy results every single time.
Why You’ll Love This Recipe
Split chicken breasts are a game-changer for anyone who wants restaurant-quality chicken without the fuss or the wait.
- Cuts cooking time dramatically, getting dinner on the table in 20 minutes or less.
- Creates perfectly even thickness, so the chicken cooks uniformly without dry edges and raw centers.
- Produces more surface area for browning, which means deeper flavor and better texture.
- Works beautifully with any sauce, marinade, or seasoning you love.
- Freezes and reheats perfectly, making meal prep a breeze.
My Experience Making This Recipe
The first time I split a chicken breast, I was honestly a little nervous about handling the knife correctly and worried I’d mess it up.
After the first try, I realized how quick and satisfying the technique actually is, and now I can’t imagine cooking chicken any other way.
My family noticed the difference immediately: the chicken was more tender, cooked faster, and browned so much better than thick breasts ever did.
Recipe Overview
- Recipe Name: Split Chicken Breast
- Servings: 4
- Prep Time: 10 minutes
- Cook Time: 12 minutes
- Total Time: 22 minutes
- Course: Main Course
- Cuisine: American
- Calories per Serving: 280
Equipment You Will Need
- Sharp chef’s knife (8-inch blade recommended)
- Cutting board
- Paper towels
- Large skillet or saute pan
- Meat thermometer (optional but helpful)
- Tongs or spatula
- Plate for finished chicken
Ingredients for Split Chicken Breast
- 4 boneless, skinless chicken breasts (about 6 to 8 ounces each)
- 2 tablespoons olive oil
- 1 teaspoon kosher salt
- 1/2 teaspoon black pepper
- 1/2 teaspoon garlic powder
- 1/4 teaspoon paprika (optional, for color and mild flavor)
Ingredient Notes and Substitutions
- Chicken Breasts: Fresh boneless, skinless breasts cook faster and more evenly than bone-in or skin-on varieties. If you only have frozen breasts, thaw them completely before splitting to ensure safe, even cooking.
- Olive Oil: Olive oil has a high smoke point and adds subtle flavor, but you can swap in avocado oil, vegetable oil, or butter if you prefer.
- Kosher Salt: Kosher salt has larger crystals and dissolves more slowly than table salt, giving you better control over seasoning. Table salt works in a pinch, but use about three-quarters of the amount.
- Paprika: Paprika is purely optional and won’t change the dish’s core flavor, but it adds mild sweetness and a prettier color if you like that touch.
How to Make Split Chicken Breast
Step 1: Prep Your Work Surface
Place a cutting board on a stable, clean surface and lay out a few paper towels nearby for cleanup. Having everything ready before you start makes the process smooth and safe.
Step 2: Pat the Chicken Dry
Remove your chicken breasts from the package and pat them completely dry with paper towels. Dry chicken browns better in the pan and prevents splattering when the oil gets hot.
Step 3: Position the Chicken for Splitting
Place one chicken breast on the cutting board with the thicker side facing you, and lay your non-knife hand flat on top of the breast to stabilize it. This grip keeps the meat from sliding around and gives you better control.
Step 4: Hold the Knife Correctly
Hold your chef’s knife parallel to the cutting board with your fingers curled back on the hand holding the chicken, so your knuckles guide the blade. This hand position protects your fingertips and lets you split evenly.
Step 5: Split the Breast Horizontally
Starting from the thinnest edge, carefully slice horizontally through the thickest part of the breast, moving the knife toward you and keeping the blade parallel to the board. Stop about three-quarters of the way through so the two halves stay attached at the thinnest edge, creating a butterfly.
If you accidentally cut all the way through, that’s completely fine; you’ll just have two separate pieces to cook, and they’ll still turn out great.
Step 6: Open and Flatten the Breast
Gently open the split breast like a book so it lies flat on the cutting board with both halves connected at the center. Now you’ll see the chicken is roughly double its original width but half as thick.
Step 7: Season Both Sides
Sprinkle the kosher salt, black pepper, garlic powder, and paprika evenly on both sides of all four split breasts. Seasoning both sides ensures flavor throughout the meat, and the salt draws out moisture that helps with browning.
Step 8: Heat Your Skillet
Place a large skillet over medium-high heat and add the olive oil, letting it warm for about 1 minute until it shimmers and moves easily around the pan. A hot pan creates a golden crust through the Maillard reaction, which is where the real flavor comes from.
Step 9: Cook the Chicken
Carefully place each split chicken breast into the hot skillet in a single layer without overcrowding. If they don’t fit comfortably, work in batches to avoid steam instead of browning.
Cook for 5 to 6 minutes on the first side without moving them, so they develop that beautiful golden crust. Flip once and cook the other side for another 5 to 6 minutes until the internal temperature reaches 165 degrees Fahrenheit at the thickest part.
Step 10: Rest Before Serving
Transfer the cooked chicken to a clean plate and let it rest for 2 to 3 minutes before eating or slicing. Resting allows the juices to redistribute throughout the meat, keeping it moist and tender.
Pro Tip: Use a meat thermometer to check doneness at the thickest part of the breast; it removes all guesswork and guarantees perfectly cooked chicken every time.
Tips for the Best Split Chicken Breast
- Let your chicken sit at room temperature for about 10 minutes before cooking so it cooks more evenly and quickly throughout.
- Don’t skip the drying step; moisture on the surface blocks browning and steam-cooks the meat instead of searing it.
- Keep your knife sharp; a dull blade slips and slides instead of cutting cleanly, making the process harder and less safe.
- Resist the urge to fidget with the chicken while it cooks; let it sit undisturbed for those crucial first few minutes to build color and crust.
- If you’re cooking four breasts, make sure your skillet is large enough that they don’t overlap; crowding the pan drops the temperature and creates steam.
- Add a splash of broth, wine, or lemon juice to the pan after cooking if you want to make a quick pan sauce to drizzle over the finished chicken.
Common Mistakes to Avoid
- Cutting all the way through during splitting: You want the two halves connected at one edge so they stay together and cook evenly. If this happens, just treat them as two separate pieces.
- Cooking from a cold start: Cold chicken takes longer to cook and won’t brown as well, so always let it sit out for a few minutes first.
- Using wet chicken: Moisture on the surface prevents browning and creates steam instead of a golden crust, so pat your breasts dry before seasoning.
- Overcrowding the skillet: Too much chicken in the pan drops the temperature and steams the meat instead of searing it; work in batches if needed.
- Cooking at too low a temperature: You want a hot skillet to brown the outside while the inside stays tender, so don’t be shy about the heat.
Serving Suggestions
Split chicken breast is endlessly versatile and pairs beautifully with almost any side dish you can imagine.
- Serve over rice or couscous with a squeeze of fresh lemon juice and a handful of fresh herbs.
- Pair with roasted vegetables like broccoli, carrots, or Brussels sprouts tossed in olive oil and garlic.
- Make a grain bowl with quinoa, cherry tomatoes, cucumber, and a creamy tahini dressing.
- Slice and add to salads, wraps, or sandwiches for quick lunch or dinner prep.
- Top with your favorite sauce: marinara, pesto, teriyaki, or a simple butter and herb combination.
Variations to Try
- Italian Style: Season with Italian herbs, cook in butter, and finish with a drizzle of balsamic vinegar and fresh basil for a bright, savory twist.
- Asian Inspired: Marinate in soy sauce, ginger, and garlic before cooking, then serve with sesame oil and scallions for deep umami flavor.
- Mediterranean: Rub with oregano, lemon zest, and olives, then cook and serve with a tomato and feta topping for a fresh, tangy dish.
- Spicy Cajun: Season generously with cayenne, paprika, garlic powder, and black pepper, then cook hot and fast for a bold, fiery finish.
- Creamy Mushroom: Cook the chicken, then make a quick pan sauce with mushrooms, garlic, and heavy cream for an elegant, comforting meal.
Dietary Adaptations
- Gluten-Free: This recipe is naturally gluten-free as written; just verify any sauces or marinades you add don’t contain hidden gluten.
- Dairy-Free: The base recipe contains no dairy, so it works perfectly for dairy-free diets; skip any butter or cream-based sauces.
- Vegan/Vegetarian: Substitute chicken with thick slices of cauliflower, tofu, or seitan; coat and cook the same way using the same seasonings.
- Low-Carb/Keto: Split chicken breast is naturally low-carb and keto-friendly; serve with non-starchy vegetables or a rich cream sauce for added fat.
Storage and Reheating
Refrigerator
Place cooked split chicken in an airtight container and refrigerate for up to 4 days. The chicken stays moist and safe for several days if stored properly.
- Cool the chicken to room temperature before storing to prevent condensation.
- Keep it in the coldest part of your fridge, away from the door where temperature fluctuates.
Freezer
Wrap individual split breasts in plastic wrap or parchment paper, then place them in a freezer bag to prevent freezer burn. Frozen chicken keeps for up to 3 months.
- Label the bag with the date so you know when you froze it.
- Thaw in the refrigerator overnight before reheating for best texture.
Reheating
Reheat gently to preserve moisture and tenderness. The oven works best for reheating without drying out the meat.
- Heat to 350 degrees Fahrenheit for 8 to 10 minutes, covered with foil, until warmed through.
- Alternatively, slice and reheat briefly in a skillet over low heat with a splash of broth or sauce.
- Microwave is fastest but can dry the chicken; cover it and reheat for 1 to 2 minutes only.
Nutrition Information
| Nutrient | Amount |
|---|---|
| Calories | 280 |
| Total Fat | 11g |
| Saturated Fat | 2g |
| Carbohydrates | 0g |
| Fiber | 0g |
| Sugar | 0g |
| Protein | 38g |
| Sodium | 460mg |
| Cholesterol | 95mg |
These values are approximate and based on standard ingredient amounts. Nutrition can vary based on your specific ingredients and cooking method.
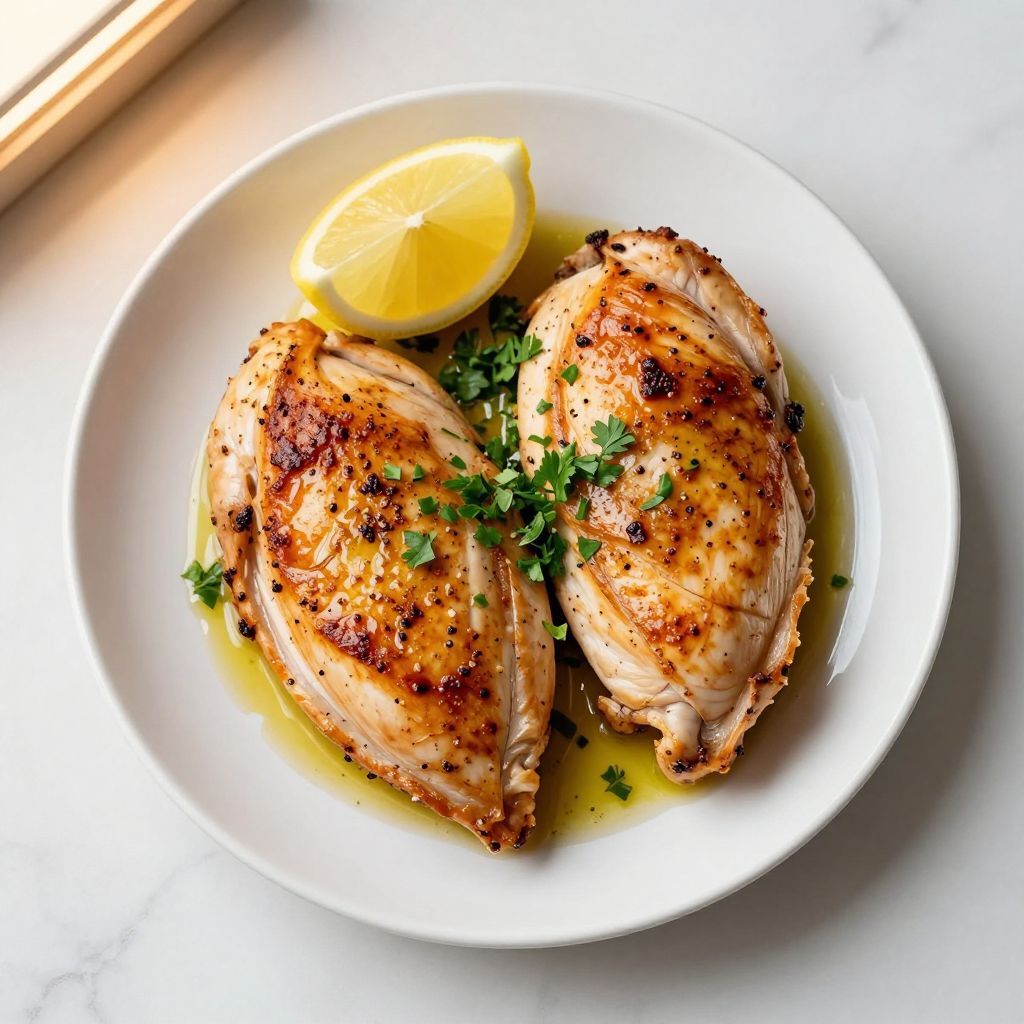
Split Chicken Breast
Ingredients
Equipment
Method
- Pat the chicken breasts dry with paper towels to remove excess moisture.
- Place a chicken breast on a cutting board and hold steady with your non-knife hand.
- Using a sharp chef's knife, slice horizontally through the thickest part of the breast, stopping about three-quarters of the way to create a butterfly.
- Open the breast like a book so it lies flat and repeat with remaining breasts.
- Season both sides of all split breasts evenly with kosher salt, black pepper, garlic powder, and paprika.
- Heat a large skillet over medium-high heat and add the olive oil, heating until it shimmers, about 1 minute.
- Add the split chicken breasts in a single layer and cook undisturbed for 5 to 6 minutes until golden brown.
- Flip the breasts and cook for another 5 to 6 minutes until the internal temperature reaches 165°F (74°C).
- Transfer the chicken to a plate and let it rest for 2 to 3 minutes before slicing or serving.
Notes
Frequently Asked Questions
Can I split chicken breast ahead of time?
Yes, you can split breasts up to 4 hours ahead and store them covered in the refrigerator. Pat them dry right before cooking to ensure proper browning.
What’s the difference between split and pounded chicken?
Splitting cuts the breast horizontally while keeping it intact, whereas pounding flattens it by striking it with a mallet. Splitting is faster and keeps the meat more tender and juicy.
Can I marinate split chicken breast?
Absolutely, and marinating for 30 minutes to 2 hours adds wonderful flavor and keeps the meat moist. Just pat the chicken dry before cooking to get a good sear.
How do I know when split chicken is cooked through?
The safest way is to use a meat thermometer; the internal temperature should reach 165 degrees Fahrenheit at the thickest part. If you don’t have a thermometer, cut the thickest part open; the meat should be white throughout with no pink.
Can I cook split chicken breast in the oven?
Yes, preheat to 400 degrees Fahrenheit, sear the chicken in a hot skillet for 2 to 3 minutes per side, then transfer to the oven for 5 to 8 minutes until cooked through. This method gives you a golden crust with even cooking inside.
Final Thoughts
Split chicken breast is one of those simple skills that transforms how you cook weeknight dinners, and once you learn the technique, you’ll use it over and over.
The combination of speed, tenderness, and flavor makes this method hard to beat, so grab four chicken breasts and give it a try tonight.
If you enjoyed this recipe, explore more protein cooking techniques on our site. Check out our sous-vide chicken breast recipe for another approach to perfectly tender poultry, or try our chicken cutlet recipe for a crispy, breaded variation that’s equally delicious.