
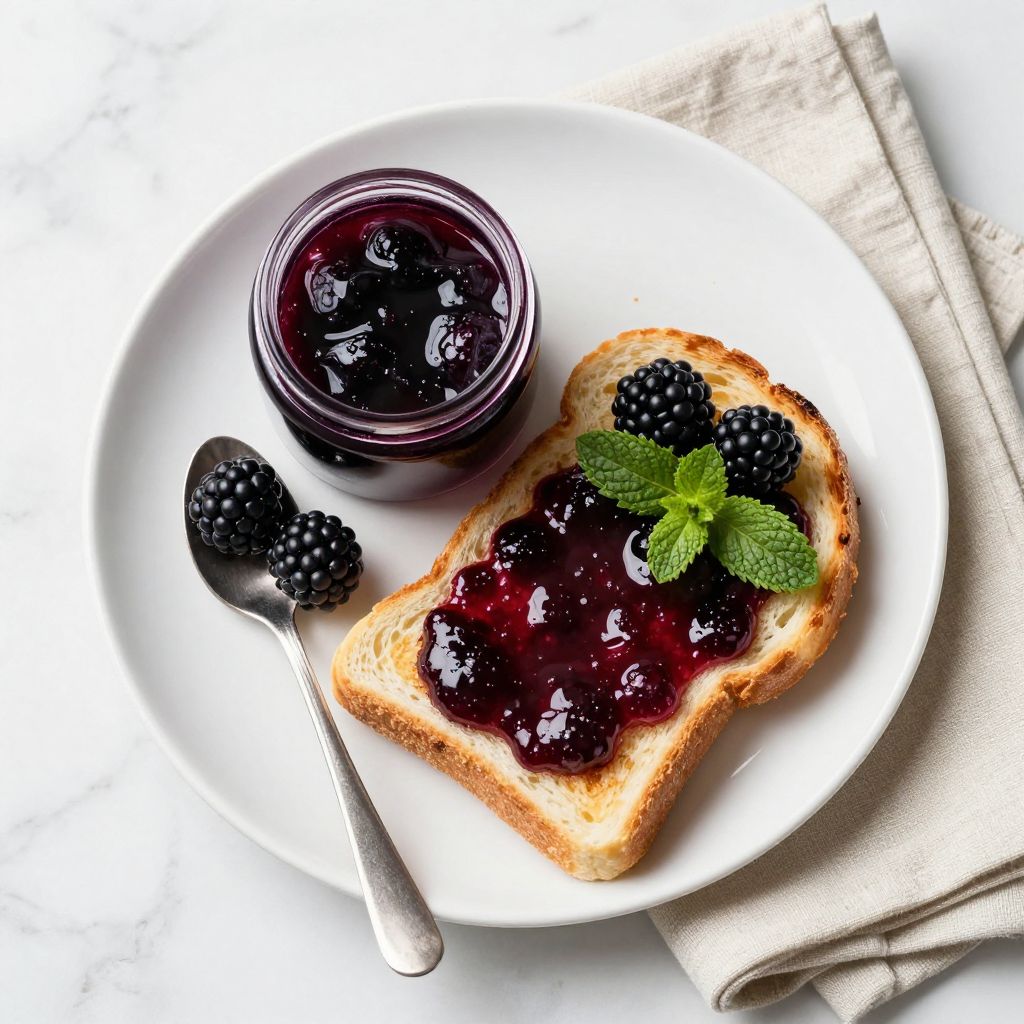
There’s something magical about the moment when dark purple juice transforms into glossy, jewel-toned jelly on a warm summer morning. Blackberry jelly is one of those recipes that feels like you’re bottling sunshine and berry-sweet memories into glass jars.
This recipe shines because it’s surprisingly forgiving and yields results that taste restaurant-quality despite minimal fuss. You’ll end up with a silky spread that tastes nothing like the overly sweet store-bought versions.
What makes this special is the balance of natural blackberry tartness against just enough sugar to set perfectly, plus that satisfying moment when the jelly wrinkles on a cold plate and you know it’s ready. Let’s dive into how to make your own.
Why You’ll Love This Recipe
This blackberry jelly captures everything you want in a homemade preserve: deep flavor, a beautiful texture, and the pride of knowing exactly what went into every jar.
- Simple ingredient list with just blackberries, sugar, and lemon juice
- Takes roughly 45 minutes from start to finish, including cooling
- No pectin required, so you rely on the natural setting power of the fruit
- Makes about four to five jars, perfect for gifts or your own pantry
- Works beautifully on toast, in yogurt, or swirled into baked goods
My Experience Making This Recipe
The first time I made blackberry jelly, I was convinced I’d ruin it because I’d heard so many horror stories about jams not setting. I followed this recipe exactly and was thrilled when my cold plate test worked on the first try.
What struck me was how the kitchen filled with this incredible sweet-tart aroma, and my partner kept sneaking spoons to taste the warm jelly straight from the pot. The finished product was glossy and deep purple, nothing like the cloudy jams I’d attempted before.
I’ve since made this at least a dozen times, and it’s become my go-to recipe for using up an abundance of berries from the farmers market. It’s the kind of recipe that builds confidence in the kitchen because you see immediate, delicious results.
Recipe Overview
- Recipe Name: Blackberry Jelly
- Servings: Makes 4 to 5 jars (approximately 20 servings)
- Prep Time: 10 minutes
- Cook Time: 30 minutes
- Total Time: 45 minutes (plus cooling)
- Course: Preserve / Condiment
- Cuisine: American
- Calories per Serving: 45 calories
Equipment You Will Need
- Large stainless steel pot
- Fine-mesh strainer or cheesecloth
- Candy or instant-read thermometer
- Wooden spoon for stirring
- Glass jars with lids (pint or half-pint size)
- Jar lifter or tongs
- Canning pot or large pot for water bath (optional, for shelf-stable storage)
- Small plate for the cold plate test
Ingredients for Blackberry Jelly
- Fresh blackberries: 3 pounds (about 7 to 8 cups)
- Granulated sugar: 2.5 pounds (about 5 cups)
- Fresh lemon juice: 2 tablespoons
- Water: 1/4 cup (optional, if berries are very dry)
Ingredient Notes and Substitutions
- Fresh blackberries: Fresh fruit provides natural pectin and bright flavor that frozen berries cannot match; if using frozen, thaw them first and expect a slightly softer set.
- Granulated sugar: Sugar acts as a preservative and helps achieve the proper gel texture through pectin activation; you can substitute with honey or maple syrup, though this changes both flavor and set.
- Lemon juice: Acid helps activate the jelly’s natural pectin and balances the berry sweetness; if you prefer less tang, use 1 tablespoon instead of 2.
- Water: Water thins very thick berries so they cook evenly; you can substitute with a splash of apple juice for subtle flavor depth.
How to Make Blackberry Jelly
Step 1: Prepare and Sort Your Blackberries
Rinse your blackberries gently under cool water and discard any soft or moldy fruit. Removing damaged berries prevents off-flavors from developing during the long cook time.
Step 2: Extract the Juice
Place the blackberries in your large pot and crush them gently with a wooden spoon to release their juices. You want to break them down enough to release liquid, but you don’t need to pulverize them completely.
Step 3: Cook the Berries
Set the pot over medium-high heat and bring the crushed berries to a gentle boil, stirring occasionally. Allow them to bubble for about 10 minutes, which softens the fruit fully and helps extract maximum juice.
Step 4: Strain for Clear Jelly
Pour the cooked berries through your fine-mesh strainer lined with cheesecloth, letting the liquid drip slowly into a clean bowl. Resist the urge to squeeze the fruit; a gentle drip yields crystal-clear jelly, while pressing creates cloudiness.
Step 5: Combine Juice and Sugar
Pour the strained juice back into your pot and add the sugar and lemon juice, stirring until the sugar dissolves completely. The sugar won’t fully dissolve until the mixture heats, so don’t worry if it looks granular.
Step 6: Reach the Proper Temperature
Increase the heat to high and bring the mixture to a rolling boil, stirring frequently to prevent scorching on the bottom. Insert your candy thermometer and monitor the temperature carefully; you’re aiming for 220 degrees Fahrenheit, which is the gel point for jelly.
Step 7: Perform the Cold Plate Test
When the mixture reaches approximately 220 degrees, drop a small spoonful onto your cold plate and let it sit for a few seconds. Push it gently with your finger; if it wrinkles and holds its shape, it’s ready to jar; if it runs, cook for another minute and test again.
Step 8: Jar and Cool
Ladle the hot jelly into clean, warm glass jars, leaving about 1/4 inch of headspace at the top. Allow the jars to cool to room temperature, then cover and refrigerate, or process them in a water bath for shelf-stable storage.
Pro Tip: The cold plate test is your most reliable indicator of doneness; an instant-read thermometer helps, but every stove cooks differently, so trust what you see on the plate.
Tips for the Best Blackberry Jelly
- Choose blackberries at peak ripeness with deep color for maximum natural pectin and flavor intensity. Berries picked too early lack both, resulting in poor set and less vibrant taste.
- Use a heavy-bottomed stainless steel pot, which distributes heat evenly and prevents hot spots that can scorch your jelly. Avoid aluminum, which reacts with the fruit’s acidity.
- Don’t skip the straining step if you want true jelly rather than jam; this makes the difference between a glossy, elegant spread and something thick with pulp.
- Keep your jars warm before filling; if you pour hot jelly into cold glass, the temperature shock can crack them or prevent a proper seal.
- Write the date on your jar lids; homemade jelly lasts up to a year in the pantry and several years in the freezer.
- Let sealed jars sit undisturbed for at least 12 hours before moving them; this allows the jelly to set fully without disruption.
Common Mistakes to Avoid
- Overcooking past 220 degrees: This hardens the jelly and can create a rubbery texture that tastes almost bitter; stop cooking the moment your cold plate test shows wrinkles.
- Squeezing the fruit during straining: This pushes pulp and sediment into your liquid, clouding the final jelly; patience yields a prettier product.
- Using overripe or underripe berries: Underripe fruit lacks natural pectin and won’t set; overripe berries yield less juice and weaker flavor, making a runny result.
- Skipping the lemon juice: Acid activates pectin, so without it, your jelly may remain syrupy no matter how long you cook it.
- Filling jars when they’re cold: Cold glass can crack under heat, and cold containers cool the jelly too quickly, preventing a proper seal.
Serving Suggestions
This blackberry jelly is stunning on buttered toast or swirled into morning yogurt, but it shines in countless other ways too. It’s equally at home spooned over ice cream, dotted on a cheese board, or stirred into cocktails for a burst of fruit flavor.
- Spread thickly on warm biscuits with a dollop of clotted cream
- Layer into thumbprint cookies for elegant homemade gifts
- Swirl into cheesecake batter before baking for marbled beauty
- Brush onto roasted duck or pork for a sweet-tart glaze
- Stir into sparkling wine for a refreshing aperitif
Variations to Try
- Blackberry-Lavender Jelly: Add 1 teaspoon of dried culinary lavender buds to the pot during cooking for floral notes; this pairs beautifully with sharp cheeses and scones.
- Blackberry-Bourbon Jelly: Stir in 2 tablespoons of bourbon whiskey after cooking and before jarring for a sophisticated, warming flavor that’s perfect for cocktails.
- Spiced Blackberry Jelly: Add a pinch of ground cinnamon, cardamom, or nutmeg during cooking to create warmth and complexity that complements desserts and savory dishes alike.
- Blackberry-Apple Jelly: Replace 1 pound of blackberries with fresh apple juice for a lighter color and texture with subtle tartness that extends set time.
- Low-Sugar Blackberry Jelly: Use 3 pounds of blackberries with just 2 pounds of sugar and add 1 teaspoon of powdered pectin for those watching carbohydrate intake; the flavor remains bright and full.
Dietary Adaptations
- Gluten-Free: This recipe is naturally gluten-free; just ensure your jars and utensils haven’t been exposed to gluten contamination, and you’re all set.
- Dairy-Free: Blackberry jelly contains no dairy ingredients, making it ideal for those avoiding animal products or managing lactose intolerance.
- Vegan: This recipe is entirely vegan, as it relies only on fruit, sugar, and lemon juice with no animal-derived ingredients or processing aids.
- Low-Carb/Keto: Reduce sugar to 1.5 pounds and add 1 teaspoon of powdered pectin to achieve set; the trade-off is slightly less sweet flavor, but the jelly remains delicious for spreading on keto-friendly breads.
Storage and Reheating
Refrigerator
Store unopened jars in a cool, dark pantry for up to one year; once opened, keep the jar refrigerated and use within three weeks. The cold slows mold growth and preserves the bright berry flavor.
- Always use a clean, dry spoon when scooping jelly from the jar
- Cover tightly after each use to prevent drying out
- Watch for any signs of mold or fermentation before eating
Freezer
Blackberry jelly freezes beautifully for up to two years in freezer-safe containers or plastic-lined jars. Thaw overnight in the refrigerator before serving.
- Leave 1/2 inch of headspace for expansion during freezing
- Label containers with date and contents for easy tracking
- Small ice cube trays work well for portioning single servings
Reheating
Blackberry jelly doesn’t require reheating; simply thaw in the refrigerator and serve cold or at room temperature. If you prefer warm jelly for baking or glazing, gently warm it in a saucepan over low heat, stirring occasionally.
- Never microwave in the jar, as uneven heating can cause cracking
- Warm jelly in a small pot for smooth, even heating
- Use warm jelly immediately for best results in recipes
Nutrition Information
| Nutrient | Amount |
|---|---|
| Calories | 45 |
| Total Fat | 0g |
| Saturated Fat | 0g |
| Carbohydrates | 12g |
| Fiber | 0g |
| Sugar | 11g |
| Protein | 0g |
| Sodium | 2mg |
| Cholesterol | 0mg |
These values are approximate and based on standard serving sizes of 1 tablespoon per serving; actual nutrition varies based on your specific ingredients and how you measure portions.
Frequently Asked Questions
Can I use frozen blackberries for this recipe?
Yes, but thaw them first and expect a slightly softer set because frozen berries lose some natural pectin during the freezing process. Fresh berries will always yield the clearest jelly with the best set, but frozen ones work in a pinch.
Why isn’t my jelly setting?
The most common culprits are undercooking (not reaching 220 degrees), using overripe berries with low pectin, or skipping the lemon juice, which activates the pectin. Always test on a cold plate before removing from heat.
How long does homemade blackberry jelly last?
Unopened jars stored in a cool, dark pantry last up to one year; once opened and refrigerated, use within three weeks. Frozen jelly keeps for two years.
What’s the difference between jelly and jam?
Jelly is made from strained fruit juice, creating a smooth, glossy spread with no pulp, while jam includes crushed fruit or pulp throughout. This recipe yields jelly because we strain out all the solids.
Can I reduce the sugar in this recipe?
You can lower it to 2 pounds, but you’ll need to add 1 teaspoon of powdered pectin to achieve proper set and ensure preservation. The trade-off is slightly less sweetness, though the berry flavor becomes more prominent.
Do I need to process these jars in a water bath?
Water bath processing isn’t required if you store jars in the refrigerator, but it’s essential if you want shelf-stable, room-temperature storage. For long-term pantry storage, follow standard canning procedures with a 10-minute water bath.
Final Thoughts
Making blackberry jelly from scratch feels like capturing late summer in a jar, and the first time you spread that glossy purple treasure on warm toast, you’ll understand why so many people love home canning. This recipe proves that impressive results don’t require complicated steps or scary equipment.
Go ahead and make a batch this weekend, and don’t be surprised when friends start asking for jars as gifts. You’ve now joined the satisfying world of fruit preservation, and I promise it’s as rewarding as it tastes.
Explore More Recipes
If you loved this blackberry jelly recipe, you’ll want to explore more ways to use your beautiful berries and expand your preserve-making skills. Check out these related recipes for even more ways to enjoy fresh fruit.
Try making a blackberry crisp recipe for a warm, comforting dessert that celebrates the same tart-sweet berry flavor. You can also explore the classic jelly roll recipe for an elegant way to use your homemade jelly as a surprise filling.
Blackberry Jelly
Ingredients
Equipment
Method
- Rinse 3 pounds of fresh blackberries under cool water, discarding any soft or moldy berries.
- Place the berries in a large pot and crush gently with a wooden spoon to release their juices.
- Heat the crushed berries over medium-high heat and bring to a gentle boil, stirring occasionally; cook for 10 minutes.
- Pour the cooked berries through a fine-mesh strainer lined with cheesecloth into a clean bowl; let the juice drip without pressing.
- Return the strained juice to the pot, add granulated sugar and lemon juice, and stir until sugar dissolves.
- Increase heat to high and bring to a rolling boil, stirring frequently; insert thermometer and boil until 220°F is reached.
- Perform a cold plate test by chilling a small plate, dropping a spoonful of jelly, and checking for wrinkles; if it runs, boil 1 more minute and test again.
- Ladle the hot jelly into warm glass jars, leaving 1/4 inch headspace; let jars cool to room temperature, then refrigerate or process in a 10-minute water bath for shelf stability.