
There’s something magical about the sound of veal cutlets hitting a hot pan and the bright aroma of lemon and capers filling your kitchen in minutes. Veal piccata is one of those restaurant dishes that feels intimidating until you realize it’s actually faster and easier than ordering takeout.
This Italian-American classic delivers crispy, tender veal in a silky lemon-caper sauce that tastes like you spent hours in the kitchen when you really spent maybe 20 minutes. The beauty lies in its simplicity: quality veal, a light flour coating, and a punchy sauce that balances bright acidity with salty capers and rich butter.
Whether you’re cooking for a weeknight dinner or impressing guests, this recipe proves that elegant food doesn’t require complicated techniques or a long ingredient list.
Why You’ll Love This Recipe
Veal piccata checks all the boxes for a weeknight dinner that feels special without the stress. You get restaurant-quality results in under 30 minutes total, which means you can have an impressive meal on the table faster than most takeout arrives.
- Ready in 20 to 25 minutes from start to finish
- Minimal ingredients, maximum flavor with bright lemon and briny capers
- Tender, crispy veal cutlets coated in a silky pan sauce
- Naturally gluten-free option when using cornstarch
- Scalable recipe that works for two or a dinner party
My Experience Making This Recipe
The first time I made veal piccata at home, I was shocked at how quickly it came together and how closely it matched the version from my favorite Italian restaurant. The key moment for me was watching the veal turn golden brown in the hot pan and then seeing that silky sauce come together in the last minute.
My family devoured it, and now it’s become a regular rotation in our dinner lineup, especially when I need something that looks impressive but doesn’t require me to spend my entire evening cooking. The technique is forgiving too; you really can’t mess this up if you follow the steps and don’t overcook the veal.
What I love most is that this dish taught me that simple food done well beats complicated food every time. The veal stays tender and delicate, the sauce clings perfectly, and the capers add that salty, briny pop that makes people ask for the recipe.
Recipe Overview
- Recipe Name: Veal Piccata
- Servings: 4
- Prep Time: 10 minutes
- Cook Time: 15 minutes
- Total Time: 25 minutes
- Course: Main Course
- Cuisine: Italian-American
- Calories per Serving: 285
Equipment You Will Need
- Large skillet or sauté pan
- Meat mallet or rolling pin
- Shallow bowls or plates for dredging
- Paper towels
- Tongs or a spatula
- Measuring spoons and cups
- Cutting board and knife
- Whisk or fork for mixing
Ingredients for Veal Piccata
- Veal cutlets, 4 pieces (about 4 ounces each, pounded thin)
- All-purpose flour, 1/2 cup
- Salt, 1 teaspoon
- Black pepper, 1/2 teaspoon
- Olive oil, 3 tablespoons
- Butter, 2 tablespoons
- Capers, 1/4 cup (drained)
- Fresh lemon juice, 1/4 cup
- Chicken or vegetable broth, 1/2 cup
- Garlic, 2 cloves (minced)
- Dry white wine, 1/4 cup (optional but recommended)
- Fresh parsley, 2 tablespoons (chopped, for garnish)
Ingredient Notes and Substitutions
- Veal cutlets: Veal is mild and tender, making it perfect for quick cooking without drying out. If veal is unavailable or too expensive, use thin chicken breasts or pounded pork cutlets instead.
- Capers: These briny pickled buds add a sharp, salty flavor that defines the dish. If you don’t have capers, green olives chopped fine or a splash of pickle juice added to the sauce can approximate the flavor.
- Fresh lemon juice: Fresh juice is essential for brightness and cannot be replaced by bottled juice without losing quality. If fresh lemons aren’t available, bottled juice works in a pinch, though use slightly less as it can be more acidic.
- White wine: Dry white wine adds depth and complexity to the sauce. If you prefer not to use wine, use an additional 1/4 cup of broth instead.
- Butter: Unsalted butter lets you control the salt level and creates a silky sauce. Salted butter works too, but reduce the added salt by half.
How to Make Veal Piccata
Step 1: Prepare the Veal
Pat your veal cutlets dry with paper towels and place them between two sheets of plastic wrap or parchment paper. Using a meat mallet or the bottom of a rolling pin, gently pound each cutlet until it is about 1/4 inch thick, working from the center outward with light, even strokes.
This step is crucial because it ensures even cooking and makes the veal tender enough to cut with just a fork. Thin, uniform cutlets cook in the same amount of time and won’t become tough or rubbery.
Step 2: Set Up Your Dredging Station
In a shallow bowl, whisk together the flour, salt, and black pepper. This flavored flour will coat the veal and create a light, golden crust when it hits the hot pan.
Having your dredging station ready before you start cooking keeps the process smooth and prevents the veal from sitting around getting soggy.
Step 3: Coat the Veal
Working one cutlet at a time, dredge it in the flour mixture on both sides, shaking off any excess. The coating should be light and even, not thick or clumpy.
A thin, even coating creates a delicate crust without making the dish feel heavy. Place the coated cutlets on a clean plate while you heat the pan.
Step 4: Heat the Pan
Place a large skillet over medium-high heat and add the olive oil. When the oil shimmers and moves easily around the pan, you’re ready to cook, which should take about 2 to 3 minutes.
Hot oil is essential for creating that golden, slightly crispy exterior on the veal. If the pan isn’t hot enough, the veal will absorb the oil instead of searing properly.
Step 5: Cook the Veal
Carefully place the veal cutlets into the hot pan, being careful of any splashing oil. Let them cook undisturbed for 2 to 3 minutes until the bottom is golden brown.
Resist the urge to move them around; they need that contact with the hot pan to develop color and flavor. Flipping too early or too often prevents proper browning.
Step 6: Flip and Finish Cooking
Flip each cutlet carefully using tongs and cook for another 1 to 2 minutes on the second side until golden brown. The veal should be cooked through but still tender and juicy inside.
This quick cooking time is why pounding the veal thin is so important; it allows the inside to cook through without the outside becoming tough or gray. Transfer the cooked veal to a plate and set aside.
Step 7: Make the Sauce
In the same pan, reduce the heat to medium and add the minced garlic. Sauté for about 30 seconds until fragrant, stirring constantly to prevent burning.
Garlic burns quickly in a hot pan, so watch it carefully. You want aromatic garlic, not bitter, burnt garlic.
Step 8: Deglaze the Pan
Add the white wine (if using) to the pan and scrape up any browned bits stuck to the bottom with a wooden spoon. These flavorful browned bits, called fond, are liquid gold for building a rich sauce.
Let the wine simmer for about 1 to 2 minutes until it reduces slightly. If you’re skipping wine, simply add the broth directly in the next step.
Step 9: Build the Sauce
Add the chicken broth, lemon juice, and drained capers to the pan. Stir everything together and let it simmer for 2 to 3 minutes until the sauce reduces slightly and becomes glossy.
The sauce should taste bright and balanced, with the lemon and capers shining through. Taste it and adjust seasoning if needed.
Step 10: Finish with Butter
Remove the pan from heat and stir in the butter, a tablespoon at a time, until fully melted and incorporated. This final addition of butter makes the sauce silky and luxurious.
Adding butter off heat prevents it from breaking and keeps the sauce emulsified and smooth. Return the veal to the pan or plate it and pour the sauce over the top.
Step 11: Garnish and Serve
Sprinkle the chopped fresh parsley over the veal and sauce for a pop of color and freshness. Serve immediately while everything is hot and the veal is at its most tender.
The parsley adds a light, herbaceous note that complements the bright lemon and briny capers perfectly. Serve with pasta, rice, or crusty bread to soak up the sauce.
Pro Tip: Don’t skip pounding the veal thin; this one step is what separates restaurant-quality veal piccata from rubbery, overcooked meat.
Tips for the Best Veal Piccata
- Use a meat mallet with the flat side for pounding, not the textured side, which can tear the delicate meat. Pound gently and evenly to avoid creating holes or thin spots.
- Pat the veal completely dry before dredging to ensure the flour coating adheres and creates a proper crust. Moisture is the enemy of browning.
- Don’t crowd the pan; cook the veal in batches if necessary to avoid steaming the meat. Each cutlet needs direct contact with the hot pan surface.
- Keep the heat at medium-high, not screaming high, to avoid burning the coating before the veal cooks through inside. Medium-high allows the exterior to brown while the interior cooks gently.
- Taste the sauce before serving and adjust the lemon juice or salt to your preference. The sauce should taste bright and balanced, never dull or overly salty.
- Make the sauce in the same pan used for the veal so you capture all those flavorful browned bits on the bottom. This fond is essential for a rich, complex sauce.
Common Mistakes to Avoid
- Pounding the veal too aggressively tears the meat and creates uneven thickness, leading to dry spots. Use gentle, even pressure and work from center outward for consistent results.
- Skipping the drying step before dredging results in a wet coating that won’t stick and won’t brown properly. Always pat the veal dry with paper towels first.
- Using cold veal from the refrigerator means uneven cooking; the outside burns while the inside stays cool. Let the veal sit at room temperature for 15 minutes before cooking.
- Over-reducing the sauce creates an overly concentrated, salty result that overwhelms the delicate veal. Simmer gently and taste frequently to avoid this.
- Cooking the veal too long turns it gray, tough, and chewy instead of tender and pale. Cook only until cooked through, about 3 to 4 minutes total.
Serving Suggestions
Veal piccata shines when paired with sides that don’t compete with its delicate, lemony flavor. The bright, silky sauce pairs beautifully with simple starches and fresh vegetables that let the veal be the star.
- Buttered egg noodles or fettuccine tossed with fresh parsley capture the sauce beautifully
- Creamy mashed potatoes provide a rich counterpoint to the bright, acidic sauce
- Sautéed spinach or arugula with garlic adds a fresh, slightly peppery note
- Crusty bread or focaccia for soaking up every last drop of sauce
- Roasted asparagus or green beans for a lighter, more elegant presentation
Variations to Try
- Chicken Piccata: Substitute thin chicken breasts pounded to 1/4 inch thickness for a lighter, more budget-friendly version with nearly identical results. The cooking time remains the same since both proteins are lean and cook quickly.
- Veal Piccata with Olives: Replace half the capers with Kalamata or green olives for a different briny flavor profile. Olives add sweetness that tempers the sharp caper flavor.
- Piccata with Artichoke Hearts: Add 1 cup of halved artichoke hearts to the sauce in the last minute of cooking for extra heartiness and earthiness. This turns the dish into a more substantial one-pan meal.
- Piccata with Mushrooms: Sauté 8 ounces of sliced mushrooms separately and add them to the sauce for umami depth and a meatier texture. Cremini, button, or shiitake mushrooms all work wonderfully.
- Lemon Caper Pasta: Toss cooked pasta directly in the sauce with the veal cutlets torn into pieces for a complete pasta dish. This works especially well for feeding a crowd.
Dietary Adaptations
- Gluten-Free: Replace all-purpose flour with cornstarch, rice flour, or a gluten-free flour blend using the same amount. The coating will be slightly less crispy but still delicious and completely gluten-free.
- Dairy-Free: Omit the butter at the end or substitute it with olive oil to finish the sauce; the result will be lighter but still flavorful. The sauce won’t be quite as silky without the butter, but the lemon and capers carry the dish.
- Paleo/Whole30: Use ghee instead of butter and cornstarch instead of flour for a compliant version. The nutritional profile changes slightly, but the dish remains delicious.
- Low-Carb/Keto: Replace flour with finely ground almond flour or crushed pork rinds for the coating, keeping everything else the same. The crust will be slightly less delicate but still golden and tasty.
Storage and Reheating
Refrigerator
Store leftover veal piccata in an airtight container for up to 2 days. The veal stays moist when stored in the sauce, which protects it from drying out.
- Let the dish cool to room temperature before transferring to a container
- Store the veal and sauce together in the same container
- Cover completely to prevent the lemon sauce from picking up other refrigerator smells
Freezer
Veal piccata freezes well for up to 3 months when stored properly. The delicate texture of the veal holds up better when frozen in the sauce.
- Cool completely before freezing to prevent condensation
- Use freezer-safe containers or heavy-duty freezer bags
- Label with the date so you remember how long it’s been frozen
Reheating
Reheat gently in a skillet over low to medium-low heat to avoid toughening the veal. Add a splash of broth or lemon juice if the sauce has thickened too much.
- Transfer from refrigerator to room temperature for 15 minutes before reheating
- Heat in a skillet over medium-low heat for 5 to 7 minutes, stirring occasionally
- Alternatively, microwave in a covered microwave-safe dish for 2 to 3 minutes, stirring halfway through
Nutrition Information
| Nutrient | Amount |
|---|---|
| Calories | 285 |
| Total Fat | 16g |
| Saturated Fat | 5g |
| Carbohydrates | 12g |
| Fiber | 0g |
| Sugar | 1g |
| Protein | 28g |
| Sodium | 480mg |
| Cholesterol | 95mg |
These values are approximate and based on standard ingredients. Individual nutrition will vary depending on specific brands used and portion sizes.
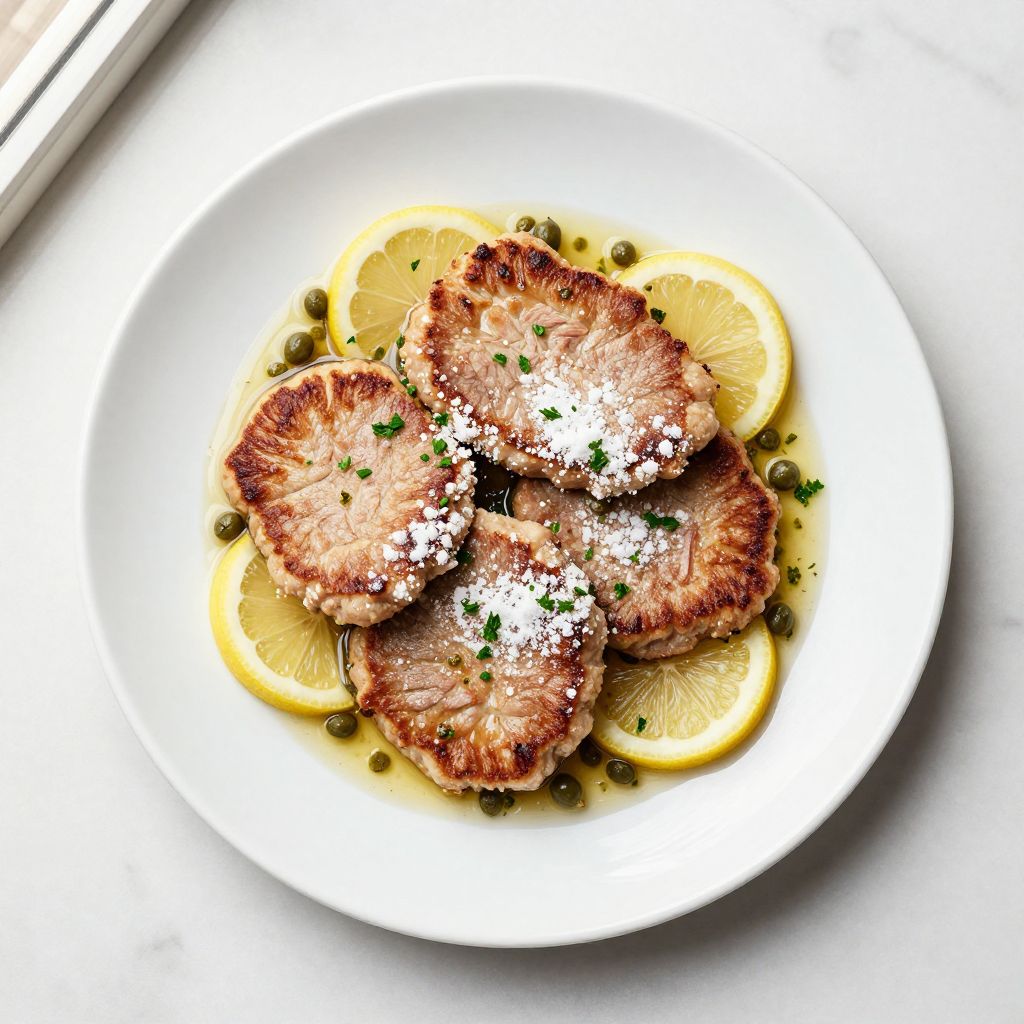
Veal Piccata
Ingredients
Equipment
Method
- Pat veal cutlets dry and pound each to 1/4 inch thickness between plastic wrap using a meat mallet.
- Whisk together flour, salt, and black pepper in a shallow bowl.
- Dredge veal cutlets in the flour mixture, shaking off excess.
- Heat olive oil in a large skillet over medium-high heat until shimmering, about 2 minutes.
- Cook veal cutlets in batches for 2 to 3 minutes per side until golden brown, transferring to a plate.
- Reduce heat to medium and add minced garlic; sauté for 30 seconds.
- Pour in white wine and scrape up browned bits, then simmer for 1 to 2 minutes.
- Add chicken broth, lemon juice, and capers; simmer for 2 to 3 minutes until slightly reduced.
- Remove pan from heat and whisk in butter one tablespoon at a time until sauce is glossy.
- Return veal cutlets to the pan and spoon sauce over them.
- Garnish with chopped fresh parsley.
- Serve immediately with pasta, rice, or crusty bread to soak up the sauce.
Notes
Frequently Asked Questions
Can I make veal piccata ahead of time?
Yes, you can prepare the veal and sauce up to 2 days ahead and store them together in the refrigerator. Reheat gently over medium-low heat just before serving to preserve the tender texture of the meat.
What’s the best substitute for veal?
Thin chicken breasts pounded to 1/4 inch thickness create an almost identical dish with identical cooking times. Pork cutlets or even thin halibut fillets work beautifully too.
Can I use bottled lemon juice instead of fresh?
Fresh lemon juice is strongly recommended for the bright, vibrant flavor the dish depends on. Bottled juice is more acidic and can make the sauce taste harsh, though it works in a pinch if you use slightly less.
Why is my veal coming out tough and gray?
This happens when the veal cooks too long or at too high a temperature. Cook at medium-high heat for only 3 to 4 minutes total, and don’t pound it too thin or it will overcook instantly.
What if I don’t have capers?
Chopped green olives provide a similar briny flavor, or add a tablespoon of pickle juice to the sauce for the salty, acidic pop capers provide. The dish will taste slightly different but still delicious.
Can I cook this in a cast iron skillet?
Absolutely, cast iron works beautifully and retains heat wonderfully for an even brown crust. Just ensure it’s seasoned well and watch for any iron flavor if your skillet is new.
Is veal piccata gluten-free?
Traditional veal piccata uses wheat flour, but you can easily make it gluten-free by substituting cornstarch or rice flour. The coating will be slightly less crispy but the dish remains delicious and fully gluten-free.
Final Thoughts
Veal piccata is proof that restaurant-quality cooking isn’t complicated or time-consuming when you understand the fundamentals and don’t overthink things. This dish rewards simplicity, precision, and quality ingredients more than fancy techniques.
Make this recipe this week and discover why it’s been a menu staple for decades. Your kitchen will smell incredible, your dinner guests will be impressed, and you’ll wonder why you don’t make veal piccata more often.
If you enjoy this elegant Italian-American classic, explore more thin-cutlet recipes like chicken cutlet recipe and chicken saltimbocca recipe for similar quick, impressive dinners that deliver maximum flavor in minimum time.