
The first time I bit into a crispy, garlicky green bean at Din Tai Fung, I was hooked—that perfect snap followed by savory umami made me wonder if I’d ever find anything as good at home.
The good news is that Din Tai Fung green bean recipe is entirely makeable in your own kitchen, and honestly, your version might rival the restaurant’s.
This dish shines because it’s simple, fast, and delivers restaurant-quality flavor with just a handful of ingredients and one hot pan.
The magic lies in the high heat that creates those charred, blistered edges while keeping the insides tender, plus garlic and soy that pack serious punch.
Ready to wow your dinner table?
Let’s get to it.
Why You’ll Love This Recipe
This recipe is quick enough for a weeknight but impressive enough to serve at a dinner party, and it works beautifully as a side or even a light vegetarian main.
- Ready in under 15 minutes from start to finish
- Minimal ingredients mean minimal prep and maximum flavor
- Vegetarian, gluten-free friendly, and naturally low-carb
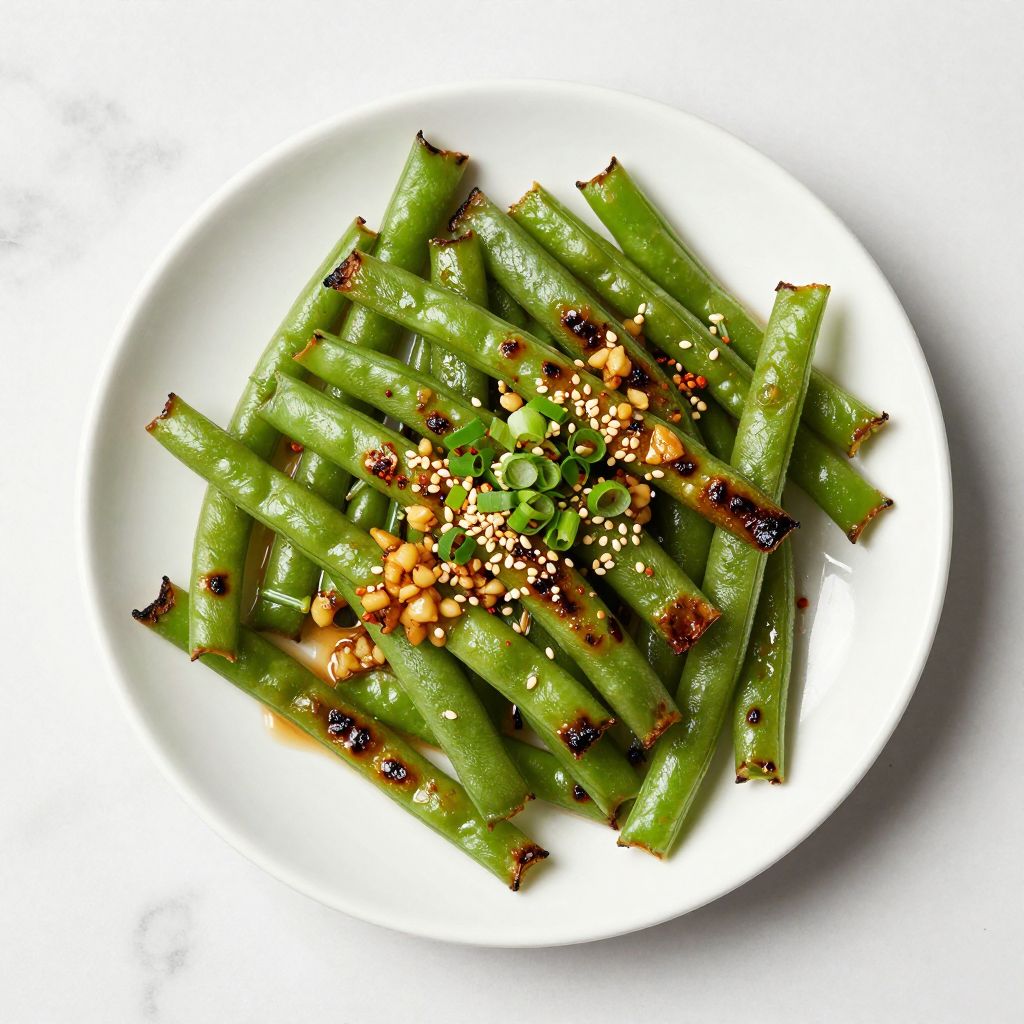
- Charred, crispy texture with tender centers that feel indulgent
- Reheats beautifully for leftovers (if you have any)
My Experience Making This Recipe
I’ve made this dish at least a dozen times now, and every time my family asks for seconds, which tells you something about how hard people fall for it.
The first time, I used regular green beans and forgot to pat them dry before cooking, so they steamed instead of charring—lesson learned fast.
Once I cranked the heat and dried those beans properly, everything changed: the kitchen filled with an amazing garlic-and-soy aroma, the edges blackened in all the right ways, and I felt like I’d unlocked a restaurant secret.
Recipe Overview
- Recipe Name: Din Tai Fung Green Bean Recipe
- Servings: 4
- Prep Time: 10 minutes
- Cook Time: 8 minutes
- Total Time: 18 minutes
- Course: Side Dish
- Cuisine: Chinese
- Calories per Serving: 65
Equipment You Will Need
- Large skillet or wok (14-inch ideal)
- Paper towels
- Cutting board
- Sharp knife
- Measuring spoons
- Measuring cups
- Wooden spoon or spatula
- Garlic mincer or knife
Ingredients for Din Tai Fung Green Bean Recipe
- Green beans: 1.5 pounds, trimmed and patted completely dry
- Vegetable oil: 3 tablespoons, divided
- Garlic: 6 cloves, minced
- Soy sauce: 2 tablespoons
- Sesame oil: 1 teaspoon
- Water: 2 tablespoons
- Sugar: 1/2 teaspoon
- Red pepper flakes: 1/4 teaspoon (optional)
- Salt and white pepper: to taste
Ingredient Notes and Substitutions
- Green beans: Fresh, firm beans give you the best snap and char; frozen beans work if thawed and dried thoroughly, but they won’t crisp quite as well. If you can’t find regular green beans, try haricots verts (thinner French beans) for a more delicate bite.
- Vegetable oil: You need a high smoke point oil here to handle the intense heat without burning; canola, peanut, or avocado oil all work perfectly. Olive oil will scorch, so skip it.
- Garlic: Freshly minced garlic gives bright flavor and won’t scorch as easily as pre-minced; if you only have jarred garlic, use slightly less since it’s more concentrated.
- Soy sauce: Regular or low-sodium both work, though low-sodium lets you control salt better. Tamari is a gluten-free swap if needed.
- Sesame oil: This adds authentic toasty depth that you can’t replicate; don’t skip it or use vegetable oil instead. A tiny bit goes a long way.
How to Make Din Tai Fung Green Bean Recipe
Step 1: Trim and Dry the Green Beans
Cut off both ends of each green bean and discard them, then rinse the beans and pat them completely dry with paper towels. Moisture is the enemy of crispiness, so don’t rush this step or your beans will steam instead of char.
Step 2: Heat Your Skillet to High Heat
Place a large skillet over high heat and let it sit for 2 minutes until it’s smoking hot. A properly heated pan is what creates those gorgeous blistered, charred edges.
Step 3: Add Oil and Test the Temperature
Add 1.5 tablespoons of vegetable oil to the hot skillet; it should shimmer and move around like water immediately. If it doesn’t shimmer, wait another 30 seconds.
Step 4: Cook the First Batch of Green Beans
Add half the green beans in a single layer and resist the urge to stir for the first 2 minutes. This undisturbed time lets the beans blister and char on one side.
After 2 minutes, stir and cook for another 1 to 2 minutes until most beans have charred spots and feel tender-crisp when pierced. Transfer to a plate and repeat with the remaining oil and beans.
Step 5: Return All Beans to the Skillet
Once both batches are cooked, return all the green beans to the skillet over medium-high heat. This combines them so they can soak up the sauce evenly.
Step 6: Make the Garlic Sauce
In a small bowl, mix together the minced garlic, soy sauce, sesame oil, water, and sugar. Stir until the sugar dissolves completely.
Step 7: Add the Sauce to the Beans
Pour the garlic sauce over the beans and toss everything together for about 30 seconds so the beans coat evenly. The sauce will sizzle and stick to the beans, building a savory glaze.
Step 8: Season and Taste
Sprinkle with red pepper flakes if you like heat, then taste and adjust salt and white pepper to your liking. Remember that the soy sauce already contains salt, so go easy.
Transfer to a serving dish and eat while warm.
Pro Tip: The beans must be completely dry before cooking, so take those extra 30 seconds to pat them thoroughly; one damp bean can ruin your char and turn the whole batch steamy.
Tips for the Best Din Tai Fung Green Bean Recipe
- Don’t crowd the pan; cooking the beans in two batches ensures they char instead of steam, which is the whole point.
- Keep your heat high throughout cooking to maximize those crispy, blistered edges that make this dish shine.
- Prep your garlic and sauce ingredients before you start cooking so you’re not scrambling when the beans are nearly done.
- Use fresh garlic that you mince yourself rather than pre-minced bottled garlic, which has a slightly off taste when cooked at high heat.
- Serve immediately while the beans are still warm and crispy; they soften a bit as they cool, though leftovers still taste great.
- If you like extra garlic flavor, add a minced clove or two more; this dish can handle bold garlic without becoming overwhelming.
Common Mistakes to Avoid
- Cooking all the beans at once: overcrowding the pan causes steaming instead of charring, and you’ll lose that signature crispy texture.
- Not drying the beans thoroughly: moisture prevents the beans from developing a crispy exterior, so skip this and you’ll get mush.
- Using low or medium heat: the whole magic of this dish comes from the intense heat that blisters the skins in minutes.
- Adding the sauce too early: if you pour sauce over wet or raw beans, they’ll steam; wait until they’re charred, then add it.
- Stirring constantly: letting the beans sit undisturbed for the first couple of minutes is what creates that gorgeous char; constant stirring prevents it.
Serving Suggestions
This green bean recipe pairs beautifully with almost any Asian-inspired meal and works equally well as a light standalone side or part of a bigger spread.
- Serve alongside fried rice or steamed white rice to soak up any extra sauce
- Pair with crispy tofu or pan-seared chicken breast for a complete meal
- Add to a dim sum spread with dumplings, buns, and other vegetables
- Enjoy as a vegetable side with roasted salmon or white fish
- Mix into noodle dishes for extra color, texture, and nutrition
Variations to Try
- Spicy Version: Increase the red pepper flakes to 1/2 teaspoon or add a diced fresh Thai chili when you add the sauce; the heat cuts through the richness beautifully.
- Ginger-Garlic: Add 1 tablespoon of minced fresh ginger to the sauce for a warming spice that complements the garlic and soy.
- Peanut Style: Stir in 2 tablespoons of peanut butter and reduce the water to 1 tablespoon; this creates a rich, nutty coating.
- Oyster Sauce Version: Replace 1 tablespoon of the soy sauce with oyster sauce for deeper umami and a slightly sweeter profile.
- Sesame Seeds and Scallions: Top the finished dish with toasted sesame seeds and sliced scallions for added crunch and fresh flavor.
Dietary Adaptations
- Gluten-Free: Use tamari instead of soy sauce, which is naturally gluten-free; the flavor is nearly identical and you won’t notice any difference.
- Dairy-Free: This recipe is already dairy-free, so no changes needed.
- Vegan: This recipe is naturally vegan with no animal products, so it’s perfect as-is.
- Low-Carb/Keto: This dish fits perfectly into low-carb eating; green beans are low in carbs and the sauce contains minimal sugar, so enjoy it freely.
Storage and Reheating
Refrigerator
Store leftover green beans in an airtight container for up to 3 days.
- The beans soften slightly but still taste delicious when cold or reheated
- Any excess sauce keeps separate and can be drizzled back over the beans before serving
Freezer
Freezing isn’t ideal because the texture changes significantly, but you can freeze for up to 1 month in an airtight container if needed.
- Thaw overnight in the refrigerator before reheating
- The beans will be softer than fresh, so use frozen leftovers in fried rice or mixed vegetable dishes
Reheating
Reheat in a skillet over medium-high heat for 2 to 3 minutes, stirring occasionally, until warmed through.
- Microwave in a covered bowl for 1 to 2 minutes, though stovetop reheating preserves texture better
- Add a splash of soy sauce or water if the beans seem dry after storage
Nutrition Information
| Nutrient | Amount |
|---|---|
| Calories | 65 |
| Total Fat | 5g |
| Saturated Fat | 0.5g |
| Carbohydrates | 5g |
| Fiber | 2g |
| Sugar | 2g |
| Protein | 2g |
| Sodium | 280mg |
| Cholesterol | 0mg |
These values are approximate and based on standard ingredient measurements.
Frequently Asked Questions
Can I make this recipe ahead of time?
You can prep the beans and sauce separately up to 4 hours ahead, but cook them together just before serving for the best texture and flavor. If you cook them fully ahead, reheat gently in a skillet to restore some crispness.
What if my green beans won’t char?
Your heat isn’t high enough or your beans aren’t dry enough; make sure your skillet is smoking hot and the beans are completely patted dry before they hit the pan. If they’re still not charring after 2 minutes, increase the heat further.
Can I use frozen green beans?
Yes, but thaw and dry them thoroughly first since they release extra moisture during freezing. They won’t crisp quite as much as fresh beans, but they’ll still taste good.
Is white pepper better than black pepper in this recipe?
White pepper tastes milder and slightly less sharp than black pepper, which keeps the focus on the garlic and soy; black pepper works too, just use a pinch less.
How do I know when the beans are done?
They’re done when they’re tender-crisp when pierced with a fork and have charred, blistered spots covering at least half the surface. Don’t overcook them or they’ll become mushy.
What’s the difference between sesame oil and vegetable oil?
Vegetable oil is neutral and handles high heat, while sesame oil is made from toasted sesame seeds and has a rich, nutty flavor; you need both in this recipe because sesame oil would burn at the cooking temperature. The sesame oil is added at the end for flavor, not cooking.
Final Thoughts
Making Din Tai Fung green bean recipe at home is easier than you might think, and once you nail the technique, you’ll make it again and again because it’s just that satisfying.
The combination of crispy charred edges, tender centers, and savory garlic-soy glaze checks every box for a side dish that feels special without any fuss.
The next time you’re craving that restaurant experience, skip the delivery app and fire up your skillet instead; your taste buds and your wallet will thank you.
Explore more delicious vegetable recipes on our site, from hearty lima beans recipe options to elegant creamed peas recipe sides, and keep building your collection of go-to dishes.
Din Tai Fung Green Bean Recipe
Ingredients
Equipment
Method
- Trim off both ends of the green beans, rinse under cold water, and pat completely dry with paper towels.
- Heat a large skillet or wok over high heat for 2 minutes until it is smoking hot.
- Add 1.5 tablespoons vegetable oil to the skillet, swirling until it shimmers; if it does not shimmer, wait an additional 30 seconds.
- Add half of the green beans in a single layer and cook undisturbed for 2 minutes, then stir and cook for another 1 to 2 minutes until charred and tender-crisp; transfer to a plate.
- Repeat cooking with the remaining 1.5 tablespoons oil and green beans, blistering them in the same manner, then return all beans to the skillet over medium-high heat.
- In a small bowl, combine minced garlic, soy sauce, sesame oil, water, and sugar, stirring until the sugar dissolves.
- Pour the garlic sauce over the beans and toss for 30 seconds until the beans are evenly coated and the sauce glazes them.
- Season with red pepper flakes (if using), salt, and white pepper to taste, then transfer to a serving dish and serve warm.