
There’s nothing quite like biting into a crispy chicken sandwich with that satisfying crunch followed by tender, juicy meat inside a soft bun. This is the kind of sandwich that stops you mid-conversation because you’re too busy savoring every bite.
What makes this recipe special is how it delivers that coveted restaurant-quality crisp without any deep frying hassle or greasy aftermath. You’ll master a simple breading technique, a quick pan-sear method, and a few assembly secrets that transform ordinary chicken into something craveable.
Why You’ll Love This Recipe
This crispy chicken sandwich comes together in under 30 minutes and delivers maximum flavor with minimal fuss. The crispy exterior contrasts beautifully with juicy meat, and the customizable toppings mean everyone at your table gets exactly what they want.
- Crunchy exterior with a tender, moist interior
- Ready in less than 30 minutes from start to finish
- Pan-fried, not deep-fried, so your kitchen stays clean
- Easily customizable with your favorite toppings and sauces
- Perfect for busy weeknights or casual entertaining
My Experience Making This Recipe
I first made this sandwich on a random Tuesday when I was craving something crispy but didn’t want to fire up the deep fryer. The moment that golden-brown chicken hit the hot skillet, my kitchen filled with this irresistible aroma that had everyone wandering in to see what was happening.
My family demolished their sandwiches in minutes, and I loved how easily I could customize each one. One person wanted extra pickles, another went for hot sauce, and someone even added crispy bacon because, well, bacon makes everything better.
The best part? Cleanup was a breeze since I used a shallow pan instead of a vat of oil. Now this sandwich is my go-to when I want something that feels indulgent but doesn’t require hours of prep work.
Recipe Overview
- Recipe Name: Crispy Chicken Sandwich
- Servings: 4
- Prep Time: 15 minutes
- Cook Time: 12 minutes
- Total Time: 27 minutes
- Course: Main Course
- Cuisine: American
- Calories per Serving: 520
Equipment You Will Need
- Meat mallet or rolling pin
- Three shallow bowls or plates for breading station
- Large skillet or frying pan
- Meat thermometer
- Tongs or spatula
- Paper towels
- Cutting board
- Measuring spoons and cups
Ingredients for Crispy Chicken Sandwich
- 4 boneless, skinless chicken breasts (about 6 ounces each)
- 1 cup all-purpose flour
- 2 large eggs
- 1 cup panko breadcrumbs
- 1 teaspoon garlic powder
- 1 teaspoon paprika
- 1/2 teaspoon cayenne pepper
- 1 teaspoon salt
- 1/2 teaspoon black pepper
- 3 tablespoons vegetable oil
- 4 brioche buns
- 2 tablespoons mayonnaise
- 4 lettuce leaves
- 4 slices tomato
- 4 dill pickle slices
Ingredient Notes and Substitutions
- Panko breadcrumbs create an extra-crispy coating compared to regular breadcrumbs. You can substitute with regular breadcrumbs, but the texture will be less crunchy.
- Brioche buns add richness and slight sweetness to balance the savory chicken. Standard burger buns work fine if brioche isn’t available.
- All-purpose flour helps the egg mixture adhere to the chicken. You can use cornstarch mixed with flour for extra crispiness, though all-purpose alone works perfectly.
- Vegetable oil has a high smoke point needed for pan-frying. Canola oil works just as well if vegetable oil isn’t on hand.
- Paprika and cayenne add warmth and depth to the breading. Omit cayenne if you prefer a milder sandwich, or add more if you like heat.
How to Make Crispy Chicken Sandwich
Step 1: Pound the Chicken Breasts
Place each chicken breast on a cutting board and cover it loosely with plastic wrap. Use a meat mallet to pound the chicken to an even thickness of about half an inch, which ensures the meat cooks evenly and stays juicy inside while the outside crisps up perfectly.
Step 2: Set Up Your Breading Station
Arrange three shallow bowls in a row. Fill the first with all-purpose flour, the second with beaten eggs, and the third with panko breadcrumbs mixed with garlic powder, paprika, cayenne, salt, and black pepper.
Having your station organized means you’ll work quickly and avoid getting your hands too messy during the breading process.
Step 3: Coat the Chicken in Flour
Take one pounded chicken breast and dredge it in the flour, shaking off any excess. This flour layer helps the egg mixture stick to the chicken and creates a better foundation for the crispy coating.
Step 4: Dip in Egg Mixture
Transfer the floured chicken to the egg bowl and coat both sides thoroughly, allowing any excess to drip back into the bowl. The egg acts as an adhesive that bonds the breadcrumbs to the chicken so they stay attached during frying.
Step 5: Coat with Panko Breadcrumbs
Press the egg-coated chicken firmly into the panko mixture, making sure both sides are completely covered with breadcrumbs. The pressure helps the panko adhere and creates that signature crunchy texture you’re after.
Repeat steps 3 through 5 with the remaining chicken breasts, then set them on a clean plate while you heat your oil.
Step 6: Heat the Oil
Pour vegetable oil into a large skillet and heat it over medium-high heat for about 2 minutes until it shimmers. Hot oil is essential for achieving that golden-brown crust without burning the outside before the inside cooks through.
Step 7: Pan-Fry the Chicken
Carefully place the breaded chicken breasts into the hot oil, working in batches if needed so you don’t overcrowd the pan. Fry for 5 to 6 minutes on the first side until golden brown and crispy.
Flip the chicken and fry for another 5 to 6 minutes on the second side until the internal temperature reaches 165 degrees Fahrenheit when checked with a meat thermometer. The oil should sizzle when the chicken hits the pan; if it doesn’t, your oil isn’t hot enough and the breading will absorb oil instead of crisping.
Step 8: Rest and Toast the Buns
Transfer the cooked chicken to a paper towel-lined plate to drain any excess oil. While the chicken rests, lightly spread mayonnaise on both halves of your brioche buns and toast them in the same skillet for about 1 minute per side until they’re golden and warm.
Toasting the buns prevents them from getting soggy when you add the hot chicken and toppings.
Step 9: Assemble Your Sandwich
On the bottom half of each toasted bun, layer a piece of crispy chicken followed by lettuce, tomato slices, and a pickle slice. Top with the other bun half and serve immediately while everything is still warm and crispy.
Pro Tip: Don’t skip the resting time after frying; it allows the chicken to finish cooking from residual heat while the coating stays crispy instead of getting soggy from the steam of a still-cooking interior.
Tips for the Best Crispy Chicken Sandwich
- Use chicken breasts of similar size so they cook evenly. If your breasts are thick, pound them gently to about half an inch thickness.
- Don’t skip the flour layer before egg. It creates a better base for the breadcrumbs to stick and adds extra crunch.
- Let the breaded chicken rest on a plate for 5 minutes before frying. This helps the coating adhere better to the meat.
- Maintain medium-high heat throughout frying. Too hot and the outside burns before the inside cooks; too cool and you get a greasy, soggy result.
- Use a meat thermometer to check doneness at 165 degrees Fahrenheit. This ensures your chicken is cooked through without overcooking it into dryness.
- Don’t press down on the chicken while it fries. Let it cook undisturbed so a proper crust can form.
Common Mistakes to Avoid
- Skipping the pounding step results in uneven cooking and a less tender bite. Always pound chicken to even thickness.
- Using wet panko straight from the container creates clumping. Mix your panko with seasonings and let it dry slightly for better coverage.
- Overcrowding the pan causes the oil temperature to drop and the chicken to steam instead of fry. Cook in batches if needed.
- Moving the chicken too much while frying prevents a proper crust from forming. Let each side cook undisturbed for the full time.
- Not letting the oil get hot enough produces soggy, greasy chicken. Wait until the oil shimmers before adding chicken to the pan.
Serving Suggestions
A crispy chicken sandwich pairs beautifully with sides that complement its richness without overwhelming it. Think crispy, fresh, or tangy accompaniments that balance the savory, crunchy chicken.
- Coleslaw with a tangy vinegar dressing cuts through the richness and adds a refreshing crunch
- Crispy french fries or waffle fries provide another satisfying texture contrast
- A simple green salad with light vinaigrette offers a fresh, healthy counterpoint
- Pickled vegetables or a side of extra pickles add brightness and acidity
- Sweet potato fries bring earthiness and slight sweetness to balance the savory chicken
Variations to Try
- Spicy version: Add one-quarter teaspoon cayenne to the panko mixture and serve with sriracha mayo for heat lovers.
- Herb-crusted: Mix fresh parsley, dried thyme, and dried oregano into the panko for an Italian-inspired twist that adds earthy flavor.
- Honey-hot: Drizzle hot sauce mixed with honey on the assembled sandwich for a sweet-spicy combination.
- Bacon and cheese: Add crispy bacon strips and a slice of melted cheddar or pepper jack cheese to the assembled sandwich.
- Lemon pepper: Add lemon zest and extra black pepper to the panko coating for a bright, zesty flavor profile.
Dietary Adaptations
- Gluten-free: Substitute one cup of gluten-free all-purpose flour for regular flour and use gluten-free panko breadcrumbs for a sandwich safe for celiac diets, though the texture may be slightly less crispy.
- Dairy-free: Use vegan mayonnaise instead of regular mayo; the sandwich remains fully dairy-free with no texture or flavor sacrifice.
- Vegan or vegetarian: Substitute thick-cut firm tofu, pounded to half-inch thickness, or a plant-based chicken alternative for the chicken breast; cook time may vary slightly.
- Low-carb or keto: Wrap the assembled sandwich in lettuce leaves instead of using buns, or serve the crispy chicken over greens as a salad topper.
Storage and Reheating
Refrigerator
Store cooked chicken and assembled sandwiches separately for best results. Keep the crispy chicken in an airtight container for up to 3 days, and store toppings in separate containers.
- Cooked chicken: up to 3 days in an airtight container
- Assembled sandwiches: up to 1 day, though the bun will soften
- Toppings like lettuce and tomato: 3 to 4 days in airtight containers
Freezer
Freeze cooked chicken breasts without toppings for maximum storage life. Wrap each piece in foil or plastic wrap and place in a freezer bag for up to 2 months.
- Cooked chicken: up to 2 months when wrapped individually
- Do not freeze assembled sandwiches as the bread becomes soggy after thawing
Reheating
To restore crispiness, reheat cooked chicken in a 375-degree oven for 8 to 10 minutes instead of microwaving. A skillet over medium heat for 3 to 4 minutes per side also works well for maintaining crunch.
- Oven method: 375 degrees for 8 to 10 minutes for best crispiness
- Skillet method: medium heat for 3 to 4 minutes per side
- Avoid the microwave as it makes the coating soggy
Nutrition Information
| Nutrient | Amount |
|---|---|
| Calories | 520 |
| Total Fat | 18g |
| Saturated Fat | 3g |
| Carbohydrates | 48g |
| Fiber | 2g |
| Sugar | 5g |
| Protein | 42g |
| Sodium | 780mg |
| Cholesterol | 125mg |
Nutritional values are approximate and based on standard ingredients. Actual nutrition will vary based on specific brands and portion sizes used.
Frequently Asked Questions
Can I make this sandwich ahead of time?
You can prepare the chicken breasts up to a day ahead by pounding and breading them, then storing them in the refrigerator on a parchment-lined plate. Fry them fresh just before serving for maximum crispiness.
What’s the best way to keep the coating from falling off?
Don’t skip the flour layer and make sure you press the panko firmly onto the egg-coated chicken. Letting the breaded chicken rest for 5 minutes before frying also helps the coating adhere better.
Can I use chicken thighs instead of breasts?
Yes, chicken thighs work great and stay juicier than breasts. Pound them to about three-quarters of an inch thickness and fry for 7 to 8 minutes per side until the internal temperature reaches 165 degrees.
How do I prevent the chicken from drying out?
Pound the chicken to even thickness, don’t cook beyond 165 degrees internal temperature, and let it rest on paper towels for a minute after frying. These steps keep the meat tender and juicy.
Can I bake this instead of pan-frying?
You can bake breaded chicken at 400 degrees for 15 to 18 minutes, but it won’t achieve the same golden-brown crispy exterior. For best results, stick with pan-frying or use an air fryer at 375 degrees for 12 to 14 minutes.
What if I don’t have panko breadcrumbs?
Regular breadcrumbs work fine but will give you a less crunchy texture. You can also crush cornflakes or crackers into crumb-sized pieces for a different crunchy coating option.
Final Thoughts
This crispy chicken sandwich proves that restaurant-quality food doesn’t require complicated techniques or hours in the kitchen. The simple three-step breading process and quick pan-fry method deliver results that feel fancy but taste like comfort.
Make this sandwich for a weeknight dinner, a casual lunch, or when you want to impress someone without the fuss. Once you master this basic technique, you’ll find yourself making it again and again because it’s that satisfying.
Explore More Chicken Recipes
If you loved this crispy chicken sandwich, you’ll want to explore more delicious chicken dishes to expand your cooking repertoire.
Try a chicken cutlet recipe for another quick and versatile weeknight option. You might also love this chicken thigh marinade recipe for a juicy, flavorful variation on poultry dishes.
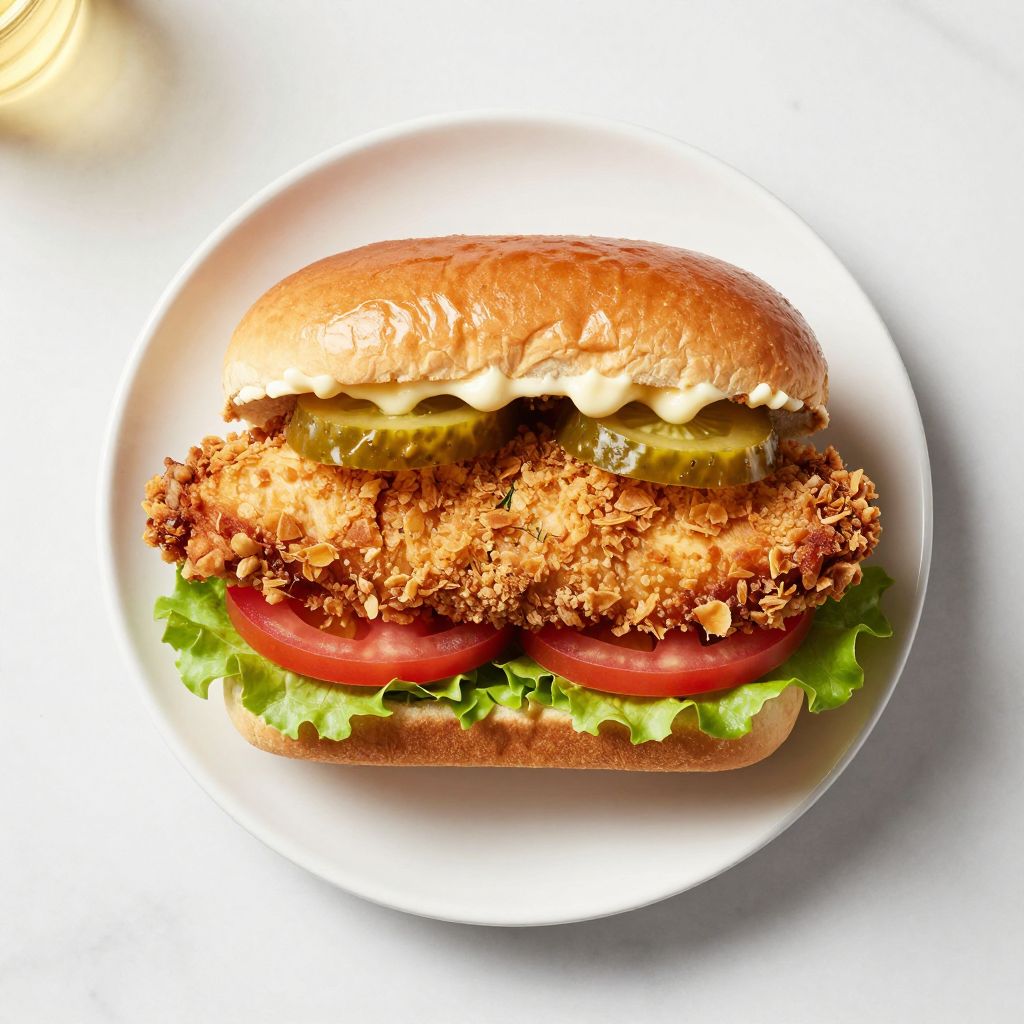
Crispy Chicken Sandwich
Ingredients
Equipment
Method
- Pound each chicken breast to an even thickness of about 1/2 inch using a meat mallet or rolling pin.
- Arrange three shallow bowls on a work surface and fill one with flour, one with beaten eggs, and one with panko mixed with garlic powder, paprika, cayenne, salt, and black pepper.
- Dredge each chicken breast in the flour, shaking off excess.
- Dip the floured chicken into the beaten eggs, allowing excess to drip back into the bowl.
- Press the egg-coated chicken into the panko mixture until fully covered on both sides.
- Heat vegetable oil in a large skillet over medium-high heat for about 2 minutes until shimmering.
- Pan-fry the chicken breasts for 5 to 6 minutes on each side, or until golden brown and the internal temperature reaches 165°F on a meat thermometer.
- Transfer the cooked chicken to a paper towel-lined plate to drain and rest for 2 minutes. Meanwhile, spread mayonnaise on brioche buns and toast in the same skillet for 1 minute per side until golden.
- Assemble each sandwich by layering chicken, lettuce, tomato slices, and a pickle on the bottom bun, then topping with the other bun half and serving immediately.