
The smell of real vanilla filling your kitchen is something that store-bought extract simply cannot replicate.
Vanilla paste is a game-changer for any baker or cook who takes their vanilla seriously. Made from scraped vanilla bean pods blended with a touch of sweetener and liquid, this paste delivers pure, concentrated vanilla flavor with those gorgeous little black specks that scream homemade quality. Unlike extract, which fades during baking, paste holds its intensity through heat and adds visual appeal to everything from frosting to custard.
The best part? You can make it at home in minutes with just three ingredients, and it costs a fraction of what premium brands charge.
Why You’ll Love This Recipe
Homemade vanilla paste tastes brighter and more complex than anything you’ll find on a grocery shelf. You control every ingredient, skip the alcohol content if you want, and save money while impressing everyone who notices those signature vanilla bean flecks in your baking.
- Pure vanilla flavor that stands up to heat and doesn’t fade in baked goods
- Beautiful visual appeal with real vanilla bean specks throughout
- Cheaper than premium commercial pastes when made at home
- No artificial additives or mysterious ingredients
- Lasts months in the fridge, so one batch goes a long way
My Experience Making This Recipe
I first made vanilla paste on a whim after spending way too much on a tiny jar of the fancy stuff at a specialty shop. I couldn’t believe how simple it was and how quickly the vanilla beans transformed into that silky, aromatic paste.
The moment I scraped those first pods, my entire kitchen smelled incredible. Within minutes, I had a jar of paste that outperformed the expensive version in my pantry.
Since then, I’ve made batches for gifts and kept one constantly in rotation. Friends always ask what’s different about my cakes and cookies, and the answer is usually this paste stirred into the batter.
Recipe Overview
- Recipe Name: Homemade Vanilla Paste
- Servings: Makes about 1/2 cup (approximately 24 teaspoons)
- Prep Time: 10 minutes
- Cook Time: 0 minutes
- Total Time: 10 minutes
- Course: Ingredient/Condiment
- Cuisine: French-inspired
- Calories per Serving: 20 calories per teaspoon
Equipment You Will Need
- Sharp chef’s knife or vanilla bean scraper
- Small cutting board
- Blender or food processor
- Rubber spatula
- Glass jar with a tight-fitting lid
- Measuring spoons
- Fine-mesh strainer (optional, for a smoother paste)
Ingredients for Vanilla Paste
- 2 vanilla beans (Grade A or Grade B, fresh and flexible)
- 2 tablespoons granulated sugar
- 1 tablespoon water or vodka
Ingredient Notes and Substitutions
- Vanilla Beans: These pods contain the tiny seeds and oils that give the paste its flavor and appearance. Grade A beans are prettier but more expensive, while Grade B beans offer equally robust flavor at lower cost. If fresh vanilla beans are unavailable, use 3 to 4 beans if they’re older and drier, as they’ll contain less moisture.
- Granulated Sugar: Sugar acts as a preservative and helps break down the beans into a paste consistency. You can swap in coconut sugar or organic cane sugar, though the flavor profile will shift slightly and the paste may be grittier until it sits for a day.
- Water or Vodka: Water creates a paste that needs refrigeration, while vodka adds a slight preservative boost and extends shelf life. For alcohol-free paste, use water, almond extract thinned with water, or even a splash of vanilla extract to intensify flavor.
How to Make Vanilla Paste
Step 1: Select and Inspect Your Vanilla Beans
Grab 2 fresh vanilla beans and bend them gently. They should flex without cracking, which means they’re fresh and pliable. If they snap or feel brittle, they’re too old and will yield a thinner paste with less aroma.
Step 2: Cut the Beans in Half Lengthwise
Place a vanilla bean on your cutting board and use a sharp knife to slice it lengthwise down the middle. This splits the pod open so you can access all those tiny seeds inside.
Step 3: Scrape Out the Seeds
Using the back of your knife or a dedicated vanilla bean scraper, drag along the inside of each pod half to release all the seeds and the moist interior. You’ll collect a dark, fragrant paste on your scraper—this is liquid gold for your recipe.
Step 4: Combine Seeds and Sugar in Your Blender
Scrape all the seeds into your blender or food processor bowl, then add the granulated sugar. The sugar will help the blades break down any remaining clumps and extract more flavor from the seeds.
Step 5: Add Your Liquid
Pour in 1 tablespoon of water or vodka, depending on your preference. Water works fine, but vodka helps prevent mold growth and extends shelf life, making it ideal if you’re planning to store the paste for several months.
Step 6: Blend Until Smooth
Pulse the blender a few times, then blend on high for 30 to 45 seconds until the mixture becomes a thick, creamy paste with tiny vanilla specks throughout. Stop and scrape down the sides once if needed to ensure even blending.
Step 7: Optional Straining for Ultra-Smooth Texture
If you prefer a smoother paste without any grit, push the blended mixture through a fine-mesh strainer into a clean bowl. Use the back of a rubber spatula to press it through, which takes about a minute but yields a refined result.
Step 8: Transfer to Your Storage Jar
Use a rubber spatula to scrape every last bit of paste into a clean glass jar with a tight-fitting lid. Make sure the jar is completely dry before filling to prevent water from thinning your paste or encouraging mold.
Pro Tip: Buy vanilla beans in bulk from specialty spice retailers or online suppliers, where they cost less than half the price of supermarket pods and often taste fresher.
Tips for the Best Vanilla Paste
- Choose beans that smell strongly of vanilla and feel slightly moist to the touch, as these will yield the most flavorful paste with the best texture.
- Make paste in small batches every 2 to 3 months so you always have fresh product on hand with peak flavor and aroma.
- Store your jar in a cool, dark cupboard away from direct sunlight, which degrades vanilla’s delicate flavor compounds over time.
- If your paste thickens too much over time, stir in a few drops of water or vodka to loosen it back to a spoonable consistency.
- Use a small spoon or measuring spoon to scoop paste so you don’t introduce moisture or bacteria into the jar with wet utensils.
- One teaspoon of homemade vanilla paste replaces one teaspoon of extract in any recipe, so conversions are straightforward and easy.
Common Mistakes to Avoid
- Buying old or brittle vanilla beans that snap instead of bending will result in weak flavor and a gritty paste that never fully softens.
- Skipping the blending step and simply mashing beans by hand leaves you with chunks and an uneven texture that works against smooth batter incorporation.
- Using too much liquid turns your paste into a thin syrup that won’t provide the same intensity as true paste, so stick to the exact measurement.
- Storing the paste in plastic instead of glass allows the vanilla to degrade faster and can impart a subtle plastic flavor to your paste.
- Screwing down the jar lid while the paste is still warm traps steam inside, which can encourage mold growth or thin your paste with excess moisture.
Serving Suggestions
Use vanilla paste anywhere you’d normally reach for vanilla extract, but expect even better flavor and visual results. The paste works beautifully in frostings, custards, whipped creams, and anywhere you want that speckled, artisanal look.
- Fold into buttercream frosting for layer cakes and cupcakes, where the specks add genuine visual elegance
- Stir into custard, crème brûlée, or panna cotta for restaurant-quality depth and appearance
- Mix into sweetened whipped cream for berries, desserts, or coffee drinks
- Add to cookie dough, cake batter, and muffin batter for enhanced vanilla flavor that bakes stable
- Swirl into homemade ice cream during churning for gorgeous flecks and complex vanilla notes
Variations to Try
- Bourbon Vanilla Paste: Soak your scraped vanilla pods in 2 tablespoons of bourbon for 24 hours, then blend with sugar as written for a warming, slightly boozy paste ideal for cocktails and desserts meant for adults.
- Maple Vanilla Paste: Replace half the sugar with pure maple syrup and proceed normally for a paste with subtle caramel notes that shines in custards and glazes.
- Extra-Thick Paste: Reduce the liquid to just 1.5 teaspoons and blend longer to create a paste so thick it clings to a spoon, perfect for decorating or for recipes where you want maximum vanilla impact without extra moisture.
- Spiced Vanilla Paste: Add 1/4 teaspoon of ground cinnamon and a pinch of nutmeg to the blender before processing for a paste that works beautifully in fall baking and warm spiced desserts.
- Brown Sugar Vanilla Paste: Swap the granulated sugar for packed brown sugar to create a paste with caramel and molasses undertones that pairs wonderfully with chocolate and spice-forward recipes.
Dietary Adaptations
- Gluten-Free: Vanilla paste is naturally gluten-free, so no changes needed. Simply use it in your gluten-free baking recipes as you would extract.
- Dairy-Free: The paste itself contains no dairy. When using it in recipes, swap any dairy ingredients in that recipe for non-dairy alternatives.
- Vegan: Vanilla paste is fully vegan since it contains only vanilla beans, sugar, and water or vodka. It works perfectly in all plant-based baking.
- Low-Carb or Keto: Replace the granulated sugar with erythritol or monk fruit sweetener in equal amounts, though the texture will be slightly less creamy.
Storage and Reheating
Refrigerator
Store your vanilla paste in a glass jar with a tight-fitting lid in the refrigerator for up to 4 months. The cold keeps the paste fresh and prevents any fermentation or spoilage.
- Always use a clean, dry spoon when scooping to avoid introducing moisture or bacteria
- If a thin layer of liquid separates on top, simply stir it back in before using
- Cover tightly after each use so the paste doesn’t absorb odors from the fridge
Freezer
Vanilla paste freezes beautifully for up to one year in an airtight container or ice cube tray. Freezing pauses all degradation and preserves peak flavor longer than refrigeration alone.
- Freeze paste in ice cube trays for easy portioning, then pop cubes into a freezer bag once solid
- Label your container with the date so you remember when it was made
- Thaw cubes at room temperature for 10 minutes before using in recipes
Reheating
Vanilla paste doesn’t require reheating since you use it cold or at room temperature in baking. Simply thaw frozen portions before stirring into your batter or frosting.
- If paste seems too thick after thawing, let it sit at room temperature for 15 minutes to soften
- Stir gently before using to redistribute any separated liquid or sugar crystals
Nutrition Information
| Nutrient | Amount |
|---|---|
| Calories | 20 |
| Total Fat | 0g |
| Saturated Fat | 0g |
| Carbohydrates | 5g |
| Fiber | 0g |
| Sugar | 5g |
| Protein | 0g |
| Sodium | 0mg |
| Cholesterol | 0mg |
Nutritional values are approximate and based on using granulated sugar and water. Values may vary slightly depending on your specific ingredients and preparation method.
Frequently Asked Questions
Can I Make Vanilla Paste with Vanilla Extract Instead?
No, vanilla extract lacks the vanilla bean solids needed to create actual paste texture and those signature black specks. You’d end up with a thin liquid rather than the thick, spreadable consistency that defines real vanilla paste.
How Much Vanilla Paste Should I Use to Replace Extract?
Use one teaspoon of vanilla paste for every one teaspoon of vanilla extract called for in your recipe. The paste delivers similar vanilla intensity but with added visual appeal and superior flavor stability under heat.
What’s the Difference Between Grade A and Grade B Vanilla Beans?
Grade A beans are longer, prettier, and contain higher moisture, making them ideal for display or steeping. Grade B beans are shorter and drier but pack equally potent flavor for cooking and paste-making, so they’re the smarter budget choice for this recipe.
Why Did My Paste Turn Out Grainy or Gritty?
Graininess usually means the sugar didn’t fully dissolve or blend into the paste. Next time, blend longer on high speed, or use a food processor instead of a blender for better grinding power.
Can I Use Vanilla Pods That I’ve Already Steeped in Something Else?
You can, but the paste will be weaker since the pods already gave up much of their flavor. Save used pods to steep in spirits for vanilla extract instead, which works better for exhausted beans.
How Do I Know If My Vanilla Paste Has Gone Bad?
Discard the paste if it smells sour, develops mold, or shows signs of fermentation like bubbling. Fresh vanilla paste always smells intensely aromatic and dark, rich in color.
Final Thoughts
Making your own vanilla paste shifts your entire approach to baking and cooking. You’ll stop settling for mediocre vanilla flavor and start noticing the difference in every dessert that contains it.
This simple recipe pays for itself after just a couple of batches, and homemade paste makes an impressive gift that any baker or cook will treasure. Give it a try and taste the difference real vanilla can make.
Explore more ways to enhance your baking by trying this vanilla bean paste recipe for variations, or discover complementary ingredients like vanilla sugar recipe to round out your homemade vanilla collection.
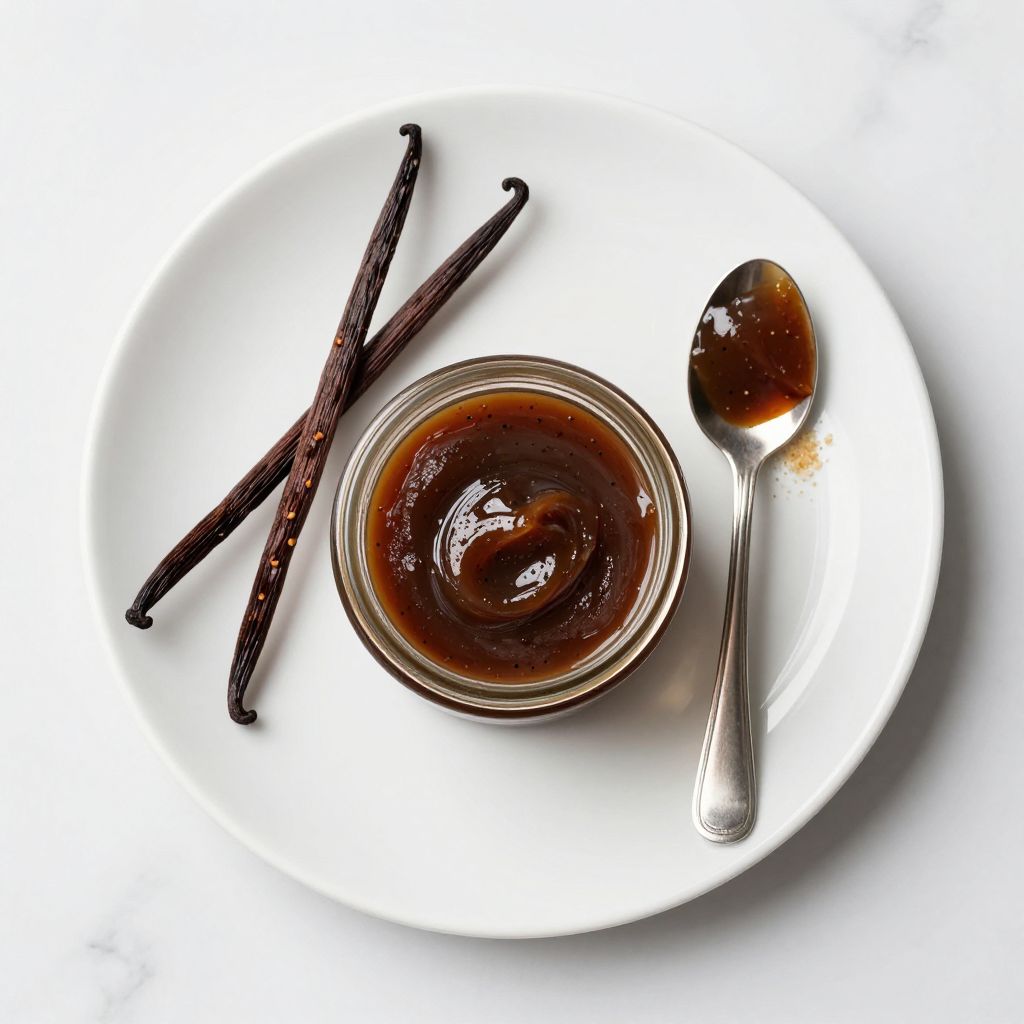
Homemade Vanilla Paste
Ingredients
Equipment
Method
- Step 1: Select and inspect your vanilla beans by bending them gently to ensure they flex without cracking.
- Step 2: Cut each vanilla bean in half lengthwise using a sharp knife.
- Step 3: Scrape out the seeds from each pod half with the back of your knife or a vanilla bean scraper.
- Step 4: Combine the scraped seeds and 2 tablespoons granulated sugar in a blender or food processor.
- Step 5: Add 1 tablespoon water or vodka to the blender.
- Step 6: Blend on high for 30 to 45 seconds until a thick, creamy paste forms, scraping down the sides as needed.
- Step 7 (Optional): For a smoother texture, strain the paste through a fine-mesh strainer, pressing with a rubber spatula for about 1 minute.
- Step 8: Transfer the paste into a clean, dry glass jar with a tight-fitting lid using a rubber spatula.