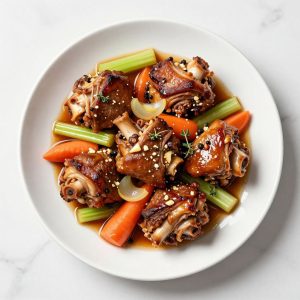
The smell of turkey necks simmering in a pot with aromatics and broth is pure comfort, and it’s a secret many home cooks overlook when planning their weeknight dinners. Turkey neck recipe transforms an inexpensive, often-ignored cut into rich, flavorful meat that falls off the bone and makes the most incredible gravy or broth you’ve ever tasted.
What makes this dish so special is how forgiving and versatile it is; whether you braise it low and slow, add it to soups, or use it as a base for stock, turkey necks deliver deep, savory flavor without fuss. The meat becomes incredibly tender when cooked properly, and the bones release gelatin that gives your cooking liquid body and richness that you simply cannot replicate any other way.
Why You’ll Love This Recipe
Turkey necks are budget-friendly, packed with flavor, and perfect for anyone who wants restaurant-quality results at home without spending a fortune.
- Incredibly tender, fall-off-the-bone meat after braising
- Creates a rich, silky cooking liquid perfect for gravy or soup
- One-pot simplicity with minimal active cooking time
- Makes your whole kitchen smell amazing
- Freezes beautifully for meal prep and batch cooking
My Experience Making This Recipe
I first made braised turkey necks on a cold October evening when I was experimenting with budget cuts, and I was absolutely shocked at how good they turned out. The meat was so tender and flavorful that my skeptical family asked for seconds, which never happens when I’m testing new recipes.
What surprised me most was how much gelatin released into the braising liquid, creating this silky, luxurious sauce without any cream or heavy ingredients. Now I make them regularly, and I always save the cooking liquid to use as a base for turkey soup the next week.
The best part is that these require almost no hands-on time; you brown them, add your aromatics and liquid, and then let the oven do all the work while you relax. My kids have started requesting turkey neck dinners, which tells you everything you need to know about how good this recipe actually is.
Recipe Overview
- Recipe Name: Braised Turkey Necks with Vegetables
- Servings: 4
- Prep Time: 15 minutes
- Cook Time: 2 hours
- Total Time: 2 hours 15 minutes
- Course: Main Dish
- Cuisine: American Comfort Food
- Calories per Serving: 385
Equipment You Will Need
- Large heavy-bottomed Dutch oven or large braising pan with a lid
- Sharp chef’s knife for chopping vegetables
- Tongs for flipping the turkey necks
- Paper towels for patting the meat dry
- Wooden spoon for stirring
- Meat thermometer to check for doneness
- Fine mesh strainer if you plan to strain the cooking liquid
- Measuring cups and spoons
Ingredients for Braised Turkey Necks with Vegetables
- Turkey necks: 3 to 4 pounds (about 4 to 5 necks)
- Olive oil: 3 tablespoons
- Yellow onion: 1 large, coarsely chopped
- Carrots: 3 medium, cut into 2-inch pieces
- Celery: 3 stalks, cut into 2-inch pieces
- Garlic cloves: 4, minced
- Chicken or turkey broth: 4 cups
- Dry white wine: 1 cup (or additional broth if you prefer)
- Fresh thyme: 3 sprigs
- Bay leaves: 2
- Black peppercorns: 8 to 10
- Salt: 1.5 teaspoons, plus more to taste
- Ground black pepper: 0.5 teaspoon, plus more to taste
Ingredient Notes and Substitutions
- Turkey necks: These are the star; they contain a high ratio of bone to meat, which releases gelatin for silky sauce. You can substitute chicken necks, but cook them for only 1 hour 15 minutes instead of 2 hours.
- Olive oil: Use neutral oil like vegetable or canola oil if you don’t have olive oil on hand. Olive oil adds a subtle richness, but the choice won’t make a major difference in the final dish.
- Yellow onion: Substitute white or red onion in equal amounts; the flavor profile will shift slightly, but the result will still be delicious.
- Chicken or turkey broth: Homemade broth is ideal for deeper flavor, but quality store-bought low-sodium broth works perfectly well. Avoid overly salty broth, which will concentrate during cooking and make your dish too salty.
- Dry white wine: Skip it entirely and use 5 cups of broth instead, or substitute with apple cider vinegar (2 tablespoons) mixed with broth for a subtle tang.
- Fresh thyme: Dried thyme works; use 1 teaspoon instead of fresh sprigs, or try rosemary or oregano for a different flavor direction.
How to Make Braised Turkey Necks with Vegetables
Step 1: Prepare and Season the Turkey Necks
Pat the turkey necks dry with paper towels and season generously on all sides with salt and black pepper. Dry meat browns better in the pan, which means better flavor development through the Maillard reaction, the chemical process that creates those delicious browned bits.
Step 2: Brown the Turkey Necks
Heat the olive oil in your Dutch oven over medium-high heat until it shimmers and is nearly smoking. Working in batches if needed to avoid crowding, place the turkey necks in the pot skin-side down and let them brown undisturbed for 4 to 5 minutes, then flip and brown the other side for another 3 to 4 minutes until deeply golden brown.
This browning step is not optional; it creates a flavorful crust that gives the entire dish depth and complexity. Remove the turkey necks to a clean plate and set aside.
Step 3: Sauté the Aromatics
In the same pot with the browned bits still stuck to the bottom, add the chopped onion, carrots, and celery and cook over medium heat for 5 to 7 minutes, stirring occasionally, until the vegetables begin to soften and the onion turns translucent. Add the minced garlic and cook for 1 minute more until fragrant, scraping up any browned bits from the bottom of the pot with your wooden spoon.
Step 4: Deglaze the Pot
Pour in the dry white wine and use your wooden spoon to scrape up all the flavorful browned bits stuck to the bottom of the pot. Let the wine reduce for 2 to 3 minutes, which burns off most of the alcohol and concentrates the flavor.
Step 5: Add Broth and Seasonings
Pour in the broth and return the turkey necks to the pot, nestling them among the vegetables so they’re mostly submerged but not completely covered. Add the fresh thyme sprigs, bay leaves, black peppercorns, and salt.
Step 6: Bring to a Simmer
Bring the liquid to a gentle simmer over medium-high heat, then immediately reduce the heat to low. The liquid should barely bubble, with just a few wisps of steam rising; a rolling boil will make the meat tough and shrivel the skin.
Step 7: Braise in the Oven
Cover the pot with a lid and transfer it to a preheated 325 degree Fahrenheit oven for 1 hour 45 minutes to 2 hours. The low, gentle heat environment of the oven produces incredibly tender, fall-apart meat and allows all the flavors to meld together beautifully.
Check the necks at the 1.5-hour mark; the meat should shred easily when pierced with a fork, and the internal temperature should register 165 to 170 degrees Fahrenheit on a meat thermometer. If the meat is still tough, cover and cook for another 15 to 30 minutes.
Step 8: Rest and Serve
Remove the pot from the oven and let the turkey necks rest in the braising liquid for 5 to 10 minutes. This allows the juices to redistribute throughout the meat, keeping it moist and tender.
Carefully remove the necks from the liquid and shred the meat from the bones or leave it in chunks depending on your preference. Taste the braising liquid and adjust salt and pepper as needed, then serve the meat with vegetables and plenty of the silky sauce spooned over top.
Pro Tip: Don’t skip the browning step; those golden, caramelized edges create a depth of flavor that separates good braised turkey necks from extraordinary ones.
Tips for the Best Braised Turkey Necks
- Use a heavy-bottomed pot that distributes heat evenly; this prevents hot spots that can cause the liquid to boil aggressively on one side and stay cool on the other.
- Keep the heat low and steady throughout braising; rapid boiling will toughen the meat and cause the skin to shrivel up instead of becoming tender.
- Add the vegetables in stages if you prefer them less soft; start with the harder vegetables like carrots and celery first, then add tender vegetables like peas or zucchini in the last 30 minutes of cooking.
- Save the braising liquid after removing the meat; it makes incredible turkey soup, gravy, or gelatin-rich broth that you can freeze for future cooking.
- Taste and season at the very end, not during cooking, because the liquid reduces and concentrates flavors, making it easy to over-salt early on.
- For extra richness, whisk a spoonful of the braising liquid into softened butter or a cornstarch slurry to thicken it into gravy.
Common Mistakes to Avoid
- Skipping the browning step will result in pale, one-dimensional flavor instead of the deep, caramelized richness that makes this dish special.
- Using a pot that’s too small causes the necks to be stacked on top of each other, which leads to uneven cooking and some pieces being tougher than others.
- Cooking at too high a temperature toughens the meat and causes the skin to become rubbery instead of tender and succulent.
- Not patting the meat dry before browning creates steam instead of a golden crust, which means less flavor development.
- Crowding the pan during browning steams the meat rather than searing it, so brown in batches if you have a lot of turkey necks.
Serving Suggestions
Serve these braised turkey necks with something that can soak up all that delicious, silky braising liquid, because that sauce is honestly the best part of the dish. Pair with creamy mashed potatoes, crusty bread, soft polenta, or tender egg noodles to make the meal feel complete and satisfying.
- Creamy mashed potatoes with roasted garlic to catch every drop of sauce
- Soft egg noodles tossed with a touch of butter for comfort food perfection
- Crusty sourdough bread for dunking and wiping the plate clean
- Creamy polenta topped with the shredded meat and braising liquid
- Rice pilaf with herbs to absorb the rich, gelatin-laden sauce
Variations to Try
- Add diced potatoes, parsnips, or turnips to the pot in the last 30 minutes of cooking for a complete one-pot meal that needs nothing else.
- Swap the white wine for red wine and add tomato paste and a pinch of cinnamon for a richer, deeper flavor profile inspired by Mediterranean cooking.
- Make it spicy by adding 0.5 teaspoon of red pepper flakes and a splash of hot sauce to the braising liquid for a kick that complements the rich meat.
- Create a Cajun version by adding diced bell peppers, okra, and a touch of file powder or cayenne pepper to the mix.
- Go Asian-inspired by replacing the white wine with soy sauce, adding fresh ginger, star anise, and a touch of sesame oil for an entirely different flavor direction.
Dietary Adaptations
- Gluten-free: This recipe is naturally gluten-free as written; just verify your broth label to ensure it contains no gluten, and you’re all set with no modifications needed.
- Dairy-free: The recipe contains no dairy, so it’s already dairy-free; simply serve with dairy-free sides like mashed sweet potatoes or rice if you prefer.
- Low-carb or keto: Skip starchy vegetables like potatoes and serve instead with a large salad or roasted low-carb vegetables like cauliflower, zucchini, or Brussels sprouts.
- Vegan or vegetarian: Substitute mushroom stems and hearty vegetables like cauliflower steak for the turkey necks, reduce cooking time to 1 hour, and use vegetable broth for a plant-based version that’s equally delicious.
Storage and Reheating
Refrigerator
Store cooled braised turkey necks in an airtight container with the braising liquid for up to 4 days. The meat actually tastes better after a day in the fridge as all the flavors continue to meld and develop.
- Keep the meat submerged in the liquid to prevent it from drying out
- Transfer to the freezer if you won’t eat within 4 days
Freezer
Freeze braised turkey necks in their braising liquid in airtight freezer containers or heavy-duty freezer bags for up to 3 months. The fat and gelatin in the liquid protect the meat and keep it moist through freezing.
- Lay flat freezer bags on a sheet pan to freeze, then stand upright to save space
- Label with the date so you know when you made it
Reheating
Thaw overnight in the refrigerator, then reheat gently in a covered pot over medium-low heat for 15 to 20 minutes, stirring occasionally. You can also reheat directly from frozen in a covered pot over low heat for 45 minutes to 1 hour, checking occasionally until heated through.
- Don’t boil vigorously, which will toughen the meat
- Add a splash of broth if the liquid has reduced too much
Nutrition Information
| Nutrient | Amount |
|---|---|
| Calories | 385 |
| Total Fat | 18 grams |
| Saturated Fat | 5 grams |
| Carbohydrates | 8 grams |
| Fiber | 2 grams |
| Sugar | 3 grams |
| Protein | 48 grams |
| Sodium | 620 milligrams |
| Cholesterol | 95 milligrams |
These values are estimates based on 4 servings of braised turkey necks with vegetables cooked in the recipe as written, and may vary depending on specific brands and exact portion sizes you use.
Frequently Asked Questions
Can I use frozen turkey necks?
Yes, absolutely; thaw them completely in the refrigerator overnight before browning them. Wet meat from thawing won’t brown properly, so pat them dry before putting them in the hot oil.
What if I don’t have a Dutch oven?
You can use any heavy-bottomed pot with a tight-fitting lid, like a large stockpot or even a large oven-safe skillet with foil tented on top. The key is that the pot needs to be oven-safe and able to hold the meat and liquid comfortably.
Can I make this on the stovetop instead of the oven?
Yes, reduce the heat to very low and partially cover the pot so the liquid barely simmers; cook for 2 to 2.5 hours instead of 2 hours in the oven. Check on it every 30 minutes and stir gently to ensure even cooking.
How do I know when the turkey necks are done?
The meat should shred easily when pierced with a fork, and a meat thermometer inserted into the thickest part should read 165 to 170 degrees Fahrenheit. If you can tear the meat apart by hand without resistance, you’ve nailed it.
Can I make this in a slow cooker?
You can brown the necks in a separate pot, then transfer everything to a slow cooker on low for 6 to 8 hours, or on high for 4 to 5 hours. The results won’t be quite as caramelized without the oven’s dry heat, but the meat will be very tender.
What’s the difference between turkey necks and chicken necks?
Turkey necks are larger, meatier, and take longer to cook than chicken necks, which are more delicate and cook in about 1 hour 15 minutes instead of 2 hours. Turkey necks have more bone relative to meat, which creates a more gelatinous, silky sauce.
Final Thoughts
This turkey neck recipe has genuinely changed how I think about budget-friendly cuts of meat and what’s possible with simple, patient cooking. If you’ve been intimidated by cooking turkey necks or have just passed them by at the butcher counter, I encourage you to grab a package and give this braised version a shot.
The combination of deep browning, gentle braising, and aromatic vegetables creates something truly special that tastes like you’ve been cooking all day. Your family will ask for this again and again, and your wallet will thank you for choosing such an affordable, delicious main course that feels elegant enough for company.
Explore More Turkey Recipes
Now that you’ve mastered braised turkey necks, you might want to explore other delicious turkey cooking methods and cuts that deliver serious flavor without the fuss.
Learn how to take your turkey preparations to the next level with a turkey injection recipe that keeps the meat incredibly moist and flavorful. You can also discover another fantastic cut by trying a turkey wings recipe that’s equally tender and satisfying.
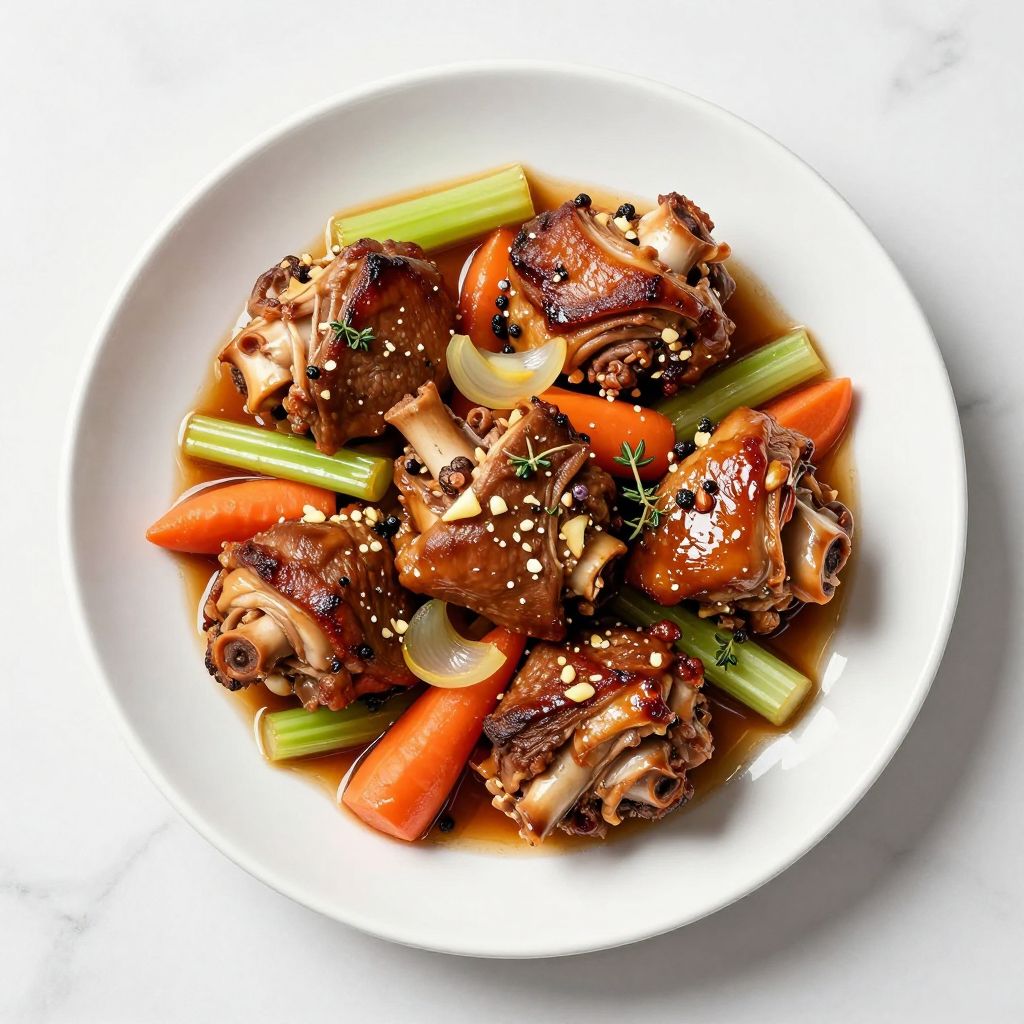
Braised Turkey Necks with Vegetables
Ingredients
Equipment
Method
- Pat the turkey necks dry with paper towels and season all sides with salt and ground black pepper.
- Heat the olive oil in a Dutch oven over medium-high heat until shimmering.
- Add turkey necks and brown skin-side down undisturbed for 4 to 5 minutes, then flip and brown the other side for 3 to 4 minutes.
- Remove the turkey necks and set aside.
- Add onion, carrots, and celery to the pot and cook over medium heat for 5 to 7 minutes until softened.
- Stir in garlic and cook for 1 minute until fragrant.
- Pour in white wine and scrape up browned bits; reduce for 2 to 3 minutes.
- Add broth, return turkey necks to the pot, and add thyme, bay leaves, and peppercorns.
- Bring to a gentle simmer on the stovetop, then cover and transfer to a 325°F oven.
- Braise in the oven for 1 hour 45 minutes to 2 hours until meat is tender and reaches 165°F.
- Remove from oven and let rest in the liquid for 5 to 10 minutes.
- Shred meat from the bones or serve in chunks with vegetables and spoon the sauce over top.