
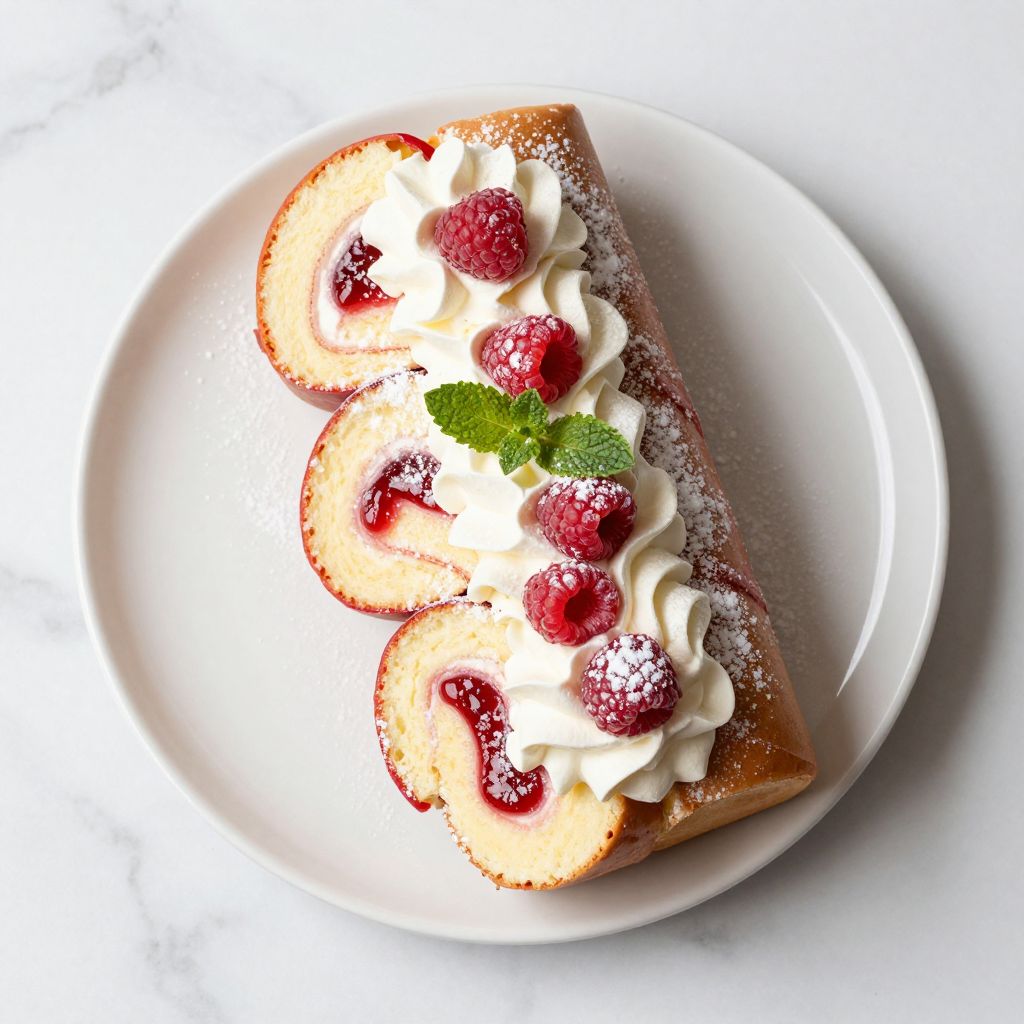
Imagine biting into a slice of sponge cake wrapped around a ribbon of bright jam and fluffy cream, and you’ve got the magic of a jelly roll right there on your plate.
This classic British dessert has been delighting home bakers for generations because it strikes the perfect balance between elegant presentation and simple execution.
What makes a jelly roll special is its tender, springy cake paired with that sweet jam and the silky cream filling, all rolled into a compact spiral that looks far more impressive than it is to make.
Whether you’re baking for a special occasion or just craving something nostalgic and comforting, this recipe delivers consistent results every time.
Why You’ll Love This Recipe
A jelly roll comes together faster than most layer cakes and yields stunning slices that impress without demanding hours in the kitchen.
- Light, spongy cake that’s soft enough to roll without cracking
- Only four main ingredients for the filling, so no complicated components
- Looks restaurant-quality despite being completely doable at home
- Perfect for tea time, dessert platters, or gift-giving to friends
- Adaptable filling options mean you can customize flavors to suit any preference
My Experience Making This Recipe
The first time I attempted a jelly roll, I was terrified the cake would tear when I rolled it, so I watched three YouTube videos beforehand just to feel confident. Turns out, the real secret is not overbaking the sponge and working quickly while it’s still warm, which nobody really emphasizes enough.
When I pulled my first roll out of the oven and dusted it with icing sugar, my kitchen suddenly smelled like a proper bakery and my family gathered around like I’d just won a baking competition. The jam and cream inside looked perfect, the slices were neat, and honestly, the whole thing took me less than an hour from start to finish.
Now I make this whenever I want to feel like a proper baker without the stress, and every single time someone asks for the recipe because they can’t believe how restaurant-quality it tastes.
Recipe Overview
- Recipe Name: Classic Jelly Roll
- Servings: 8 slices
- Prep Time: 15 minutes
- Cook Time: 12 minutes
- Total Time: 45 minutes (including cooling and assembly)
- Course: Dessert
- Cuisine: British
- Calories per Serving: 245 calories
Equipment You Will Need
- 9×13 inch baking sheet or Swiss roll tin
- Parchment paper for lining
- Electric mixer or whisk
- Large mixing bowl
- Medium mixing bowl
- Sifter or fine mesh sieve
- Offset spatula or butter knife
- Clean kitchen towel
- Cooling rack
- Measuring cups and spoons
- Serrated knife for slicing
Ingredients for Classic Jelly Roll
For the Sponge Cake
- 3 large eggs, separated into yolks and whites
- 3/4 cup caster sugar or superfine sugar
- 3/4 cup self-raising flour, sifted
- 1 teaspoon vanilla extract
- 1 teaspoon baking powder
- Pinch of salt
- 2 tablespoons warm water
For the Filling
- 4 tablespoons good quality jam (strawberry, raspberry, or your favorite flavor)
- 1/2 cup heavy whipping cream
- 2 tablespoons powdered sugar
- 1/2 teaspoon vanilla extract
- Extra powdered sugar for dusting the finished roll
Ingredient Notes and Substitutions
- Caster Sugar: This fine sugar dissolves evenly into the egg mixture and creates a light, airy sponge that rolls without cracking. You can substitute with regular granulated sugar, though the texture may be slightly less delicate.
- Self-Raising Flour: This flour contains baking powder already mixed in, which helps the sponge rise quickly and stay tender. If you only have all-purpose flour, use 3/4 cup all-purpose flour plus 1 teaspoon baking powder.
- Jam: The acidity and pectin in jam help bind the filling and add flavor, plus jam sets as it cools, helping the roll hold its shape. You can swap any flavor of jam, or use lemon curd or a homemade fruit compote instead.
- Heavy Cream: Real whipped cream provides richness and airiness that complements the light sponge. Whipped coconut cream or mascarpone mixed with a touch of cream works for dairy-free options.
- Eggs: Room temperature eggs whip faster and incorporate more air, creating a fluffier cake that rolls without tearing. Cold eggs won’t reach the same volume even with longer beating.
How to Make Classic Jelly Roll
Step 1: Prepare Your Oven and Baking Sheet
Preheat your oven to 400 degrees Fahrenheit and line a 9×13 inch baking sheet with parchment paper, leaving an inch of overhang on the sides. This high heat ensures the sponge rises quickly and sets before it can dry out, while the parchment prevents sticking and lets you roll the cake easily.
Step 2: Separate and Prepare Your Eggs
Separate your eggs into two bowls, making sure no yolk gets into the whites, then let them sit at room temperature for 10 minutes. Yolk-free whites whip into stiff peaks much faster, and room temperature eggs incorporate air more efficiently than cold ones.
Step 3: Beat the Egg Yolks with Sugar
In a large bowl, beat the egg yolks with 3/4 cup caster sugar for about 3 minutes until the mixture turns pale yellow and thick like ribbons. This creaming process incorporates air and dissolves the sugar, which lightens the cake and helps it rise properly.
Step 4: Whip the Egg Whites to Stiff Peaks
In a separate, scrupulously clean bowl, whip the egg whites with a pinch of salt until they form stiff, glossy peaks that stand upright. Clean bowls matter here because even a tiny bit of grease prevents the whites from whipping to full volume, which means a denser cake.
Step 5: Fold in the Flour and Combine
Add the vanilla extract and warm water to your egg yolk mixture, then sift the flour and baking powder over the top and fold gently with a spatula until just combined. Fold in the whipped egg whites in two batches, being careful to keep the batter light and airy by not overmixing.
Step 6: Spread and Bake the Sponge
Pour the batter evenly onto your prepared baking sheet and smooth the top with an offset spatula, then bake for 12 to 14 minutes until the sponge is golden and springs back when lightly touched. Overbaking dries out the cake and makes it crack when you roll it, so watch carefully after 11 minutes.
Step 7: Turn Out and Cool the Cake
While the cake is still warm, lay a clean kitchen towel on a flat surface and carefully turn the cake out onto it, then peel away the parchment paper. Let the cake cool for about 5 minutes until it’s warm but not hot, which makes it pliable enough to roll without tearing.
Step 8: Prepare the Filling
While the cake cools, whip the heavy cream with 2 tablespoons powdered sugar and 1/2 teaspoon vanilla extract until soft peaks form. Soft peaks mean the cream holds a shape but still looks light and fluffy, not chunky or grainy like butter.
Step 9: Assemble the Roll
Spread the jam evenly over the warm cake, leaving a quarter-inch border on all sides, then spread the whipped cream over the jam in an even layer. Working from the long end closest to you, roll the cake tightly into a log using the towel to guide it, then slide it seam-side down onto a serving plate.
Step 10: Chill and Dust
Refrigerate the jelly roll for at least 30 minutes so the filling sets and the cake firms up, making it easier to slice cleanly. Just before serving, dust generously with powdered sugar, which adds a beautiful finish and a hint of sweetness.
Pro Tip: Don’t skip cooling the cake slightly before rolling it, and never roll it while it’s piping hot or while it’s completely cold, as both extremes cause cracking.
Tips for the Best Classic Jelly Roll
- Use a serrated knife dipped in hot water and wiped dry between each slice to get clean, neat edges without crushing the cake.
- Make sure your mixing bowls are completely grease-free by wiping them with vinegar before beating egg whites, which helps them reach maximum volume.
- If your jam is very thick or chunky, warm it slightly and push it through a sieve for an even, spreadable layer that won’t tear the cake.
- Don’t whip the cream to stiff peaks or it will turn grainy when you spread it, sticking to the cake and creating an uneven texture.
- Keep the rolled cake in the refrigerator until you’re ready to slice and serve so the filling stays firm and the cake doesn’t unravel.
- If you’re making this ahead, wrap the cooled roll tightly in plastic wrap and refrigerate for up to 2 days without dusting with powdered sugar until serving.
Common Mistakes to Avoid
- Overbaking the sponge causes it to crack and tear when you roll it, so aim for 12 to 13 minutes at 400 degrees and don’t go by color alone.
- Rolling the cake while it’s cold makes it stiff and brittle, leading to cracks, while rolling it piping hot makes it stick and tear apart.
- Overmixing the batter after folding in the egg whites deflates the cake and makes it dense instead of light and springy.
- Spreading the filling too thickly or too close to the edges causes it to squeeze out when you roll, making the outside messy and the filling uneven.
- Skipping the towel and trying to roll directly on the baking sheet causes the cake to stick and break apart instead of rolling smoothly into a log.
Serving Suggestions
Serve your jelly roll chilled with a hot cup of tea or coffee, and it becomes the perfect afternoon snack or elegant dessert for a small gathering. A dollop of extra whipped cream on top of each slice adds luxury, and fresh berries alongside the plate make it feel restaurant-quality.
- Serve with fresh whipped cream and a scatter of fresh berries on the plate
- Pair with a cup of Earl Grey tea or strong coffee for a traditional British tea time
- Add a drizzle of fresh fruit coulis or compote over each slice for extra flavor
- Dust with cocoa powder instead of powdered sugar if you want a chocolate twist
- Serve alongside a glass of sweet dessert wine or Prosecco for a special occasion
Variations to Try
- Chocolate Jelly Roll: Replace 2 tablespoons of flour with 2 tablespoons cocoa powder for a chocolate sponge, then fill with chocolate jam or chocolate cream instead of regular jam.
- Lemon and Cream Roll: Swap the jam for lemon curd and add the zest of one lemon to the batter, creating a bright, tangy flavor that feels fresh and summery.
- Raspberry and White Chocolate Roll: Use raspberry jam and add 2 ounces of melted white chocolate to the whipped cream filling for a sweeter, more luxurious taste.
- Passion Fruit Roll: Replace jam with passion fruit curd and add a teaspoon of passion fruit pulp to the whipped cream for an exotic flavor profile.
- Coffee and Cream Roll: Dissolve 1 teaspoon of instant coffee in the warm water, then use coffee cream (whipped cream mixed with 1/2 teaspoon instant coffee) instead of plain cream.
Dietary Adaptations
- Gluten-Free: Swap self-raising flour for a gluten-free self-raising flour blend in a 1:1 ratio, though the cake may be slightly less springy and tender.
- Dairy-Free: Replace heavy cream with whipped coconut cream or aquafaba whipped with a touch of powdered sugar and vanilla, which creates a similar texture but with a slightly different flavor.
- Vegan: Use three flax eggs (three tablespoons ground flaxseed mixed with nine tablespoons water) instead of regular eggs, and replace the cream with coconut whipped cream or vegan butter whipped with powdered sugar.
- Low-Sugar: Replace caster sugar with erythritol or stevia in a 1:1 ratio for the cake and filling, though you may need to add an extra tablespoon of flour to the batter for proper texture.
Storage and Reheating
Refrigerator
Store your finished jelly roll in an airtight container on a flat plate so it doesn’t get squished, and it keeps fresh for up to 3 days. The cake and filling stay moist and the flavors meld together nicely over time.
- Keep covered with plastic wrap or in an airtight container to prevent it from drying out
- Store on a flat plate or shallow container so the roll doesn’t get compressed
- Wait until serving to dust with powdered sugar so it doesn’t absorb moisture and clump
Freezer
Wrap the cooled jelly roll tightly in plastic wrap and then foil before freezing, and it keeps for up to 3 months without any loss of quality. The cream and jam freeze beautifully, and the cake thaws back to its original texture.
- Wrap in plastic wrap first, then in foil to prevent freezer burn
- Label with the date so you know when you made it
- Thaw in the refrigerator for at least 4 hours before serving
Reheating
Don’t reheat a jelly roll because heat melts the cream filling and makes the cake overly soft. Instead, let it sit at room temperature for 30 minutes before serving if you prefer it slightly less cold.
- Serve chilled straight from the refrigerator for the best texture and flavor
- If you prefer it less cold, let it sit on the counter for 30 to 45 minutes before slicing
- Never microwave or heat the roll, as this melts the cream and makes the cake soggy
Nutrition Information
| Nutrient | Amount |
|---|---|
| Calories | 245 |
| Total Fat | 12g |
| Saturated Fat | 7g |
| Carbohydrates | 32g |
| Fiber | 0.5g |
| Sugar | 24g |
| Protein | 3g |
| Sodium | 85mg |
| Cholesterol | 68mg |
These values are approximate and based on standard ingredients, so check your specific brands if you have dietary restrictions or are counting calories carefully.
Frequently Asked Questions
Can I make a jelly roll the day before?
Yes, you can bake the sponge the day before and store it wrapped in plastic wrap, then assemble it the morning of serving. The assembled roll also keeps perfectly in the refrigerator for up to 3 days, so make-ahead is definitely doable.
Why did my cake crack when I rolled it?
Cracks usually happen from overbaking the sponge, rolling it while too hot or too cold, or overmixing the batter. Make sure you’re baking for exactly 12 to 13 minutes and rolling the cake when it’s warm but not piping hot.
Can I use store-bought jam or does it have to be homemade?
Store-bought jam works beautifully and tastes just as good as homemade, so there’s no need to make your own unless you want to. Just choose a jam you love and the rest will follow naturally.
What’s the best way to slice the jelly roll without squishing it?
Use a serrated knife dipped in hot water and wiped dry between each slice, then cut gently with a sawing motion instead of pressing down hard. This method gives you clean, neat slices without crushing the tender cake or squeezing out the filling.
Can I add flavoring to the cream filling?
Absolutely, you can add lemon zest, a splash of liqueur, a teaspoon of instant coffee, or a bit of chocolate to the whipped cream for extra flavor. Just fold in your additions carefully so you don’t deflate the cream.
Is it okay to roll the cake in the opposite direction?
Yes, you can roll from either end without affecting the final result, so choose whichever direction feels most comfortable and natural for you.
Final Thoughts
A jelly roll might look intimidating if you’ve never made one, but the truth is that this recipe delivers professional-quality results to anyone willing to follow a few simple steps and avoid the common pitfalls. The whole project takes less than an hour from start to finish, and the payoff in terms of appearance and flavor is absolutely worth every minute.
Bake this recipe this week and watch your friends and family react with genuine delight when they see those beautiful spiral slices on their plate, knowing you made something this special with your own hands.
If you love classic British desserts, you might also enjoy trying a Libby’s pumpkin roll recipe for a seasonal twist, or explore the elegance of a cinnamon roll cheesecake recipe if you want to combine two beloved desserts into one show-stopping creation.
Classic Jelly Roll
Ingredients
Equipment
Method
- Preheat oven to 400°F (200°C) and line a 9x13 inch baking sheet with parchment paper, leaving an inch overhang.
- Separate 3 eggs into yolks and whites, ensuring no yolk is in the whites, then let sit at room temperature for 10 minutes.
- In a large bowl, beat the egg yolks with 3/4 cup caster sugar for 3 minutes until pale and ribbon-like.
- In a clean medium bowl, whip the egg whites with a pinch of salt until stiff, glossy peaks form.
- Add 1 teaspoon vanilla extract and 2 tablespoons warm water to the yolk mixture, sift in the flour and baking powder, and fold gently to combine.
- Fold the whipped egg whites into the batter in two batches, keeping the mixture light and airy.
- Spread the batter evenly on the prepared sheet and bake for 12 minutes until golden and springy to the touch.
- Turn the warm cake out onto a clean kitchen towel, peel off the parchment paper, and let cool for 5 minutes.
- Whip 1/2 cup heavy cream with 2 tablespoons powdered sugar and 1/2 teaspoon vanilla extract until soft peaks form.
- Spread the jam evenly over the warm cake, leaving a 1/4 inch border, then spread the whipped cream on top and roll tightly using the towel.
- Chill the roll seam-side down for at least 30 minutes, then dust generously with powdered sugar before slicing and serving.