
Picture a warm, crispy outside with a soft, chewy inside. That’s the magic of a Colombian Arepas — a staple in Colombian kitchens that brings comfort and flavor to any meal.
These delicious corn cakes are not just easy to make, but they are also incredibly versatile, able to be stuffed or topped with all sorts of goodies. Whether you’re enjoying them for breakfast, lunch, or dinner, arepas will steal the show on your table.
Why You’ll Love This Recipe
This recipe is perfect for anyone looking to bring a taste of Colombia home. You can customize them to suit your cravings.
- Quick to prepare, perfect for busy weeknights.
- Endlessly customizable with various fillings and toppings.
- Gluten-free, making them accessible for many diets.
- Great for meal prep — they reheat beautifully.
- A fun cooking project that the whole family can enjoy.
My Experience Making This Recipe
Making Colombian Arepas has become a cherished routine in my kitchen. The smell of cornmeal toasting on the skillet is enough to make anyone’s mouth water.
When I first introduced arepas to my family, they were an instant hit. Each bite brought smiles and requests for more, proving that these little cakes are a crowd-pleaser.
Recipe Overview
- Recipe Name: Colombian Arepas
- Servings: 4
- Prep Time: 10 minutes
- Cook Time: 20 minutes
- Total Time: 30 minutes
- Course: Main or Side Dish
- Cuisine: Colombian
- Calories per Serving: 150
Equipment You Will Need
- Mixing bowl
- Skillet or griddle
- Spatula
- Measuring cups
- Plastic wrap or parchment paper
Ingredients for Colombian Arepas
- 2 cups of precooked cornmeal (such as arepa flour or masa harina)
- 2 1/2 cups of warm water
- 1 teaspoon of salt
- 1 tablespoon of vegetable oil (plus more for cooking)
- Optional: shredded cheese, cooked meats, or vegetables for filling
Ingredient Notes and Substitutions
- Precooked cornmeal: This is the key ingredient for arepas, giving them their signature texture. You can use regular cornmeal, but the texture will differ.
- Salt: Enhances flavor; feel free to adjust to your taste. For those on a low-sodium diet, use a salt substitute.
- Vegetable oil: Used for cooking; olive oil works too, adding a unique flavor.
How to Make Colombian Arepas
Step 1: Combine Ingredients
In a mixing bowl, combine the precooked cornmeal, salt, and 1 tablespoon of vegetable oil. This ensures that the oil is evenly distributed for a better texture.
Step 2: Add Warm Water
Gradually pour in the warm water while mixing with your hands or a spoon. Warm water helps the cornmeal absorb moisture more effectively.
Step 3: Form the Dough
Knead the mixture until you form a smooth dough, about 2-3 minutes. The dough should be moist but not sticky; add more water if too dry.
Step 4: Shape the Arepas
Divide the dough into 4 equal balls, then flatten each ball into a patty about 1/2 inch thick. This thickness allows for a crispy outside and a fluffy inside.
Step 5: Heat the Skillet
Heat a skillet or griddle over medium heat and add a bit of vegetable oil. This prevents sticking and helps achieve that golden crust.
Step 6: Cook the Arepas
Place the arepas in the skillet and cook for about 5-7 minutes on each side, until they are golden brown. Cooking them thoroughly ensures a delightful texture.
Step 7: Optional – Stuff the Arepas
If you want to add fillings, slice the arepas in half after cooking and stuff them with your favorite ingredients. Don’t hold back; the world is your oyster!
Step 8: Serve and Enjoy
Serve the arepas warm, and enjoy them plain or with toppings of your choice. They are perfect for dipping or simply savoring on their own.
Pro Tip: For a cheesy twist, add shredded cheese to the dough before forming the arepas.
Tips for the Best Colombian Arepas
- Use warm water for the dough; it helps create a better texture.
- Don’t overwork the dough; knead just enough to combine.
- For extra flavor, season the water with herbs or spices.
- Experiment with different fillings to discover your favorite combination.
- Keep the cooked arepas warm in a towel while you finish cooking the rest.
Common Mistakes to Avoid
- Using cold water can lead to a tough texture; always use warm water.
- Making the arepas too thick may result in an undercooked center.
- Not letting them cook long enough can leave them doughy inside.
- Overworking the dough can make it dense; knead just until combined.
Serving Suggestions
These arepas shine on their own but pair beautifully with various accompaniments. Add a side of fresh avocado or a simple salad for a delightful meal.
- Guacamole or avocado slices
- Black beans or lentils
- Shredded chicken or beef
- Fresh salsa or pico de gallo
- Fried eggs for breakfast arepas
Variations to Try
- Cheese Arepas: Mix cheese into the dough for a gooey center.
- Sweet Arepas: Add sugar and cinnamon for a sweet breakfast treat.
- Vegetable Arepas: Incorporate finely chopped veggies into the dough.
- Spicy Arepas: Add jalapeños or hot sauce for a kick.
Dietary Adaptations
- Gluten-Free: These arepas are naturally gluten-free, perfect for sensitive diets.
- Dairy-Free: Omit cheese and use vegetable oil to keep it dairy-free.
- Vegetarian: Fill with veggies or beans for a hearty vegetarian option.
- Low-Carb/Keto: Substitute with almond flour for a low-carb variant.
Storage and Reheating
Refrigerator
Store leftover arepas in an airtight container in the fridge for up to 3 days.
- Place parchment paper between layers to prevent sticking.
Freezer
Arepas freeze well for up to 3 months. Wrap each one in plastic wrap and place them in a freezer bag.
- Label the bag with the date for easy organization.
Reheating
Reheat arepas in a skillet over medium heat or in an oven. This helps restore their original texture.
- Microwave reheating is quick but may result in a softer texture.
Nutrition Information
| Nutrient | Amount |
|---|---|
| Calories | 150 |
| Total Fat | 5g |
| Saturated Fat | 0.5g |
| Carbohydrates | 24g |
| Fiber | 2g |
| Sugar | 0g |
| Protein | 3g |
| Sodium | 150mg |
| Cholesterol | 0mg |
This nutritional information is approximate and may vary based on specific ingredients used.
Frequently Asked Questions
Can I make arepas ahead of time?
Absolutely! You can prepare the dough and shape the arepas in advance, then cook them when ready to serve.
What can I use instead of precooked cornmeal?
You can use regular cornmeal, but the texture will be different, and it may require additional water.
How do I store leftover arepas?
Store them in an airtight container in the refrigerator for up to 3 days or freeze for up to 3 months.
Why are my arepas too dry?
This usually happens if not enough water is added to the dough, so make sure to gradually incorporate it.
Can I make arepas without cheese?
Yes, you can make them plain or fill them with your choice of ingredients for a delicious alternative.
Final Thoughts
Making Colombian Arepas is a rewarding experience that brings a taste of Colombia right into your kitchen. With their versatility and comforting nature, they are sure to become a family favorite.
So roll up your sleeves and get cooking; you won’t regret adding this delightful dish to your repertoire. Explore more delicious recipes like Baleadas or Fry Bread for even more culinary adventures.
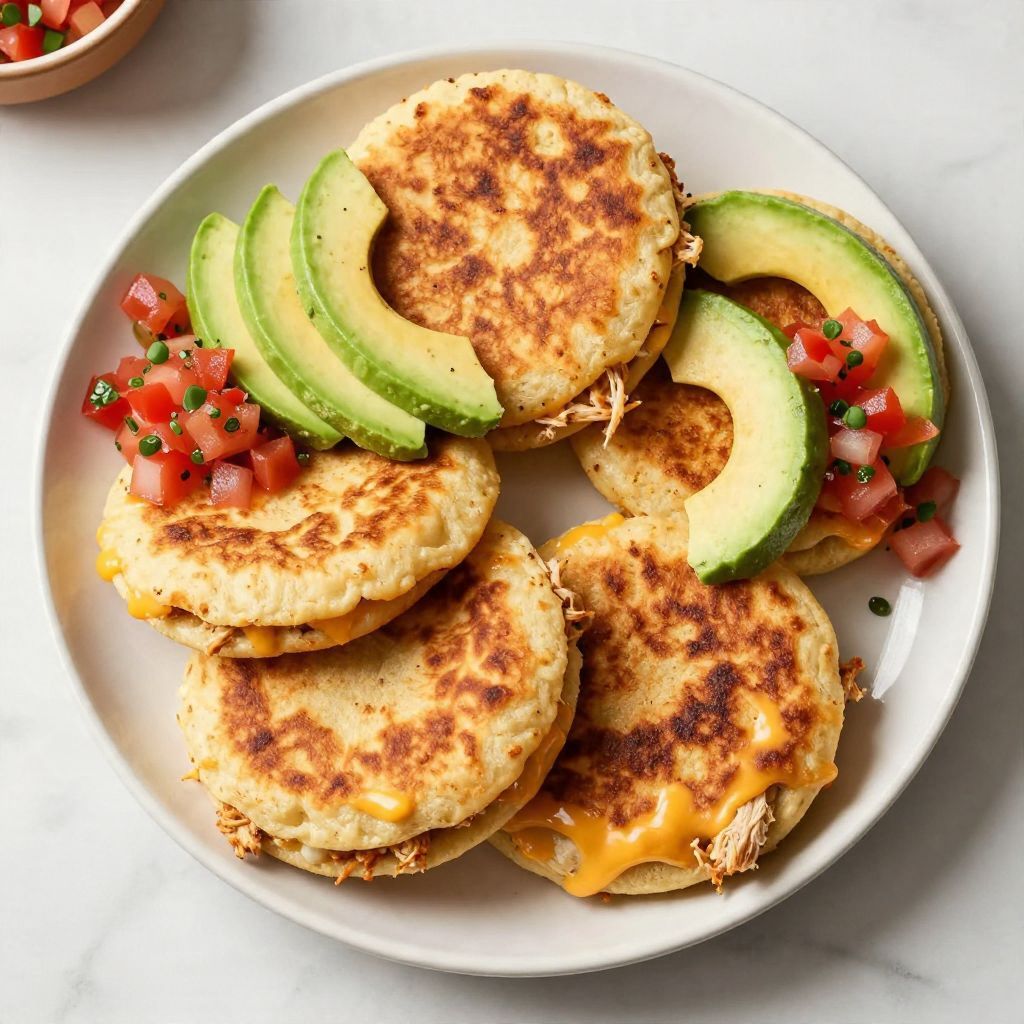
Colombian Arepas
Ingredients
Equipment
Method
- In a mixing bowl, combine the precooked cornmeal, salt, and 1 tablespoon of vegetable oil.
- Gradually pour in the warm water while mixing with your hands or a spoon.
- Knead the mixture until you form a smooth dough, about 2-3 minutes.
- Divide the dough into 4 equal balls, then flatten each ball into a patty about 1/2 inch thick.
- Heat a skillet or griddle over medium heat and add a bit of vegetable oil.
- Place the arepas in the skillet and cook for about 5-7 minutes on each side, until they are golden brown.
- If you want to add fillings, slice the arepas in half after cooking and stuff them with your favorite ingredients.
- Serve the arepas warm, and enjoy them plain or with toppings of your choice.