
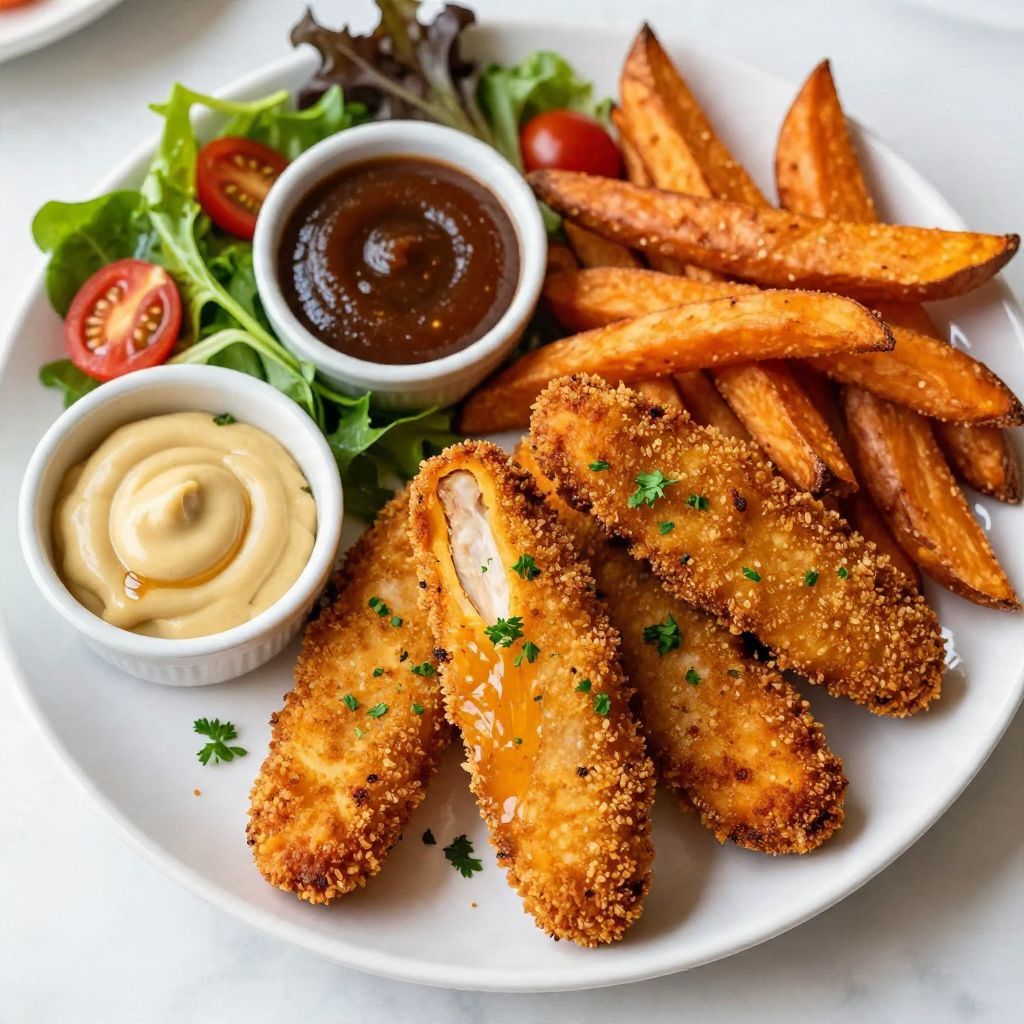
There’s something undeniably comforting about the smell of baked chicken tenders wafting through the kitchen, isn’t there? These tenders are crispy on the outside and tender on the inside, making them a perfect weeknight dinner that’s both quick and fun for the whole family.
This recipe is a winner because it’s not only easy to prepare, but it also offers that satisfying crunch without the guilt of frying. Plus, they’re versatile enough to pair with your favorite dipping sauce or side dish, making them a fantastic option for busy parents and food enthusiasts alike.
Why You’ll Love This Recipe
This recipe is a keeper for several reasons.
- Quick to prepare, perfect for busy weeknights.
- Crispy texture without the frying mess.
- Kid-friendly and customizable with different seasonings.
- Healthy option for a protein-packed meal.
- Great for meal prep and leftovers!
My Experience Making This Recipe
When I first made these baked chicken tenders, the aroma filled my home, and I could hardly wait for them to come out of the oven. My family gathered around, and the first bite was met with smiles and satisfied nods.
Each tender was juicy, and the crispy coating had just the right amount of seasoning. It was a moment of triumph, knowing I had made a dish everyone would enjoy, and it reminded me of those classic family dinners from my childhood.
Recipe Overview
- Recipe Name: Baked Chicken Tenders
- Servings: 4
- Prep Time: 15 minutes
- Cook Time: 20 minutes
- Total Time: 35 minutes
- Course: Main Course
- Cuisine: American
- Calories per Serving: 280
Equipment You Will Need
- Baking sheet
- Parchment paper
- Mixing bowls
- Whisk
- Meat mallet or rolling pin
- Meat thermometer (optional)
Ingredients for Baked Chicken Tenders
- 1 pound chicken breast tenders
- 1 cup breadcrumbs (preferably panko for extra crunch)
- 1/2 cup grated Parmesan cheese
- 1 teaspoon garlic powder
- 1 teaspoon onion powder
- 1/2 teaspoon paprika
- 1/2 teaspoon salt
- 1/4 teaspoon black pepper
- 1/2 cup buttermilk (or regular milk)
- 1 large egg
Ingredient Notes and Substitutions
- Chicken breast tenders: They are tender and cook quickly. You can substitute with chicken thighs for a richer flavor.
- Breadcrumbs: Panko gives a crunchier texture. Regular breadcrumbs work too, but may be less crispy.
- Parmesan cheese: Adds a savory depth. Nutritional yeast can be used as a dairy-free alternative.
- Buttermilk: This adds moisture. You can mix regular milk with a teaspoon of vinegar as a substitute.
How to Make Baked Chicken Tenders
Step 1: Preheat the Oven
Preheat your oven to 400°F (200°C). Getting the oven hot is essential for achieving that crispy exterior.
Step 2: Prepare the Baking Sheet
Line a baking sheet with parchment paper to prevent sticking and make cleanup easier. This will help the tenders cook evenly and maintain their crunch.
Step 3: Prepare the Chicken
If the chicken tenders are uneven in thickness, gently pound them with a meat mallet to ensure even cooking. This helps the tenders cook through at the same rate.
Step 4: Create the Coating Mixture
In a mixing bowl, combine the breadcrumbs, Parmesan cheese, garlic powder, onion powder, paprika, salt, and black pepper. This mixture will provide the crunchy coating that makes these tenders irresistible.
Step 5: Mix the Wet Ingredients
In another bowl, whisk together the buttermilk and egg until well combined. This will help the breadcrumbs adhere to the chicken.
Step 6: Coat the Chicken
Dip each chicken tender into the wet mixture, allowing any excess to drip off. Then, coat it thoroughly in the breadcrumb mixture, pressing lightly to ensure it sticks.
Step 7: Arrange on the Baking Sheet
Place the coated tenders onto the prepared baking sheet, leaving some space between each piece. This allows hot air to circulate and promotes even browning.
Step 8: Bake to Perfection
Bake in the preheated oven for about 20 minutes or until golden brown and the internal temperature reaches 165°F (75°C). This ensures they are cooked through and safe to eat.
Pro Tip: For extra crispiness, broil the tenders for the last 2 minutes of baking, keeping a close watch to prevent burning.
Tips for the Best Baked Chicken Tenders
- Don’t skimp on the seasoning in the breadcrumb mixture for maximum flavor.
- Let the chicken rest for a few minutes after baking to keep the juices locked in.
- Use a meat thermometer for precise cooking; it takes the guesswork out.
- Experiment with different spices like cayenne for a kick or Italian seasoning for a herby twist.
- Serve with a variety of dipping sauces to keep things exciting.
Common Mistakes to Avoid
- Skipping the buttermilk can result in a dry texture. The buttermilk helps to tenderize the chicken.
- Not preheating the oven can lead to soggy tenders. A hot oven is key for crispiness.
- Overcrowding the baking sheet can prevent even cooking. Give each tender space to breathe.
- Not allowing excess wet mixture to drip off can lead to a soggy coating. Ensure a good coating application.
Serving Suggestions
These baked chicken tenders are delightful on their own but pair beautifully with sides.
- Serve with a fresh garden salad.
- Pair with sweet potato fries for a tasty contrast.
- Try dipping them in honey mustard or barbecue sauce.
- Serve alongside macaroni and cheese for a classic comfort meal.
Variations to Try
- Add crushed cornflakes to the breadcrumb mixture for an extra crunch.
- Mix in different herbs like thyme or rosemary for a fresh twist.
- Use a spicy dipping sauce for a buffalo chicken version.
- Substitute the chicken with tofu for a vegetarian option.
Dietary Adaptations
- Gluten-free: Use gluten-free breadcrumbs for a similar texture.
- Dairy-free: Swap Parmesan with nutritional yeast and use dairy-free milk.
- Vegan: Replace chicken with tofu, use vegan buttermilk, and skip the egg.
- Low-carb/Keto: Use almond flour instead of breadcrumbs for a low-carb option.
Storage and Reheating
Refrigerator
Store leftover chicken tenders in an airtight container for up to 3 days.
- Place parchment paper between layers to keep them from sticking.
Freezer
Freeze cooked tenders in a single layer on a baking sheet, then transfer to a freezer-safe bag for up to 3 months.
- Thaw in the refrigerator before reheating for best results.
Reheating
Reheat in the oven at 375°F (190°C) for about 10-15 minutes to restore crispiness.
- Microwaving can make them soggy, so avoid that if possible.
Nutrition Information
| Nutrient | Amount |
|---|---|
| Calories | 280 |
| Total Fat | 12g |
| Saturated Fat | 3g |
| Carbohydrates | 20g |
| Fiber | 1g |
| Sugar | 1g |
| Protein | 25g |
| Sodium | 600mg |
| Cholesterol | 80mg |
This information is based on approximate values and can vary based on specific ingredients used.
Frequently Asked Questions
Can I use frozen chicken tenders?
Yes, but ensure they’re fully thawed and drained before coating for the best results.
How can I make these tenders ahead of time?
Coat the chicken tenders and store them in the fridge for a few hours before baking. This will save time during meal prep.
What should I do if the coating falls off?
Make sure to press the coating onto the chicken firmly and allow the tenders to rest before baking to help it stick better.
Can I bake these without breadcrumbs?
Yes, you can use crushed nuts or seeds for a different texture, or skip the coating for a lighter option.
How do I know when the chicken is done?
Use a meat thermometer; the internal temperature should reach 165°F (75°C) for safe eating.
Final Thoughts
These baked chicken tenders are a delightful dish that combines ease and flavor in one package. I encourage you to give them a try and enjoy a crispy, delicious meal that the whole family will cherish.
For more delicious chicken recipes, check out this baked chicken wings recipe or try this chicken cutlet recipe for a tasty twist!