
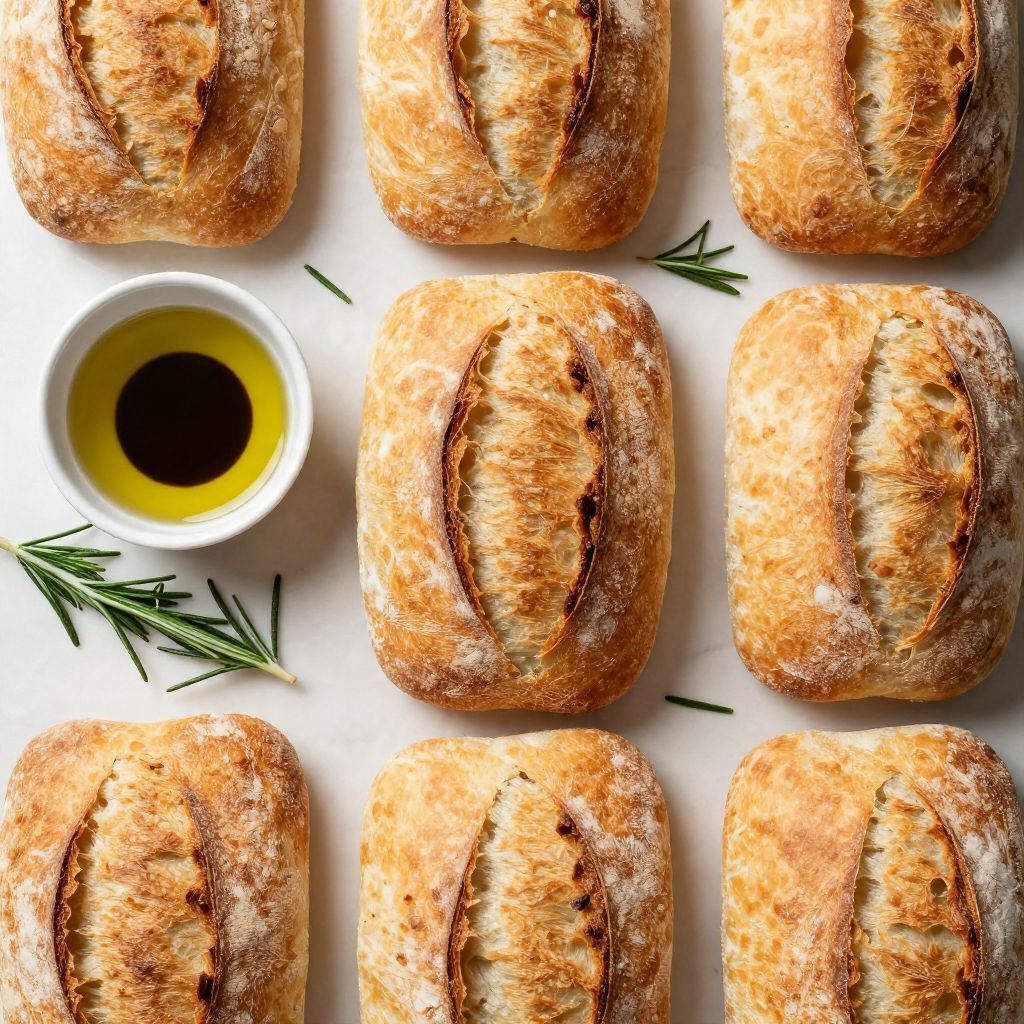
Freshly baked ciabatta rolls are a magical treat that can elevate any meal. The crisp crust gives way to a soft, airy interior that’s perfect for sandwiches or served alongside soups and salads.
This recipe is special because it captures the authentic flavor of Italian bread while being surprisingly easy to make at home. The standout qualities are the delightful texture and the aroma that fills your kitchen as they bake.
Why You’ll Love This Recipe
These ciabatta rolls are a joy to make and eat. They’re perfect for any occasion.
- Simple ingredients that yield fantastic results.
- Perfectly crispy on the outside and fluffy within.
- Versatile enough for sandwiches or as a side dish.
- Great for meal prep or freezing.
- Impressive enough to serve at gatherings.
My Experience Making This Recipe
When I first tried making ciabatta rolls, I felt like a true baker in my kitchen. The anticipation of pulling those golden rolls from the oven was exhilarating.
Once baked, the aroma wafted through my home, making everyone who walked in wonder what I was creating. The first bite of that crusty exterior and soft, airy inside had my family asking for seconds.
Recipe Overview
- Recipe Name: Ciabatta Roll Recipe
- Servings: 12 rolls
- Prep Time: 2 hours (includes rising time)
- Cook Time: 20-25 minutes
- Total Time: 2 hours 30 minutes
- Course: Bread
- Cuisine: Italian
- Calories per Serving: 180
Equipment You Will Need
- Mixing bowl
- Whisk
- Rubber spatula
- Baking sheet
- Parchment paper
- Kitchen scale (optional)
- Cooling rack
Ingredients for Ciabatta Rolls
- 4 cups all-purpose flour
- 1 ½ cups warm water (about 110°F)
- 2 teaspoons instant yeast
- 2 teaspoons salt
- 1 tablespoon olive oil (optional)
Ingredient Notes and Substitutions
- All-purpose flour: Provides a great structure for the rolls. You can use bread flour for a chewier texture.
- Instant yeast: Helps the dough rise. Active dry yeast can be used, but you’ll need to activate it first.
- Salt: Essential for flavor. Avoid skipping it, as it enhances the taste.
- Olive oil: Adds richness. You can omit it if you prefer a leaner dough.
How to Make Ciabatta Rolls
Step 1: Prepare the Dough
In a large mixing bowl, combine the warm water and yeast. This step activates the yeast, ensuring your rolls rise beautifully.
Step 2: Mix in the Flour and Salt
Add the flour and salt to the yeast mixture. Use a rubber spatula to mix until a sticky dough forms, ensuring all the flour is incorporated.
Step 3: Knead the Dough
Turn the dough onto a floured surface and knead for about 10 minutes. This develops gluten, giving your rolls structure.
Step 4: First Rise
Place the dough in a lightly greased bowl, cover it with a damp cloth, and let it rise for 1 to 1.5 hours. The dough should double in size, creating those lovely air pockets.
Step 5: Shape the Rolls
After the first rise, gently deflate the dough on a floured surface. Divide it into 12 equal pieces, shaping each into a roll without overworking it.
Step 6: Second Rise
Place the shaped rolls on a baking sheet lined with parchment paper. Cover them and let rise for another 30-45 minutes until puffy.
Step 7: Preheat the Oven
While the rolls are rising, preheat your oven to 425°F. A hot oven creates a perfect crust on the rolls.
Step 8: Bake the Rolls
Bake for 20-25 minutes, or until golden brown. This is when your kitchen fills with mouthwatering scents, making it hard to resist.
Pro Tip: Let the rolls cool on a rack for at least 10 minutes before slicing. This helps set the texture inside.
Tips for the Best Ciabatta Rolls
- Use a kitchen scale for precise measurements, ensuring consistent results.
- Don’t rush the rising times; they are crucial for texture.
- Use a pizza stone for an even bake if you have one.
- Experiment with adding herbs or cheese for extra flavor.
- Store extra dough in the fridge for fresh rolls later in the week.
Common Mistakes to Avoid
- Not using enough flour while shaping can lead to sticky rolls. Always flour your surface well.
- Rushing the rising process can result in dense rolls. Patience is key for the perfect texture.
- Over-kneading the dough can make it tough. Knead just until smooth and elastic.
- Skipping the cooling time can cause the rolls to become gummy inside. Let them breathe!
Serving Suggestions
These ciabatta rolls shine at any table. They pair beautifully with a variety of dishes.
- Serve with olive oil and balsamic vinegar for dipping.
- Use them for hearty sandwiches filled with meats and cheeses.
- Pair with soups for a comforting meal.
- Toast and top with bruschetta for a delightful appetizer.
Variations to Try
- Add rosemary or thyme to the dough for a fragrant twist.
- Incorporate cheese such as parmesan into the dough for richness.
- Try making mini rolls for sliders or appetizers.
- Experiment with whole wheat flour for a nutty flavor.
Dietary Adaptations
- Gluten-free: Use a gluten-free flour blend, adjusting water as needed.
- Dairy-free: This recipe is naturally dairy-free.
- Vegan: No animal products are used, making it vegan-friendly.
- Low-carb/keto: Substitute with almond flour for low-carb options, but texture may vary.
Storage and Reheating
Refrigerator
Store the rolls in an airtight container for up to 3 days.
- Keep them at room temperature for best texture.
- Reheat in the oven for a few minutes to restore crispness.
Freezer
These rolls freeze well for up to 3 months.
- Wrap each roll tightly in plastic wrap and place in a freezer bag.
- Thaw overnight in the fridge when ready to use.
Reheating
To reheat, place rolls in a preheated oven at 350°F for about 10 minutes.
- This will help restore their original texture and flavor.
- Microwaving is not recommended as it can make them soggy.
Nutrition Information
| Nutrient | Amount |
|---|---|
| Calories | 180 |
| Total Fat | 1g |
| Saturated Fat | 0g |
| Carbohydrates | 36g |
| Fiber | 1g |
| Sugar | 0g |
| Protein | 6g |
| Sodium | 200mg |
| Cholesterol | 0mg |
This nutrition information is approximate and may vary based on ingredients used.
Frequently Asked Questions
Can I use all-purpose flour instead of bread flour?
Yes, all-purpose flour works well, but bread flour gives a chewier texture.
How far in advance can I make the dough?
You can prepare the dough up to 2 days in advance and store it in the fridge.
Can I freeze the rolls after baking?
Absolutely, they freeze beautifully for up to 3 months.
What should I do if my rolls are dense?
This usually means the dough didn’t rise enough. Make sure to give it enough time to double in size.
Can I add herbs to the dough?
Yes, adding herbs like rosemary can enhance the flavor significantly.
Final Thoughts
Making fresh ciabatta rolls at home is a rewarding experience that fills your kitchen with delightful aromas. Once you taste the crispy crust and soft interior, you’ll wonder why you didn’t try it sooner.
So gather your ingredients and let your baking adventure begin. And if you’re looking for more delicious recipes, check out this amazing Pretzel Bun Recipe or give this Carnivore Bread Recipe a try!