
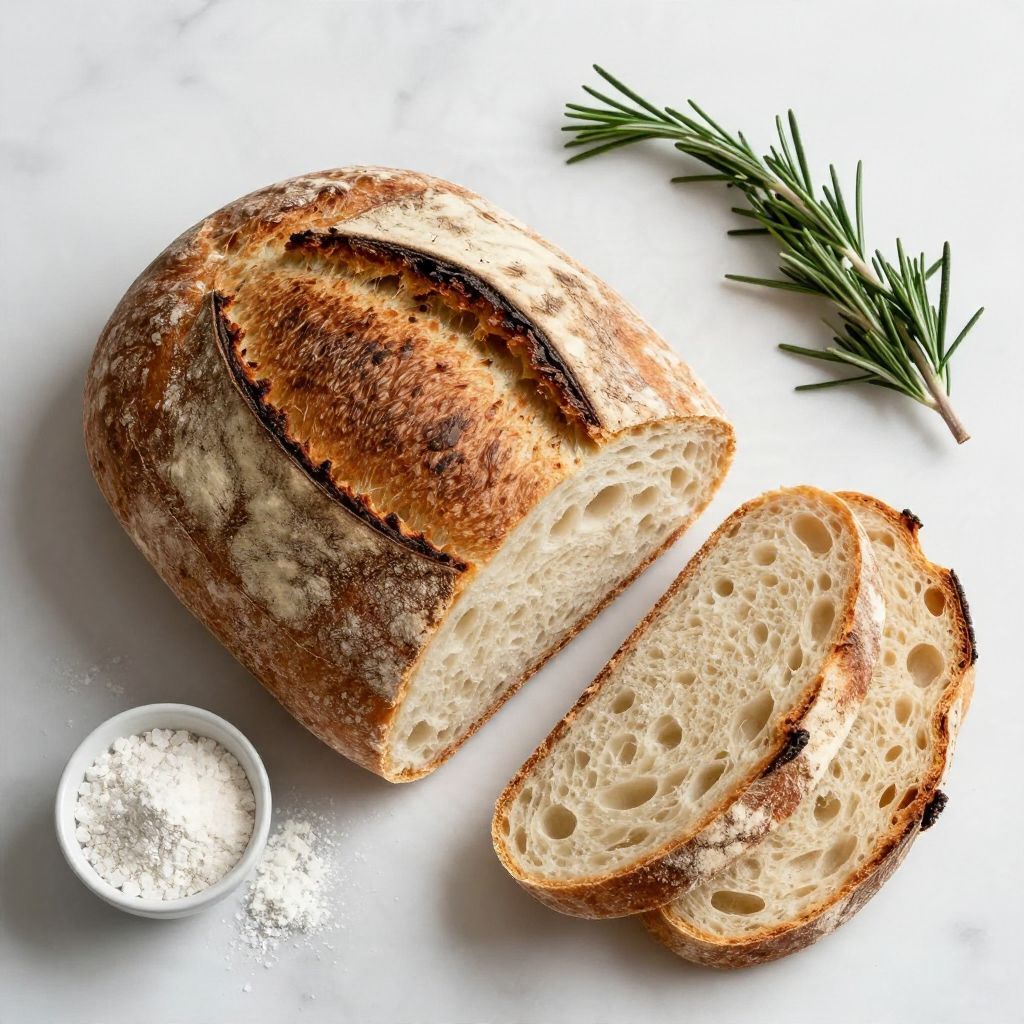
There’s nothing quite like the aroma of freshly baked sour bread wafting through your home. This recipe for Sour Bread captures that delightful tang and crusty exterior, making it a must-try for any baking enthusiast. The chewy texture and rich flavor are simply irresistible and perfect for sandwiches or toasting. Whether you’re a seasoned baker or just starting, this sour bread is a rewarding project that yields delicious results. Let’s get into the details, shall we?
Why You’ll Love This Recipe
This sour bread recipe is a joy to make and eat. Its unique flavor and texture will have you baking it again and again.
- Deliciously tangy flavor that improves with time.
- Perfectly crusty exterior with a soft, chewy inside.
- Versatile for sandwiches, toast, or enjoying with butter.
- Fun and satisfying to make from scratch.
My Experience Making This Recipe
When I first tackled this sour bread recipe, I was a bit intimidated. However, as the dough came together and started to rise, excitement took over.
The smell of baking bread filled my kitchen, and I couldn’t help but sneak a slice while it was still warm. The combination of the tangy flavor and the crusty outside made it worth every minute spent waiting.
Recipe Overview
- Recipe Name: Sour Bread
- Servings: 12
- Prep Time: 30 minutes (plus rising time)
- Cook Time: 45 minutes
- Total Time: 12 hours (including fermentation)
- Course: Bread
- Cuisine: American
- Calories per Serving: 150
Equipment You Will Need
- Large mixing bowl
- Wooden spoon or spatula
- Kitchen scale (for precise measurements)
- Proofing basket or bowl
- Baking stone or baking sheet
- Sharp knife or lame for scoring
Ingredients for Sour Bread
- 500g bread flour
- 350g water (room temperature)
- 100g active sourdough starter
- 10g salt
Ingredient Notes and Substitutions
- Bread flour: Provides the structure and chewiness. You can substitute with all-purpose flour, but the texture may vary.
- Water: Hydrates the dough, helping gluten formation. Filtered or bottled water works well if your tap water has a strong taste.
- Active sourdough starter: This gives the bread its characteristic flavor. If you don’t have a starter, you can make one or use instant yeast (adjust the amount).
- Salt: Enhances flavor and strengthens gluten. Sea salt or kosher salt can be used as substitutes.
How to Make Sour Bread
Step 1: Prepare the Dough
In a large mixing bowl, combine the bread flour and water. Mix until no dry flour remains to create a shaggy dough.
Step 2: Autolyse
Let the dough rest for about 30 minutes. This allows the flour to absorb the water, making kneading easier.
Step 3: Add Sourdough Starter and Salt
After resting, add the sourdough starter and salt to the dough. Mix until fully incorporated.
Step 4: Knead the Dough
Knead the dough for about 10 minutes until it becomes smooth and elastic. This develops the gluten structure essential for your bread.
Step 5: Bulk Fermentation
Cover the bowl with a damp cloth and let it rise at room temperature for 4-6 hours. Stretch and fold the dough every hour to strengthen it.
Step 6: Shape the Dough
After bulk fermentation, gently turn the dough out onto a floured surface. Shape it into a round loaf by tucking the edges into the center.
Step 7: Second Rise
Place the shaped dough into a proofing basket (or bowl) and let it rise for another 2-4 hours. This develops the flavor and texture.
Step 8: Preheat the Oven
While the dough is rising, preheat your oven to 450°F (230°C). If using a baking stone, place it in the oven to heat up.
Step 9: Score and Bake
Once the dough is ready, carefully turn it onto a baking sheet or stone. Use a sharp knife or lame to score the top before baking.
Step 10: Bake the Bread
Bake for 30-45 minutes or until the bread has a deep golden crust. This creates that beautiful crunchy exterior.
Pro Tip: Allow the bread to cool completely before slicing for the best texture and flavor.
Tips for the Best Sour Bread
- Use a kitchen scale for precise measurements, as baking is a science.
- Ensure your sourdough starter is active and bubbly for best results.
- Experiment with different flours like whole wheat for added flavor.
- Keep the dough covered to prevent it from drying out during rising.
- Patience is key; don’t rush the fermentation process for the best flavor.
Common Mistakes to Avoid
- Not measuring ingredients accurately can lead to poor texture.
- Skipping the autolyse stage results in dense bread.
- Under-kneading the dough means insufficient gluten development.
- Over-proofing the dough can cause it to collapse.
Serving Suggestions
This sour bread is fantastic on its own but pairs wonderfully with various toppings. Here are some ideas to elevate your slices:
- Spread with creamy butter and a sprinkle of sea salt.
- Top with avocado and a pinch of chili flakes.
- Serve alongside a hearty soup or salad.
- Create delicious sandwiches with your favorite fillings.
Variations to Try
- Add herbs like rosemary or thyme to the dough for a fragrant twist.
- Mix in nuts or dried fruits for added texture and flavor.
- Use whole wheat flour for a nuttier taste and more nutrition.
- Experiment with different seed toppings for a crunchy crust.
Dietary Adaptations
- Gluten-free: Use a gluten-free flour blend, but the texture will differ.
- Dairy-free: This recipe is naturally dairy-free; no substitutions needed.
- Vegan: The recipe is vegan-friendly as no animal products are used.
- Low-carb/Keto: This bread is not suitable for low-carb diets; alternatives are needed.
Storage and Reheating
Refrigerator
Store the bread in an airtight container for up to a week.
- Slice as needed to maintain freshness.
Freezer
For longer storage, freeze slices or whole loaves in a freezer-safe bag.
- Thaw at room temperature before enjoying.
Reheating
Reheat the bread in an oven at 350°F (175°C) for about 10 minutes.
- This restores its crusty exterior.
Nutrition Information
| Nutrient | Amount |
|---|---|
| Calories | 150 |
| Total Fat | 0.5g |
| Saturated Fat | 0g |
| Carbohydrates | 31g |
| Fiber | 1g |
| Sugar | 0g |
| Protein | 5g |
| Sodium | 200mg |
| Cholesterol | 0mg |
This nutrition information is approximate and may vary based on specific ingredients used.
Frequently Asked Questions
Can I use all-purpose flour instead of bread flour?
Yes, you can, but the bread may not have the same chewy texture.
How long does sourdough starter last?
With proper care, a sourdough starter can last indefinitely. Just remember to feed it regularly.
Can I make this bread ahead of time?
Yes, you can prepare the dough the night before and bake it in the morning.
Why did my bread not rise?
This can happen if your sourdough starter is inactive or if the dough was over-proofed.
How do I know when my bread is done baking?
The bread is done when it has a golden-brown crust and sounds hollow when tapped on the bottom.
Final Thoughts
Baking sour bread is a rewarding experience that fills your kitchen with warmth and delightful aromas. I hope you enjoy this recipe as much as I do.
Don’t forget to explore more delicious recipes like the sourdough baguette recipe or try the sourdough discard pizza dough for more fun in the kitchen.
Sour Bread
Ingredients
Equipment
Method
- In a large mixing bowl, combine the bread flour and water. Mix until no dry flour remains to create a shaggy dough.
- Let the dough rest for about 30 minutes.
- After resting, add the sourdough starter and salt to the dough. Mix until fully incorporated.
- Knead the dough for about 10 minutes until it becomes smooth and elastic.
- Cover the bowl with a damp cloth and let it rise at room temperature for 4-6 hours. Stretch and fold the dough every hour.
- After bulk fermentation, gently turn the dough out onto a floured surface. Shape it into a round loaf.
- Place the shaped dough into a proofing basket and let it rise for another 2-4 hours.
- While the dough is rising, preheat your oven to 450°F (230°C).
- Once the dough is ready, carefully turn it onto a baking sheet or stone. Score the top before baking.
- Bake for 30-45 minutes or until the bread has a deep golden crust.