
Picture this: a warm baguette dipped into a creamy, garlicky sauce, and suddenly, life feels just right. This Garlic Aioli Recipe is not just a condiment, it’s a flavor explosion that transforms even the simplest dishes into gourmet delights.
Perfect for slathering on sandwiches, dipping fries, or drizzling over roasted vegetables, it brings a rich, garlicky depth that’s hard to resist. With just a few ingredients, it’s an easy way to elevate your meals and impress your guests. Let’s dive into the delicious details!
Why You’ll Love This Recipe
This aioli is a winner for several reasons.
- Simple ingredients you probably have on hand.
- Quick to whip up in under 10 minutes.
- Versatile enough to pair with many dishes.
- Rich and creamy texture that enhances everything.
- Adjustable garlic levels for your personal taste.
My Experience Making This Recipe
The first time I made this garlic aioli, I was astounded by how something so simple could taste so incredible. The aroma of fresh garlic mingling with the rich oil was intoxicating and made my kitchen feel like a gourmet restaurant.
Friends and family devoured it at our last gathering, and I found myself sharing the recipe multiple times. Watching people enjoy this dip was the ultimate reward for my efforts.
Recipe Overview
- Recipe Name: Garlic Aioli
- Servings: 8
- Prep Time: 10 minutes
- Cook Time: 0 minutes
- Total Time: 10 minutes
- Course: Condiment
- Cuisine: Mediterranean
- Calories per Serving: 120
Equipment You Will Need
- Mixing bowl
- Whisk or hand blender
- Measuring spoons
- Garlic press (optional)
- Spatula
Ingredients for Garlic Aioli
- 1 cup mayonnaise
- 3 cloves garlic, minced
- 2 tablespoons lemon juice
- 1 tablespoon Dijon mustard
- Salt to taste
- Pepper to taste
Ingredient Notes and Substitutions
- Mayonnaise: This is the base for our aioli, providing creaminess. You can substitute with Greek yogurt for a lighter version.
- Garlic: Fresh garlic gives the best flavor. Garlic powder can be used in a pinch, but the taste won’t be as vibrant.
- Lemon juice: Adds brightness to the aioli. Vinegar can be a good substitute if you’re out of lemons.
- Dijon mustard: Adds a touch of tanginess. You can use yellow mustard if that’s what you have.
How to Make Garlic Aioli
Step 1: Gather Your Ingredients
Start by assembling all your ingredients on the counter. This makes the process smoother and ensures you don’t forget something essential.
Step 2: Mince the Garlic
Using a sharp knife or a garlic press, mince the garlic cloves finely. This step is crucial for releasing maximum flavor into your aioli.
Step 3: Combine Mayonnaise and Garlic
In a mixing bowl, combine the mayonnaise and the minced garlic. Stir these together until they are well blended; this creates the creamy base of your aioli.
Step 4: Add Lemon Juice and Mustard
Next, mix in the lemon juice and Dijon mustard. These ingredients will bring brightness and a slight tang, balancing the richness of the mayonnaise.
Step 5: Season to Taste
Add salt and pepper according to your preference. Taste as you go, adjusting the seasoning until it’s just right for you.
Step 6: Whisk Until Smooth
Use a whisk or a hand blender to combine everything thoroughly until the aioli is smooth and creamy. This step helps incorporate air, making the texture light and fluffy.
Step 7: Chill Before Serving
Refrigerate the aioli for at least 30 minutes before serving. Chilling allows the flavors to meld beautifully, making each bite even more delicious.
Step 8: Serve and Enjoy!
Once chilled, transfer your aioli to a serving dish. Enjoy it with your favorite dishes, and watch it disappear!
Pro Tip: For a stronger garlic flavor, let the minced garlic sit in the lemon juice for a few minutes before adding it to the mayo.
Tips for the Best Garlic Aioli
- Use fresh garlic for the best flavor; dried garlic won’t cut it.
- Make it ahead of time to let the flavors develop more.
- Serve chilled for a refreshing taste.
- Experiment with different herbs for a unique twist.
- Always taste and adjust seasonings as needed.
Common Mistakes to Avoid
- Using pre-minced garlic; it lacks the freshness needed for a great flavor.
- Skipping the chilling step; this step is vital for flavor integration.
- Over-salting; start small and add more gradually.
- Not tasting until the end; keep tasting throughout to ensure perfection.
Serving Suggestions
This garlic aioli pairs wonderfully with a variety of dishes.
- Serve with crispy fries or sweet potato fries.
- Spread it on a savory sandwich or wrap.
- Use it as a dip for fresh vegetables.
- Drizzle over grilled chicken or fish for added flavor.
Variations to Try
- Add roasted garlic for a milder, sweeter flavor.
- Incorporate herbs like dill or basil for a fresh twist.
- Mix in a bit of chipotle for a smoky kick.
- Try adding a dash of hot sauce for some heat.
Dietary Adaptations
- Gluten-free: This recipe is naturally gluten-free.
- Dairy-free: Use vegan mayonnaise for a dairy-free version.
- Vegan: Again, vegan mayo makes this recipe vegan-friendly.
- Low-carb/Keto: This recipe is low in carbs, perfect for keto diets.
Storage and Reheating
Refrigerator
Store any leftover aioli in an airtight container in the refrigerator.
- It will keep well for up to one week.
- Make sure to stir before using again.
Freezer
While it’s best fresh, you can freeze aioli.
- Store in a freezer-safe container for up to three months.
- Thaw in the refrigerator before use.
Reheating
Aioli is best served cold, so no reheating is necessary.
- Simply let it come to room temperature if it’s been in the fridge.
Nutrition Information
| Nutrient | Amount |
|---|---|
| Calories | 120 |
| Total Fat | 13g |
| Saturated Fat | 2g |
| Carbohydrates | 1g |
| Fiber | 0g |
| Sugar | 0g |
| Protein | 1g |
| Sodium | 100mg |
| Cholesterol | 10mg |
This nutrition information is an estimate and may vary based on the specific ingredients used.
Frequently Asked Questions
Can I make aioli ahead of time?
Yes, making aioli ahead of time allows the flavors to meld, enhancing the taste.
Can I substitute the mayonnaise?
Yes, you can use Greek yogurt or a vegan mayonnaise for a different flavor profile.
How long does garlic aioli last?
It can be stored in the refrigerator for up to one week in an airtight container.
Why is my aioli too runny?
This could happen if you used too much lemon juice or did not mix it well. Adding more mayonnaise can help thicken it.
Can I use roasted garlic instead of raw?
Absolutely, roasted garlic offers a sweeter, milder flavor and works wonderfully in aioli.
Final Thoughts
There you have it! This Garlic Aioli Recipe is sure to become a staple in your kitchen.
With its rich flavor and creamy texture, it enhances any dish you serve it with. Don’t forget to check out our Garlic Mayo Recipe and Chipotle Aioli Recipe for more delicious variations!
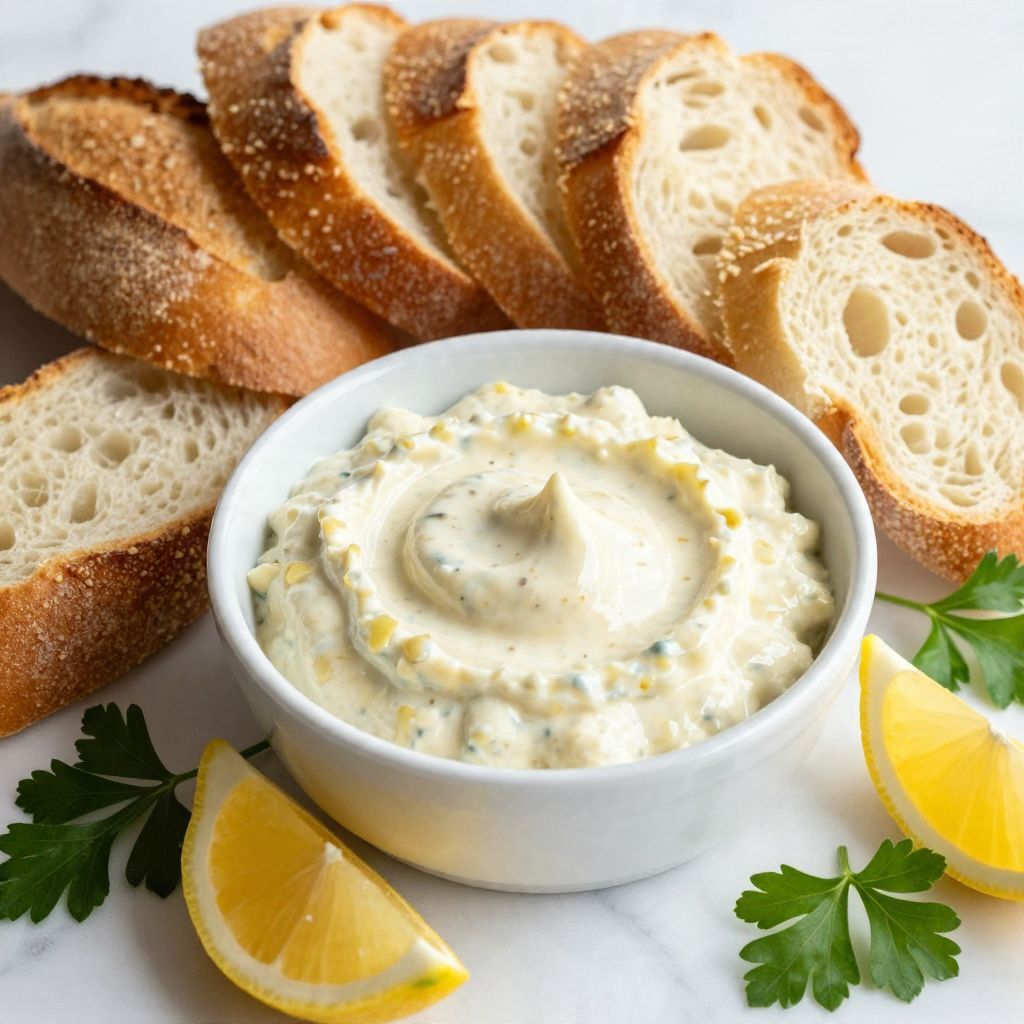
Garlic Aioli
Ingredients
Equipment
Method
- Gather all your ingredients on the counter.
- Using a sharp knife or a garlic press, mince the garlic cloves finely.
- In a mixing bowl, combine the mayonnaise and the minced garlic. Stir until well blended.
- Mix in the lemon juice and Dijon mustard.
- Add salt and pepper according to your taste.
- Use a whisk or hand blender to combine everything until smooth.
- Refrigerate the aioli for at least 30 minutes before serving.