
There’s something incredibly comforting about the aroma of freshly made Makki Ki Roti wafting through the kitchen. This traditional Indian cornflatbread is not just delicious; it holds a special place in many hearts, often served during winter months with a dollop of butter and a side of greens. With its hearty texture and slightly sweet flavor, it’s the perfect accompaniment to spicy dishes and a staple in many households.
Why You’ll Love This Recipe
This recipe is a true delight for the senses and brings a taste of tradition right to your table.
- Simple ingredients create a bold flavor.
- Gluten-free and perfect for all diets.
- Versatile enough to pair with various dishes.
- Quick to make once you get the hang of it.
- Perfect for family gatherings or cozy dinners.
My Experience Making This Recipe
Every time I make Makki Ki Roti, I’m transported back to my grandmother’s kitchen, where the crackling sound of the roti on the tawa would fill the air. The golden-brown flatbreads would come off the stove, hot and inviting, just waiting to be slathered with butter.
My family always gathers around the table, eagerly waiting for that first bite, and there’s no greater joy than witnessing their smiles as they enjoy this warm, rustic bread with a side of sarson da saag.
Recipe Overview
- Recipe Name: Makki Ki Roti
- Servings: 4
- Prep Time: 15 minutes
- Cook Time: 15 minutes
- Total Time: 30 minutes
- Course: Main Course
- Cuisine: Indian
- Calories per Serving: 180
Equipment You Will Need
- Large mixing bowl
- Rolling pin
- Tawa or flat skillet
- Spatula
- Wet cloth or paper towel
Ingredients for Makki Ki Roti
- 2 cups makki ka atta (corn flour)
- 1/2 cup water (adjust as needed)
- 1/2 teaspoon salt
- 1 tablespoon ghee or oil (optional, for cooking)
- Additional flour for dusting
Ingredient Notes and Substitutions
- Makki ka atta: This is the star ingredient and provides the unique flavor. You can substitute it with millet flour for a different taste.
- Water: Used to bind the dough. Use warm water for easier mixing.
- Ghee or oil: Adds richness to the roti. You can omit it if you prefer a lighter version.
How to Make Makki Ki Roti
Step 1: Prepare the Dough
In a large mixing bowl, combine the makki ka atta and salt. Gradually add water while mixing to form a soft dough.
Step 2: Knead the Dough
Knead the dough for about 5 minutes until smooth. This ensures the rotis are pliable and easy to roll out.
Step 3: Let the Dough Rest
Cover the dough with a damp cloth and let it rest for 15 minutes. Resting allows the flour to absorb moisture and makes rolling easier.
Step 4: Divide the Dough
Divide the dough into equal portions, about the size of a golf ball. This will help in rolling out uniform rotis.
Step 5: Roll the Roti
Flatten one ball slightly and dust it with flour. Use a rolling pin to roll it out into a circular shape, about 6 inches in diameter.
Step 6: Preheat the Tawa
Heat a tawa or skillet over medium-high heat until hot. A hot surface ensures a nice char and crispiness.
Step 7: Cook the Roti
Place the rolled roti on the hot tawa. Cook for about 1-2 minutes on one side until bubbles form, then flip it over.
Step 8: Finish Cooking
Press down gently with a spatula and cook for another 1-2 minutes until golden brown. Repeat with the remaining dough, brushing each roti with ghee or oil if desired.
Pro Tip: Make sure the dough is soft but not sticky for the best results.
Tips for the Best Makki Ki Roti
- Use warm water to make the dough for better elasticity.
- Let the dough rest for at least 15 minutes to soften.
- Keep the tawa hot to achieve that perfect golden-brown crust.
- Dust the dough balls with flour to prevent sticking while rolling.
- Cook on medium heat to avoid burning while ensuring it’s fully cooked.
Common Mistakes to Avoid
- Not resting the dough can lead to tough rotis.
- Rolling too thin can cause the roti to break apart.
- Using cold water can make the dough hard to work with.
- Cooking on low heat may result in uneven cooking.
Serving Suggestions
Makki Ki Roti pairs beautifully with a variety of dishes, enhancing the flavor of your meal.
- Serve with sarson da saag for a classic combination.
- Enjoy with yogurt or raita for a refreshing contrast.
- Pair with spicy pickles for an added kick.
- Drizzle with honey or jaggery for a sweet twist.
Variations to Try
- Add finely chopped onions for extra flavor and crunch.
- Incorporate spices like cumin or ajwain to enhance aroma.
- Mix in chopped greens for a nutritious boost.
- Use different flours like wheat for a unique texture.
Dietary Adaptations
- Gluten-free: Naturally gluten-free as it uses corn flour.
- Dairy-free: Can be made without ghee; use oil instead.
- Vegan: Suitable for vegans by avoiding ghee.
- Low-carb: Not low-carb but can experiment with almond flour.
Storage and Reheating
Refrigerator
Store leftover rotis in an airtight container for up to 3 days.
- Place parchment paper between layers to prevent sticking.
Freezer
Freeze rotis in a single layer, then transfer to a freezer bag for up to a month.
- Thaw overnight in the refrigerator before reheating.
Reheating
Reheat in a hot tawa for best results, adding a little ghee if desired.
- Microwave can be used but may make them chewy.
Nutrition Information
| Nutrient | Amount |
|---|---|
| Calories | 180 |
| Total Fat | 5g |
| Saturated Fat | 1g |
| Carbohydrates | 31g |
| Fiber | 3g |
| Sugar | 1g |
| Protein | 4g |
| Sodium | 6mg |
| Cholesterol | 0mg |
This nutritional information is approximate and may vary based on cooking methods and specific ingredients used.
Frequently Asked Questions
Can I make the dough ahead of time?
Yes, you can prepare the dough a few hours in advance and store it in the refrigerator.
What can I substitute for makki ka atta?
You can use millet flour or a blend of gluten-free flours for a different flavor.
How do I store leftover rotis?
Keep them in an airtight container in the refrigerator for up to three days.
Why is my roti breaking while rolling?
This usually happens if the dough is too dry; adding a little water can help.
Can I make these rotis without ghee?
Absolutely, you can use oil or skip the fat altogether for a lighter version.
Final Thoughts
Making Makki Ki Roti is more than just a cooking task; it’s about bringing people together over warm, flavorful food. I hope you give this recipe a try and enjoy the delightful taste and texture it offers.
If you’re eager to explore more culinary creations, check out this fry bread recipe or indulge in making sourdough naan. Happy cooking!
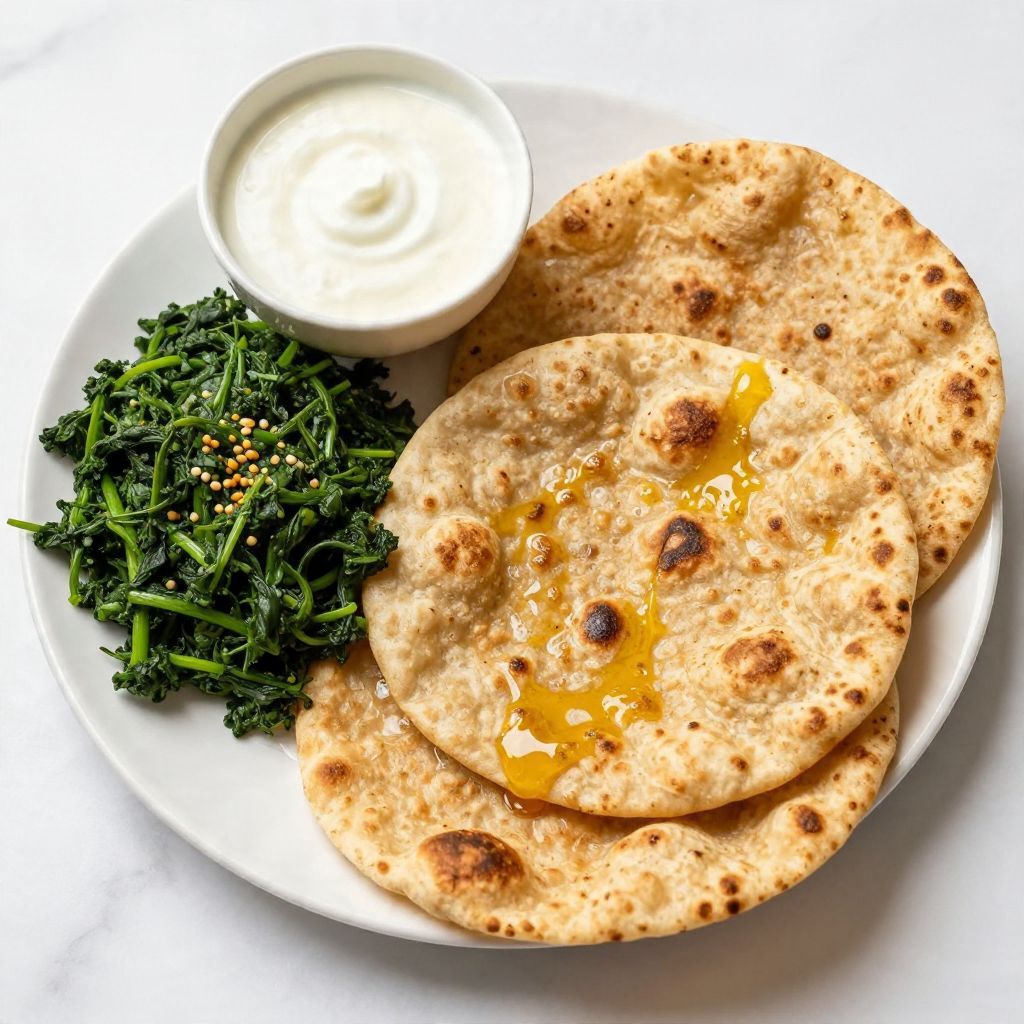
Makki Ki Roti
Ingredients
Equipment
Method
- In a large mixing bowl, combine the makki ka atta and salt.
- Gradually add water while mixing to form a soft dough.
- Knead the dough for about 5 minutes until smooth.
- Cover the dough with a damp cloth and let it rest for 15 minutes.
- Divide the dough into equal portions, about the size of a golf ball.
- Flatten one ball slightly and dust it with flour.
- Use a rolling pin to roll it out into a circular shape, about 6 inches in diameter.
- Heat a tawa or skillet over medium-high heat until hot.
- Place the rolled roti on the hot tawa and cook for about 1-2 minutes until bubbles form.
- Flip the roti over and press down gently with a spatula, cooking for another 1-2 minutes until golden brown.
- Repeat with the remaining dough, brushing each roti with ghee or oil if desired.