Beer can chicken recipe delivers juicy, flavorful meat with the crispiest skin you have ever tasted, all thanks to a clever technique that uses an open beer can to steam the bird from the inside out. This method works beautifully for weeknight dinners or weekend cookouts when you want to impress without spending hours in the kitchen. The beer keeps the chicken moist while the indirect heat creates a golden, crackly exterior that practically shatters when you bite into it.
You only need a whole chicken, your favorite beer, and a few pantry spices to make this happen. The setup takes about ten minutes, and your grill or oven does the rest of the work while you relax with friends or prep side dishes.
Why You’ll Love This Recipe
This recipe solves the age-old problem of dry chicken breasts while giving you show-stopping presentation. The beer can method is equal parts functional and fun, turning a simple roast chicken into a conversation starter.
- The chicken stays incredibly moist because the beer creates constant steam inside the cavity
- You get perfectly crispy skin on all sides thanks to the upright position and even heat circulation
- Cleanup is minimal since the chicken cooks directly on the can with no roasting pan required
- The spice rub is endlessly customizable to match whatever flavors you crave
- It looks ridiculously impressive when you bring it to the table, even though the technique is simple
My Experience Making This Recipe
I was skeptical the first time I saw someone balance a chicken on a beer can, thinking it was more novelty than actual cooking technique. Then I tasted the results and immediately understood why people swear by this method.
The aroma while it cooks is incredible, filling your backyard or kitchen with a blend of caramelized spices and roasted meat. My family now requests this chicken for every warm-weather gathering, and I have stopped bothering with traditional roast chicken altogether.
The hardest part is waiting for it to rest before carving because everyone crowds around the grill asking when they can eat. I have made this at least twenty times now, tweaking the spice blend each time, and it never fails to get compliments.
Recipe Overview
- Recipe Name: Beer Can Chicken
- Servings: 4
- Prep Time: 15 minutes
- Cook Time: 75 minutes
- Total Time: 90 minutes
- Course: Main Course
- Cuisine: American
- Calories per Serving: 385
Equipment You Will Need
- Gas or charcoal grill, or oven
- 12-ounce can of beer
- Can opener
- Small mixing bowl for spice rub
- Paper towels
- Meat thermometer
- Aluminum drip pan for grill, or rimmed baking sheet for oven
- Tongs
- Cutting board
Ingredients for Beer Can Chicken Recipe
- 1 whole chicken (4 to 5 pounds)
- 1 can beer (12 ounces, any light lager or pilsner works)
- 2 tablespoons olive oil
- 2 tablespoons brown sugar
- 1 tablespoon paprika
- 1 tablespoon garlic powder
- 1 tablespoon onion powder
- 2 teaspoons kosher salt
- 1 teaspoon black pepper
- 1 teaspoon dried thyme
- 1/2 teaspoon cayenne pepper
Ingredient Notes and Substitutions
- Whole chicken: Provides the best ratio of meat to crispy skin and cooks evenly on the can. You can use a smaller 3-pound chicken, but reduce cooking time by about 15 minutes.
- Beer: Creates moisture and adds subtle flavor through steam, though most alcohol cooks off. Substitute with chicken broth, root beer, or apple cider if you prefer non-alcoholic options.
- Brown sugar: Balances the spices and helps create caramelization on the skin. White sugar or honey works, but reduce honey to 1 tablespoon since it burns faster.
- Paprika: Adds color and mild sweetness to the rub. Smoked paprika gives a deeper, smokier flavor that pairs beautifully with grilled chicken.
- Cayenne pepper: Brings gentle heat without overwhelming other flavors. Skip it entirely for a milder version, or double it if you like spicy food.
How to Make Beer Can Chicken Recipe
Step 1: Prepare Your Grill or Oven
Set up your grill for indirect heat by lighting burners on one side only and aiming for a temperature of 375 degrees Fahrenheit, or preheat your oven to 375 degrees. Indirect heat prevents the bottom of the chicken from burning while the top stays pale and sad.
Place a drip pan filled with one cup of water under the unlit side of the grill or on the lower oven rack to catch drippings. This prevents flare-ups and makes cleanup easier later.
Step 2: Make the Spice Rub
Combine brown sugar, paprika, garlic powder, onion powder, salt, black pepper, thyme, and cayenne in a small bowl, mixing thoroughly with a fork. The sugar will look clumpy at first, but it will break down as you mix and coat the chicken.
This rub creates a flavorful crust that balances sweet, savory, and spicy notes. You can make a double batch and store the extra in an airtight container for up to three months.
Step 3: Prepare the Chicken
Remove the giblets from the chicken cavity if they are included, then pat the entire bird dry inside and out with paper towels. Moisture is the enemy of crispy skin, so spend an extra minute getting it really dry.
Rub the olive oil all over the chicken, coating every surface including under the wings and around the legs. The oil helps the spice rub stick and promotes even browning.
Step 4: Season the Chicken
Sprinkle the spice rub generously over the entire chicken, using your hands to massage it into the skin and ensure even coverage. Do not forget the bottom and inside the cavity, where the rub adds flavor as the beer steams.
Use all the rub because this is your only source of seasoning, and the chicken has a lot of surface area to cover. Any leftover rub will fall into the drip pan, creating a flavorful base for gravy if you want to make one later.
Step 5: Prepare the Beer Can
Open the beer can and pour out about half, leaving roughly 6 ounces in the can. You can drink the other half or save it for cooking, but you need space in the can for steam to build.
Use a can opener to punch two or three additional holes in the top of the can. This increases steam output and helps the beer evaporate more evenly throughout the cooking process.
Step 6: Mount the Chicken
Hold the chicken upright with the cavity opening facing down, then lower it onto the beer can so the can slides into the cavity. The chicken should sit upright with the can supporting it and the legs spread out like a tripod.
Tuck the wing tips behind the back to prevent them from burning. This position looks ridiculous, but it works perfectly because heat circulates around the entire bird.
Step 7: Cook the Chicken
Place the chicken on the unlit side of the grill or on a rimmed baking sheet in the oven, making sure it stands upright and stable. Close the grill lid or oven door and cook for 60 to 75 minutes without opening it, because every peek releases heat and extends cooking time.
The chicken is done when a meat thermometer inserted into the thickest part of the thigh reads 165 degrees Fahrenheit. The skin should be deep golden brown and crispy all over.
Step 8: Rest and Serve
Carefully remove the chicken from the grill or oven using tongs to grasp the can, being cautious because the can and liquid inside are extremely hot. Transfer the chicken, still on the can, to a cutting board and let it rest for 10 minutes.
This resting period lets the juices redistribute throughout the meat, keeping every bite moist. Remove the beer can by holding the chicken steady with one hand and pulling the can out with tongs, then carve and serve immediately.
Pro Tip: Check your chicken at the 60-minute mark even if your recipe says longer, because grill temperatures vary wildly and you risk drying out the meat if you blindly follow times. A meat thermometer is your best friend here and takes the guesswork out of doneness.
Tips for the Best Beer Can Chicken Recipe
- Buy a chicken that fits comfortably on your grill or in your oven while standing upright, checking the height before you start cooking to avoid a smoky disaster.
- Let the chicken sit at room temperature for 30 minutes before cooking so the meat cooks more evenly and you avoid a cold center with overcooked edges.
- Apply the spice rub the night before and refrigerate the chicken uncovered, which dries out the skin even more for extra crispiness and lets the flavors penetrate deeper.
- Use a drip pan with aromatics like onion wedges, garlic cloves, and fresh herbs in the water to create fragrant steam that flavors the chicken from below.
- Rotate the chicken 180 degrees halfway through cooking if your grill has hot spots, which helps achieve even browning on all sides.
- Save the drippings from the pan and skim off the fat to make a quick gravy or use them to flavor rice or roasted vegetables.
Common Mistakes to Avoid
- Using a full can of beer creates too much liquid that never fully evaporates, leaving you with a soggy bottom instead of crispy skin all around.
- Skipping the oil before applying the rub results in spices that do not stick properly and fall off during cooking, wasting your seasoning.
- Cooking over direct heat burns the outside before the inside reaches a safe temperature, giving you charred skin and raw meat near the bone.
- Opening the grill or oven repeatedly to check on the chicken releases heat and extends cooking time, plus it dries out the meat by letting steam escape.
- Carving immediately after cooking causes all the juices to run out onto the cutting board instead of staying in the meat where they belong.
Serving Suggestions
This chicken pairs beautifully with classic picnic sides and fresh summer salads. The rich, seasoned meat can handle bold flavors, so do not be shy about pairing it with tangy or spicy accompaniments.
- Creamy coleslaw with a vinegar-based dressing cuts through the richness of the chicken skin
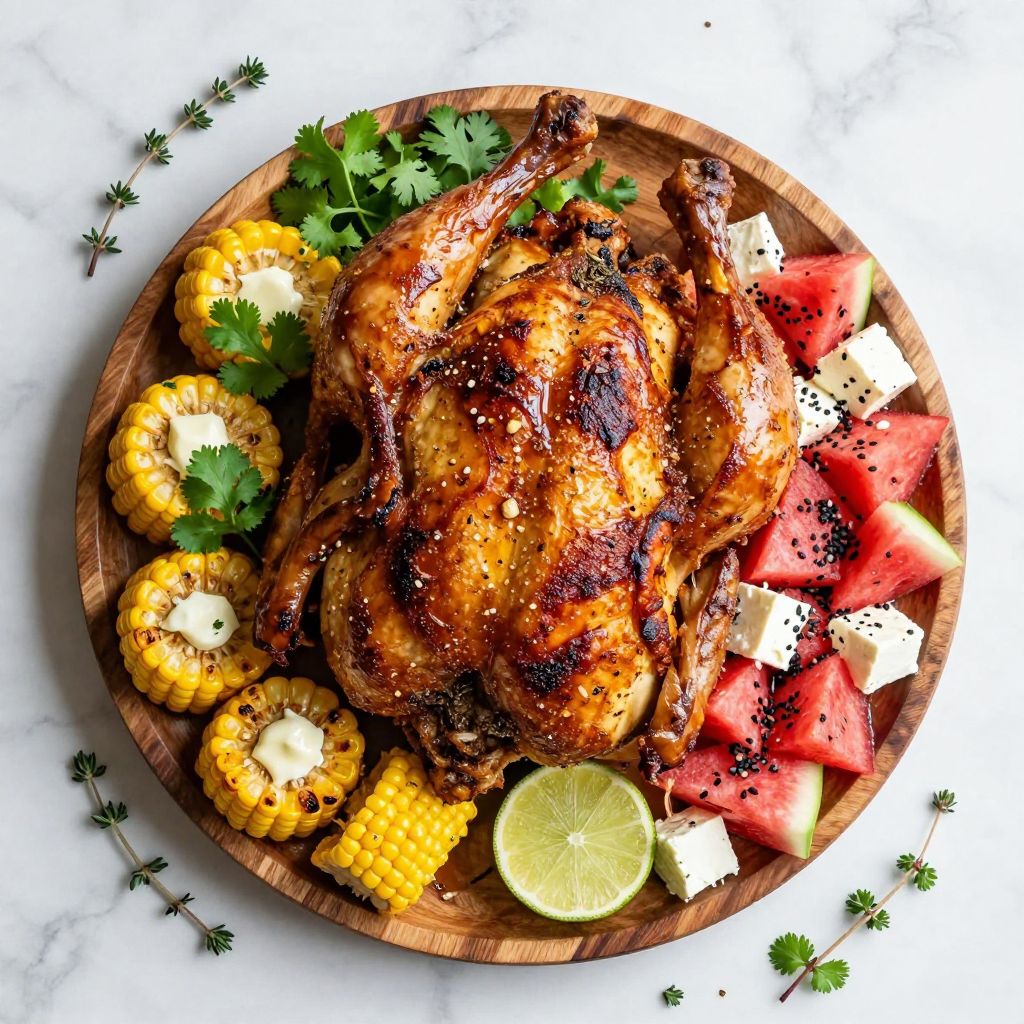
- Grilled corn on the cob with butter and lime makes perfect use of the already-hot grill
- Baked beans with brown sugar and bacon echo the sweet-savory notes in the spice rub
- Potato salad with mustard and fresh dill adds cool creaminess to balance the hot, crispy chicken
- Watermelon and feta salad brings refreshing sweetness that contrasts nicely with the savory meat
Variations to Try
- Lemon herb version: Replace the brown sugar with lemon zest and swap thyme for a mix of rosemary, oregano, and parsley for a Mediterranean flavor profile that tastes lighter and brighter.
- BBQ style: Mix 2 tablespoons of your favorite BBQ rub into the spice blend and brush the chicken with BBQ sauce during the last 10 minutes of cooking for sticky, caramelized goodness.
- Asian-inspired: Use a rub made from five-spice powder, ginger, garlic, and brown sugar, then brush with a mixture of soy sauce and honey halfway through cooking.
- Spicy jalapeño: Add 2 tablespoons of chopped jalapeños to the beer can and increase cayenne to 1 tablespoon for a chicken with serious heat that builds with each bite.
- Maple mustard: Replace brown sugar with maple syrup mixed into a Dijon mustard coating, then dust with paprika and garlic powder for a sweet-tangy glaze.
Dietary Adaptations
- Gluten-free: This recipe is naturally gluten-free as long as you verify your spices contain no additives and use gluten-free beer or substitute with broth.
- Dairy-free: The recipe contains no dairy, making it suitable for dairy-free diets without any modifications needed.
- Low-carb/Keto: Remove the brown sugar from the rub and the recipe becomes keto-friendly, though you lose some caramelization on the skin.
- Paleo: Skip the beer and use chicken broth or water in the can instead, and the recipe fits paleo guidelines perfectly.
Storage and Reheating
Refrigerator
Let the chicken cool completely, then remove the meat from the bones and store in an airtight container for up to four days. The skin loses its crispiness in the fridge, but the meat stays flavorful and moist.
- Store white and dark meat separately if you prefer, since they reheat at different rates
- Keep the skin attached if you plan to crisp it up again during reheating
Freezer
Freeze carved chicken in freezer-safe bags or containers for up to three months. Remove as much air as possible to prevent freezer burn, and label with the date.
- Freeze in portion sizes that match your typical meals to avoid thawing more than you need
- Thaw overnight in the refrigerator before reheating for best texture
Reheating
Reheat chicken in a 350-degree oven for 15 to 20 minutes until warmed through. Add a splash of chicken broth to the pan to prevent drying.
- For crispy skin, place pieces skin-side up under the broiler for 2 to 3 minutes after reheating
- Microwave individual portions for 60 to 90 seconds on 50% power if you are in a hurry, though the texture suffers slightly
Nutrition Information
| Nutrient | Amount |
|---|---|
| Calories | 385 |
| Total Fat | 22g |
| Saturated Fat | 6g |
| Carbohydrates | 9g |
| Fiber | 1g |
| Sugar | 7g |
| Protein | 36g |
| Sodium | 680mg |
| Cholesterol | 115mg |
Nutrition values are approximate and vary based on the size of your chicken and whether you eat the skin. These calculations assume you consume a quarter of a 4-pound chicken including some skin.
Frequently Asked Questions
Can I make beer can chicken in the oven if I do not have a grill?
Absolutely, and the method is nearly identical to grilling. Place the chicken on a rimmed baking sheet at 375 degrees and cook for the same amount of time, though you will miss the subtle smoky flavor from the grill.
Can I prepare the chicken ahead of time?
You can apply the spice rub up to 24 hours before cooking and store the seasoned chicken in the refrigerator. Let it sit at room temperature for 30 minutes before mounting it on the can and cooking.
What if my chicken is wobbly on the can and will not stand up?
Spread the legs wider to create a more stable tripod, or use a special beer can chicken holder that provides extra support. Some chickens are just awkwardly shaped, and a holder solves this problem completely.
Why is my chicken skin not crispy?
Moisture is the culprit, so make sure you dry the chicken thoroughly before seasoning and avoid basting during cooking. Cooking at too low a temperature also prevents crisping, so keep your heat at 375 degrees or slightly higher.
Can I use a different type of alcohol or liquid in the can?
Hard cider, wine, or even soda work beautifully and add their own subtle flavors to the steam. Just avoid anything with a lot of sugar that might burn or anything too strongly flavored that will overpower the chicken.
Final Thoughts
Beer can chicken turns out perfectly every single time once you master the simple technique, giving you juicy meat and crispy skin without any fancy equipment or skills. The novelty factor never gets old, and your guests will remember this chicken long after the meal ends.
Try this recipe at your next cookout and watch how quickly it disappears from the platter. You will wonder why you ever bothered with any other method for roasting a whole chicken.
Beer Can Chicken
Ingredients
Equipment
Method
- Set up your grill for indirect heat by lighting burners on one side only and aiming for a temperature of 375 degrees Fahrenheit, or preheat your oven to 375 degrees. Place a drip pan filled with one cup of water under the unlit side of the grill or on the lower oven rack to catch drippings.
- Combine brown sugar, paprika, garlic powder, onion powder, salt, black pepper, thyme, and cayenne in a small bowl, mixing thoroughly with a fork.
- Remove the giblets from the chicken cavity if they are included, then pat the entire bird dry inside and out with paper towels.
- Rub the olive oil all over the chicken, coating every surface including under the wings and around the legs.
- Sprinkle the spice rub generously over the entire chicken, using your hands to massage it into the skin and ensure even coverage, including the bottom and inside the cavity.
- Open the beer can and pour out about half, leaving roughly 6 ounces in the can. Use a can opener to punch two or three additional holes in the top of the can.
- Hold the chicken upright with the cavity opening facing down, then lower it onto the beer can so the can slides into the cavity. The chicken should sit upright with the can supporting it and the legs spread out like a tripod. Tuck the wing tips behind the back to prevent them from burning.
- Place the chicken on the unlit side of the grill or on a rimmed baking sheet in the oven, making sure it stands upright and stable. Close the grill lid or oven door and cook for 60 to 75 minutes without opening it. The chicken is done when a meat thermometer inserted into the thickest part of the thigh reads 165 degrees Fahrenheit.
- Carefully remove the chicken from the grill or oven using tongs to grasp the can. Transfer the chicken, still on the can, to a cutting board and let it rest for 10 minutes. Remove the beer can by holding the chicken steady with one hand and pulling the can out with tongs, then carve and serve immediately.