
Picture this: the sweet, rich taste of chocolate melting in your mouth, paired with a creamy coconut center that takes you right back to your childhood. The Mounds Candy Recipe is a delightful treat that’s not just a nostalgic favorite but also surprisingly easy to make at home. With its smooth texture and delectable flavor, this candy is perfect for satisfying your sweet tooth or sharing with friends. Let’s get into the ingredients and steps to create this mouthwatering delight!
Why You’ll Love This Recipe
There’s so much to adore about making your own Mounds candy.
- Rich chocolate coating that’s hard to resist.
- Creamy coconut filling that brings a tropical twist.
- Perfect for gift-giving or special occasions.
- Simple ingredients you likely already have at home.
- Customizable to your preference—make them mini or large!
My Experience Making This Recipe
When I first tried making Mounds candy, I was surprised by how quickly the flavors came together. The kitchen filled with the sweet aroma of melted chocolate, and I knew I was in for a treat.
My family couldn’t resist sneaking bites before the candies even cooled! Watching their faces light up with each bite made all the effort worthwhile.
Recipe Overview
- Recipe Name: Mounds Candy
- Servings: 12 pieces
- Prep Time: 30 minutes
- Cook Time: 15 minutes
- Total Time: 45 minutes
- Course: Dessert
- Cuisine: American
- Calories per Serving: 200
Equipment You Will Need
- Mixing bowls
- Measuring cups and spoons
- Microwave-safe dish
- Parchment paper
- Baking sheet
- Fork or dipping tool
Ingredients for Mounds Candy
- 2 cups sweetened shredded coconut
- 1 cup sweetened condensed milk
- 1 teaspoon vanilla extract
- 2 cups semi-sweet chocolate chips
- 1 tablespoon coconut oil (optional)
Ingredient Notes and Substitutions
- Sweetened shredded coconut: Provides a chewy texture and sweetness. Unsweetened coconut can be used, but you may need to adjust the sugar.
- Sweetened condensed milk: Binds the coconut mixture together. You can use evaporated milk with a bit of sugar if needed.
- Semi-sweet chocolate chips: Offers a perfect balance of sweetness. Dark chocolate is a great alternative for a richer flavor.
- Coconut oil: Helps the chocolate melt smoothly. You can substitute with vegetable oil if desired.
How to Make Mounds Candy
Step 1: Prepare the Baking Sheet
Line a baking sheet with parchment paper. This helps prevent the candy from sticking and makes cleanup easier.
Step 2: Mix Coconut Filling
In a mixing bowl, combine sweetened shredded coconut, sweetened condensed milk, and vanilla extract. This mixture forms the chewy, creamy coconut center that makes Mounds so delicious.
Step 3: Shape the Coconut Mixture
Using your hands, shape the coconut mixture into small, oval mounds and place them on the prepared baking sheet. Make them about the size of a golf ball; this ensures they are a good bite-sized treat.
Step 4: Chill the Coconut Mounds
Refrigerate the mounds for at least 15 minutes, or until firm. Chilling helps them hold their shape when you dip them in chocolate.
Step 5: Melt the Chocolate
In a microwave-safe dish, melt the chocolate chips and coconut oil in 30-second intervals, stirring in between. This ensures the chocolate melts evenly without burning.
Step 6: Dip the Mounds in Chocolate
Using a fork or dipping tool, dip each coconut mound into the melted chocolate, allowing the excess to drip off. This chocolate coating is what makes these candies irresistible!
Step 7: Set the Chocolate
Place the dipped candies back on the parchment-lined sheet. Allow the chocolate to set at room temperature, or speed up the process by refrigerating them for a few minutes.
Step 8: Enjoy Your Mounds Candy
Once the chocolate is firm, your Mounds candy is ready to enjoy! Each bite is a perfect mix of creamy coconut and rich chocolate.
Pro Tip: For an extra touch, sprinkle a little sea salt on top of the chocolate before it sets. The salty-sweet combo is heavenly!
Tips for the Best Mounds Candy
- Use high-quality chocolate for a richer flavor.
- Let the coconut mixture cool before shaping to prevent sticking to your hands.
- Make sure the coconut is evenly mixed to avoid clumps.
- Experiment with different chocolate types for unique flavors.
- Store leftovers in an airtight container to maintain freshness.
Common Mistakes to Avoid
- Not chilling the coconut mounds long enough can cause them to fall apart when dipped.
- Using chocolate that is too hot can lead to a grainy texture.
- Skipping the parchment paper can make cleanup a nightmare.
- Overmixing the coconut can lead to a dense filling instead of a fluffy one.
Serving Suggestions
These Mounds candies are delightful on their own, but you can elevate your dessert spread with some thoughtful pairings.
- Serve alongside fresh fruit for a refreshing contrast.
- Pair with coffee or tea for a cozy afternoon treat.
- Include them in a dessert platter with brownies and cookies.
- Wrap them up as homemade gifts for friends or family.
Variations to Try
- Add chopped nuts to the coconut mixture for a crunchy texture.
- Use dark chocolate for a richer flavor profile.
- Incorporate flavored extracts like almond or coconut for a twist.
- Make mini-sized versions for bite-sized treats at parties.
Dietary Adaptations
- For gluten-free, ensure all ingredients are certified gluten-free.
- Use dairy-free chocolate and coconut cream for a vegan version.
- For low-carb, consider using sugar-free chocolate and unsweetened coconut.
Storage and Reheating
Refrigerator
Store your Mounds candy in an airtight container in the fridge for up to two weeks. This keeps them fresh and prevents melting.
- Use parchment paper between layers to avoid sticking.
Freezer
You can freeze Mounds candy for up to three months. Just make sure they are well-wrapped to avoid freezer burn.
- Thaw in the refrigerator before serving for the best texture.
Reheating
There’s no need to reheat these treats, but if they soften, place them back in the fridge for a few minutes.
- Avoid the microwave to preserve the chocolate coating.
Nutrition Information
| Nutrient | Amount |
|---|---|
| Calories | 200 |
| Total Fat | 12g |
| Saturated Fat | 10g |
| Carbohydrates | 23g |
| Fiber | 2g |
| Sugar | 18g |
| Protein | 2g |
| Sodium | 60mg |
| Cholesterol | 0mg |
This nutrition information is approximate and can vary based on the specific ingredients used.
Frequently Asked Questions
Can I use unsweetened coconut?
Yes, but you may need to add extra sugar to balance the flavors.
Can I make these ahead of time?
Absolutely! They can be made a few days in advance and stored in the fridge.
How should I store leftovers?
Keep them in an airtight container in the refrigerator for optimal freshness.
What if my chocolate is grainy?
This often happens if the chocolate is overheated; make sure to melt it slowly.
Can I customize the filling?
Yes! Feel free to add flavors like almond extract or nuts for a unique twist.
Final Thoughts
Making your own Mounds candy is a fun and rewarding experience that brings a taste of nostalgia right to your kitchen. With a few simple ingredients, you can create a treat that’s sure to impress!
So grab your ingredients, roll up your sleeves, and indulge in this delightful candy. And while you’re at it, check out my recipes for candied bacon and popcorn balls for more delightful treats!
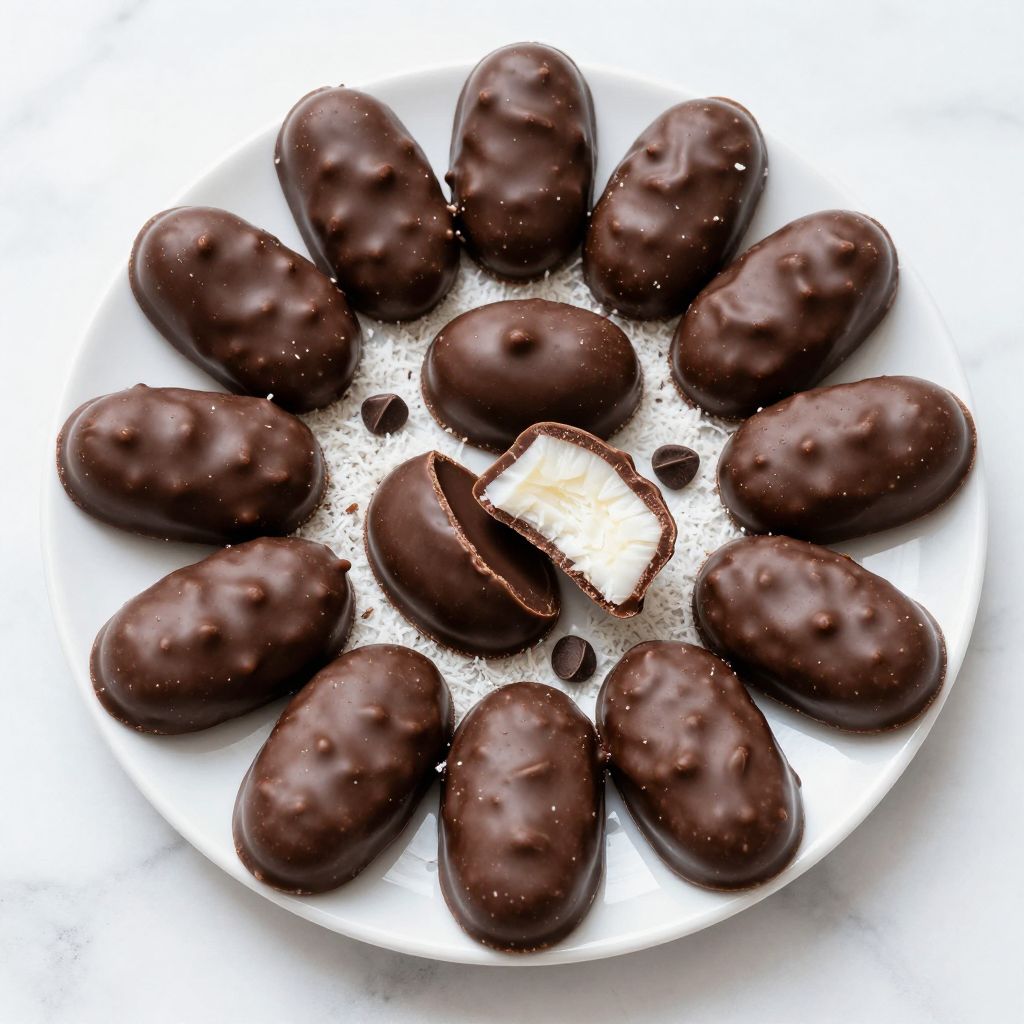
Mounds Candy
Ingredients
Equipment
Method
- Line a baking sheet with parchment paper.
- In a mixing bowl, combine sweetened shredded coconut, sweetened condensed milk, and vanilla extract.
- Shape the coconut mixture into small, oval mounds and place them on the prepared baking sheet.
- Refrigerate the mounds for at least 15 minutes, or until firm.
- In a microwave-safe dish, melt the chocolate chips and coconut oil in 30-second intervals, stirring in between.
- Using a fork or dipping tool, dip each coconut mound into the melted chocolate, allowing the excess to drip off.
- Place the dipped candies back on the parchment-lined sheet.
- Allow the chocolate to set at room temperature, or refrigerate for a few minutes.
- Once the chocolate is firm, enjoy your Mounds candy!