
As the rich aroma of toasted buckwheat fills your kitchen, memories of family gatherings come rushing back. Kasha Varnishkes is more than just a dish; it’s a cozy embrace of flavors and textures that blends nutty buckwheat with tender pasta and a savory onion sauté. This recipe is special because it brings together simplicity and heartiness in one bowl, making it a delightful weeknight dinner or a comforting side dish. With its unique flavor profile and wholesome ingredients, you’ll find this dish is not only satisfying but also versatile for any meal. Let’s gather our ingredients and get started on this delicious journey!
Why You’ll Love This Recipe
This recipe is a true crowd-pleaser with its delightful textures and flavors.
- Tasty and filling, perfect for any occasion.
- Quick to prepare, making it ideal for busy nights.
- Versatile enough to be served as a main dish or side.
- Nutritious, packed with fiber and protein.
- Great for meal prep and leftovers.
My Experience Making This Recipe
When I first made Kasha Varnishkes, I was immediately drawn in by the nutty aroma of the buckwheat toasting in the pan. The combination of sautéed onions and pasta creates a warm, inviting dish that fills the house with comfort.
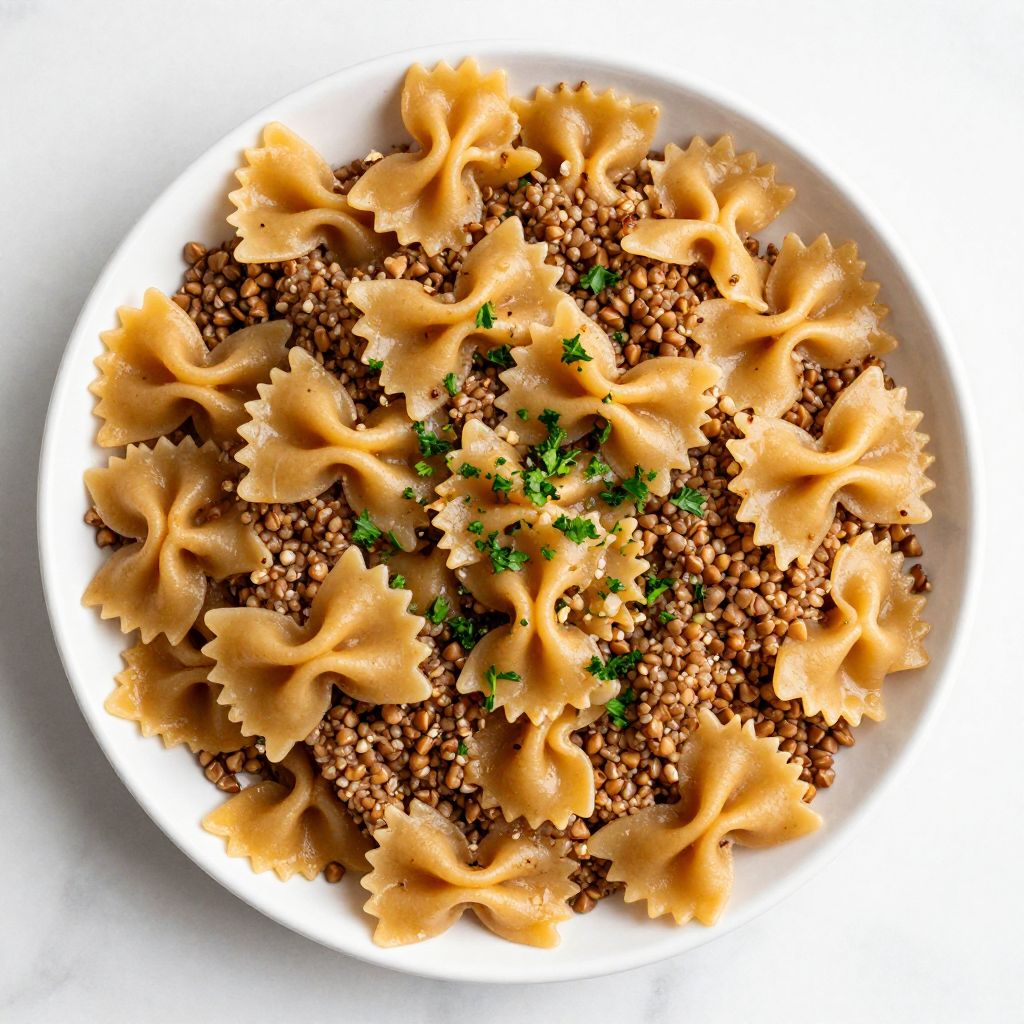
As I plated the dish, the golden-brown pasta and the rich kasha formed a beautiful contrast. Each bite was a delightful reminder of family traditions and the simple joys of home-cooked meals.
Recipe Overview
- Recipe Name: Kasha Varnishkes
- Servings: 4
- Prep Time: 15 minutes
- Cook Time: 30 minutes
- Total Time: 45 minutes
- Course: Main or Side Dish
- Cuisine: Eastern European
- Calories per Serving: 320
Equipment You Will Need
- Large skillet
- Medium saucepan
- Wooden spoon or spatula
- Measuring cups and spoons
- Colander
Ingredients for Kasha Varnishkes
- 1 cup buckwheat kasha
- 2 cups water or broth
- 1 cup bowtie pasta (or any pasta of choice)
- 2 tablespoons olive oil or butter
- 1 medium onion, finely chopped
- Salt to taste
- Pepper to taste
- Chopped parsley for garnish (optional)
Ingredient Notes and Substitutions
- Buckwheat kasha: Adds a nutty flavor and is gluten-free. For a different texture, try quinoa.
- Bowtie pasta: Complements the dish well. Any pasta can be used, like egg noodles or penne.
- Olive oil or butter: Provides richness. You can use vegan butter for a dairy-free option.
- Onion: Adds sweetness and depth. Shallots can be a lovely substitute.
How to Make Kasha Varnishkes
Step 1: Toast the Kasha
In a large skillet, heat 1 tablespoon of olive oil over medium heat. Add the buckwheat kasha and toast for about 5 minutes until fragrant, stirring frequently. This enhances the nutty flavor.
Step 2: Add Liquid
Pour in 2 cups of water or broth and bring to a boil. Reduce the heat to low, cover, and simmer for 10-15 minutes until the kasha is tender and the liquid is absorbed.
Step 3: Cook the Pasta
Meanwhile, in a medium saucepan, cook the pasta according to package instructions until al dente. Drain and set aside, reserving a bit of pasta water for later.
Step 4: Sauté the Onion
In the same skillet used for the kasha, add another tablespoon of olive oil and the chopped onion. Sauté over medium heat until the onion is golden and translucent, about 5 minutes.
Step 5: Combine Kasha and Pasta
Once the onions are ready, add the cooked kasha and pasta to the skillet. Gently toss to combine, allowing the flavors to meld together.
Step 6: Season the Dish
Season with salt and pepper to taste. If the mixture seems dry, add a bit of reserved pasta water to achieve your desired consistency.
Step 7: Garnish and Serve
Transfer the Kasha Varnishkes to a serving dish. Garnish with chopped parsley for a fresh touch.
Step 8: Enjoy!
Serve warm and enjoy the comforting flavors of this classic dish. It’s great as a main course or as a side alongside roasted meats.
Pro Tip: Toasting the kasha is key to unlocking its full flavor; don’t skip this step!
Tips for the Best Kasha Varnishkes
- Toast the kasha longer for a deeper nuttiness.
- Use homemade broth for extra flavor in the dish.
- Adjust the seasoning at the end for a personalized touch.
- Incorporate vegetables like mushrooms or spinach for added nutrition.
- Serve with a dollop of sour cream or yogurt for creaminess.
Common Mistakes to Avoid
- Not toasting the kasha enough; it can taste bland if rushed.
- Overcooking the pasta can make it mushy, so watch the timer.
- Skipping the sautéing of onions means missing out on flavor depth.
- Using too much liquid can make the kasha soggy.
Serving Suggestions
Pair this dish with a fresh salad or roasted vegetables. Here are some ideas to complement your meal:
- Roasted chicken or turkey
- Grilled sausages
- Vegetable stir-fry
- Pickled beets
Variations to Try
- Add sautéed mushrooms for an earthy flavor.
- Incorporate diced carrots or peas for a pop of color.
- Use different pasta shapes for a fun twist.
- Try adding cooked lentils for extra protein.
Dietary Adaptations
- Gluten-free: Use gluten-free pasta.
- Dairy-free: Substitute butter with olive oil or vegan butter.
- Vegan: Omit any dairy products like sour cream.
- Low-carb/keto: Replace pasta with spiralized vegetables.
Storage and Reheating
Refrigerator
Store leftovers in an airtight container in the refrigerator for up to four days.
- Allow to cool before sealing.
- Reheat on the stove or microwave.
Freezer
You can freeze Kasha Varnishkes for up to three months.
- Portion into freezer-safe containers.
- Label with date for easy tracking.
Reheating
Reheat gently on the stovetop with a splash of water to avoid drying out.
- Stir frequently to ensure even heating.
- Microwave in 30-second intervals if preferred.
Nutrition Information
| Nutrient | Amount |
|---|---|
| Calories | 320 |
| Total Fat | 10g |
| Saturated Fat | 2g |
| Carbohydrates | 50g |
| Fiber | 8g |
| Sugar | 1g |
| Protein | 12g |
| Sodium | 150mg |
| Cholesterol | 5mg |
This nutritional information is approximate and can vary based on specific ingredients used.
Frequently Asked Questions
Can I make Kasha Varnishkes ahead of time?
Absolutely! You can prepare it a day in advance and reheat when ready to serve.
What can I use instead of buckwheat kasha?
Quinoa or farro can be great substitutes, providing a different but delicious texture.
How should I store leftovers?
Keep leftovers in the refrigerator in an airtight container or freeze them for later use.
Why is my kasha mushy?
This can happen if too much liquid was added or if it was overcooked. Make sure to follow the measurements closely.
Can I add meat to this dish?
Yes, adding cooked chicken or sausage can complement the flavors beautifully.
Final Thoughts
Making Kasha Varnishkes brings a taste of tradition to your table and is sure to become a beloved staple. With its delightful nuttiness and versatile nature, you’ll find yourself reaching for this recipe time and time again.
Explore more comforting recipes like Noodle Kugel or delicious Chicken and Biscuits. Enjoy your cooking adventures!
Kasha Varnishkes
Ingredients
Equipment
Method
- In a large skillet, heat 1 tablespoon of olive oil over medium heat.
- Add the buckwheat kasha and toast for about 5 minutes until fragrant, stirring frequently.
- Pour in 2 cups of water or broth and bring to a boil.
- Reduce the heat to low, cover, and simmer for 10-15 minutes until the kasha is tender and the liquid is absorbed.
- Meanwhile, in a medium saucepan, cook the pasta according to package instructions until al dente. Drain and set aside, reserving a bit of pasta water.
- In the same skillet used for the kasha, add another tablespoon of olive oil and the chopped onion.
- Sauté over medium heat until the onion is golden and translucent, about 5 minutes.
- Once the onions are ready, add the cooked kasha and pasta to the skillet and gently toss to combine.
- Season with salt and pepper to taste, adding a bit of reserved pasta water if needed.
- Transfer the Kasha Varnishkes to a serving dish and garnish with chopped parsley.
- Serve warm and enjoy.