There’s something magical about biting into a warm, tangy sourdough hamburger bun that you’ve made yourself, steam still rising from the soft crumb inside. Sourdough hamburger buns transform an ordinary backyard burger into something restaurant-worthy, with a subtle fermented flavor that store-bought buns simply can’t match.
These buns are worth making because they stay fresh longer than commercial versions, have a tender yet sturdy structure that won’t fall apart under toppings, and deliver that distinctive sourdough tang that elevates any burger. The natural fermentation also makes them easier to digest and more flavorful than quick breads.
Why You’ll Love This Recipe
This recipe delivers soft, pillowy buns with a chewy crust and complex sourdough flavor that makes every burger taste better.
- Uses active sourdough starter for authentic tang and natural leavening
- Buns stay soft for days without preservatives or dough conditioners
- Sturdy enough to handle generous toppings without falling apart
- Freezer-friendly for meal prep and entertaining
- Requires minimal hands-on time, mostly passive fermentation
My Experience Making This Recipe
I first made these buns when a neighbor complained that my homemade burgers deserved better than supermarket buns. After my third batch, I realized I’d stumbled onto something special, and my family started requesting these buns for every gathering.
The dough comes together quickly, and the cold fermentation overnight does most of the work for you. I love how the buns develop a subtle sourdough aroma during the rise, and that first batch I pulled from the oven had my entire kitchen smelling like an artisan bakery.
What impressed me most was the texture: the crumb stays tender even after cooling, the crust has just enough chew, and they genuinely taste better the next day as the flavors deepen. My kids now prefer these to any bakery option, and I’ve made these buns at least twice a month for the past year.
Recipe Overview
- Recipe Name: Sourdough Hamburger Buns
- Servings: 8 buns
- Prep Time: 20 minutes (plus overnight fermentation)
- Cook Time: 20 minutes
- Total Time: 12 hours 40 minutes (mostly hands-off)
- Course: Bread
- Cuisine: American
- Calories per Serving: 245
Equipment You Will Need
- Large mixing bowl
- Kitchen scale (highly recommended for accuracy)
- Bench scraper
- Instant-read thermometer
- Banneton basket or bowl lined with a clean kitchen towel
- Dutch oven or covered baking vessel
- Parchment paper
- Spray bottle for steam
- Stand mixer (optional but helpful)
Ingredients for Sourdough Hamburger Buns
- 500g bread flour (approximately 4 cups)
- 350g water (approximately 1.5 cups)
- 100g active sourdough starter (fed 4 to 8 hours prior)
- 10g salt (approximately 2 teaspoons)
- 7g instant yeast (approximately 2 teaspoons, optional but speeds fermentation)
- 5g sugar (approximately 1 teaspoon)
- Sesame seeds or everything bagel seasoning (optional topping)
- Egg wash: 1 egg beaten with 1 tablespoon water
Ingredient Notes and Substitutions
- Bread flour: Provides structure and chew through higher protein content. All-purpose flour works but yields slightly less structure; use 520g if substituting.
- Active sourdough starter: The heart of flavor and leavening; it must be fed and bubbly before use. If you don’t have starter, you can use 150g active starter and omit the instant yeast, though fermentation takes 24 hours instead of 12.
- Instant yeast: Accelerates fermentation for faster results. You can omit this entirely and extend cold fermentation to 18 to 24 hours if you prefer pure sourdough.
- Water temperature: Use 75 to 80 degrees Fahrenheit water; warm water speeds fermentation, cold water slows it. Adjust based on your kitchen temperature.
- Salt: Essential for flavor and gluten strength; never skip it. Sea salt and kosher salt both work; measure by weight for precision.
How to Make Sourdough Hamburger Buns
Step 1: Mix Your Dough
Combine 500g bread flour, 350g water at 75 to 80 degrees Fahrenheit, 100g active sourdough starter, and 5g sugar in a large bowl. Mix by hand or with a stand mixer on low speed for 3 to 4 minutes until all dry flour is hydrated and you have a shaggy, wet dough.
This initial mixing develops initial gluten strands without overworking the dough. The water needs to be warm enough to encourage fermentation but not hot enough to kill the starter’s wild yeast.
Step 2: Autolyse Rest
Cover the bowl with a clean towel or plastic wrap and let the dough rest for 30 minutes at room temperature. This rest allows the flour to fully absorb water and begins gluten development naturally.
During this autolyse phase, the dough becomes smoother and more extensible, which means you’ll need less mixing later and the final crumb structure improves. This is a game-changer for sourdough baking.
Step 3: Add Salt and Yeast
After the autolyse, sprinkle 10g salt and 7g instant yeast (if using) over the dough and mix on medium speed for 5 to 7 minutes, or knead by hand for 10 minutes. The dough should become smooth, elastic, and slightly tacky but not overly sticky.
The salt strengthens the gluten network and slows fermentation slightly, giving you better control. Instant yeast ensures the buns rise reliably even if your sourdough starter is young or not fully mature.
Step 4: Bulk Fermentation
Place the dough in a lightly oiled bowl, cover loosely, and let it ferment at room temperature for 4 to 6 hours. Perform stretch and fold (grab one side of the dough, stretch it up and fold it over itself) every 30 minutes for the first 2 hours, then leave undisturbed.
The dough should increase by 50 to 75 percent in volume and feel airy with visible bubbles when you poke it. Stretch and folds build strength without aggressive kneading and create a more open crumb structure.
Step 5: Shape the Buns
Gently turn the dough onto a lightly floured surface and divide it into 8 equal pieces (approximately 110g each) using a bench scraper. Working with one piece at a time, gently shape it into a tight ball by pulling the edges toward the center and rotating the dough slightly with each fold, then flip it seam-side down and use your cupped hands to roll it on the counter until it forms a smooth, round dome.
Shaping creates surface tension that helps the buns rise up rather than out and gives them a professional appearance. A tight shape also ensures even cooking and prevents blowouts during baking.
Step 6: Cold Fermentation Overnight
Place the shaped buns on a parchment-lined baking sheet, cover with plastic wrap or place them in a banneton basket lined with a towel, and refrigerate for 8 to 12 hours (or up to 24 hours). Cold fermentation develops flavor and makes the dough easier to score and handle.
The cold slows yeast activity and allows flavors to deepen through slow enzymatic activity. This overnight rest is why these buns taste complex and slightly tangy, similar to what you’d find at a good bakery.
Step 7: Prepare for Baking
Remove the buns from the refrigerator and let them rest at room temperature for 45 to 60 minutes while you preheat your oven to 450 degrees Fahrenheit. If using a Dutch oven, preheat it inside the oven for at least 30 minutes.
Bringing the buns to room temperature allows them to continue rising slightly and ensures they bake evenly. The steam trapped in a Dutch oven creates that beautiful, slightly crispy crust.
Step 8: Apply Egg Wash and Toppings
Once the buns have rested, brush each one generously with egg wash (1 egg beaten with 1 tablespoon water) and sprinkle with sesame seeds or everything bagel seasoning if desired. The egg wash creates a glossy, golden-brown finish and helps toppings adhere.
Egg wash is optional but transforms the appearance of your buns from homemade to bakery-quality. Even just a light brush makes a visible difference in the final presentation.
Step 9: Score and Bake
Using a sharp knife or bread lame, make a shallow slash across the top of each bun (this is optional but traditional). If baking in a Dutch oven, place the buns on parchment paper and transfer the parchment into the hot Dutch oven, then cover and bake for 15 minutes.
Scoring allows steam to escape in a controlled way and creates that signature artisan look. The Dutch oven traps steam during the first half of baking, which sets the crust, and then uncovering allows the crust to brown.
Step 10: Finish Baking
Remove the Dutch oven lid and bake for another 8 to 12 minutes until the buns are deep golden brown and register 205 to 210 degrees Fahrenheit on an instant-read thermometer inserted into the center of one bun. If baking on a regular sheet pan, spray the buns lightly with water twice during the first 10 minutes of baking, then finish uncovered.
Internal temperature is the most reliable indicator of doneness; this temperature ensures the crumb is fully set without being dry. The deep golden color signals proper Maillard reaction, which creates the complex crust flavor.
Pro Tip: Measure your dough by weight, not volume, for consistent results every single time. A kitchen scale takes the guesswork out of sourdough baking and ensures your buns turn out exactly the same batch after batch.
Tips for the Best Sourdough Hamburger Buns
- Feed your sourdough starter 4 to 8 hours before using it; it should be bubbly and nearly doubled in size with a pleasant, slightly tangy aroma. A weak starter produces weak dough and poor rise.
- Use a kitchen scale to weigh ingredients rather than measuring by cups; sourdough baking depends on precise hydration ratios, and cups introduce too much variability.
- Keep your dough at 75 to 78 degrees Fahrenheit during bulk fermentation for optimal rise and flavor development. A warmer kitchen means faster fermentation; a cooler kitchen means slower but more flavorful results.
- Don’t over-proof your shaped buns; they should look slightly puffy but not fully doubled when they go into the oven. Over-proofed buns collapse during baking and turn flat and gummy.
- Let your buns cool completely on a wire rack before slicing; cutting into warm bread releases steam and turns the crumb gummy. Wait at least 1 hour before using them for burgers.
- Keep leftover buns in an airtight container at room temperature for up to 3 days, or slice and freeze them in a freezer bag for up to 3 months. Refresh frozen buns in a 350-degree Fahrenheit oven for 10 minutes.
Common Mistakes to Avoid
- Using weak or unfed starter: A starter that’s not actively bubbling produces sluggish fermentation and flat buns with little flavor. Always feed your starter at least 4 hours before using it and look for visible bubbles and a pleasant smell.
- Skipping the autolyse: Mixing salt immediately into the dough toughens it and requires much more mixing. The 30-minute autolyse without salt allows gluten to develop naturally and requires less aggressive mixing.
- Over-proofing the shaped buns: Buns that rise too much during the overnight fermentation don’t have enough oven spring and come out flat and dense. Aim for a slight puff, not full doubling.
- Not allowing enough cooling time: Slicing warm bread traps steam inside and creates a gummy, doughy crumb instead of a light, airy one. Patience here makes a huge difference in the final texture.
- Baking without steam: Dry-baked buns develop a thick, hard crust that’s difficult to bite. Use a Dutch oven or spray the oven interior with water to create steam during the first half of baking.
Serving Suggestions
These sourdough buns shine as the foundation for any burger, but they’re versatile enough for sandwiches, sliders, or even breakfast toast. Their tender crumb and subtle tang make them exceptional at supporting bold flavors without overwhelming them.
- Classic cheeseburger with cheddar, lettuce, tomato, and house sauce
- Pulled pork or brisket sandwich with coleslaw and pickles
- Spicy fried chicken sandwich with hot sauce and ranch dressing
- Breakfast sandwich with bacon, egg, and melted cheese
- Toasted bun with butter and jam for a simple after-school snack
Variations to Try
- Herb and garlic buns: Add 2 tablespoons minced fresh garlic and 1 tablespoon fresh rosemary to the dough during the final mix for aromatic, savory buns that pair perfectly with herb-forward burgers.
- Whole wheat sourdough buns: Replace 20 percent of the bread flour with whole wheat flour (100g wheat, 400g bread flour) for a nuttier flavor and denser crumb. Increase water by 20g to compensate for whole wheat’s higher absorption.
- Everything bagel buns: Top with a homemade everything bagel seasoning blend (sesame seeds, poppy seeds, dried garlic, dried onion, and salt) before baking for an extra flavor boost that works especially well with smoked meat burgers.
- Brioche-style sourdough: Add 1 egg and 30g softened butter during the final mix and increase sugar to 15g for a richer, more tender crumb that leans sweet while maintaining sourdough tang.
- Seeded buns: Top with a mix of sunflower seeds, pumpkin seeds, and flax seeds for extra crunch and nutrition. Press seeds firmly into the egg wash so they don’t fall off during baking.
Dietary Adaptations
- Gluten-free: Substitute a 1-to-1 gluten-free bread flour blend and add 5g xanthan gum to replace gluten’s binding properties; expect a slightly denser crumb and shorter shelf life (1 to 2 days versus 3 to 4 days).
- Dairy-free: Use water or vegetable oil instead of egg wash for a plant-based finish; the buns will be slightly less glossy but taste identical.
- Vegan: Replace the egg wash with a simple mixture of plant milk and cornstarch or aquafaba (the liquid from canned chickpeas); the buns stay tender and flavorful without animal products.
- Low-carb and keto: This recipe doesn’t adapt well to low-carb because the flour base is essential to structure and flavor; consider cloud bread or almond flour buns as a completely different recipe instead.
Storage and Reheating
Refrigerator
Store cooled buns in an airtight container or resealable bag in the refrigerator for up to 5 days. They actually improve slightly as flavors meld, and the crumb stays soft thanks to the sourdough’s natural moisture retention.
- Keep in an airtight container to prevent drying
- Slice buns only when ready to use to minimize moisture loss
- Let cold buns come to room temperature before eating, or refresh in a 300-degree oven for 10 minutes
Freezer
Freeze cooled, whole buns in a freezer-safe bag for up to 3 months; slice them before freezing if you prefer to thaw individual portions. Freezing halts all flavor development, so buns taste best used within 1 month.
- Wrap buns individually in plastic wrap before placing in a freezer bag to prevent freezer burn
- Label the bag with the date so you don’t forget how long they’ve been frozen
- Thaw at room temperature for 1 to 2 hours, or bake frozen buns directly in a 350-degree oven for 15 to 20 minutes
Reheating
Refresh refrigerated or frozen buns in a 350-degree Fahrenheit oven for 10 minutes to restore softness and warmth. Never use a microwave, which turns bread gummy and unpleasant.
- Wrap buns loosely in foil to prevent over-browning while reheating
- Toast split buns cut-side down in a skillet for a crispy interior perfect for burgers that sit during service
- Spritz buns lightly with water before reheating to help restore moisture if they’ve dried slightly
Nutrition Information
| Nutrient | Amount |
|---|---|
| Calories | 245 |
| Total Fat | 2g |
| Saturated Fat | 0.5g |
| Carbohydrates | 49g |
| Fiber | 2g |
| Sugar | 1g |
| Protein | 8g |
| Sodium | 380mg |
| Cholesterol | 25mg |
Nutrition values are approximate and calculated per bun using standard ingredient databases. Actual values vary based on ingredient brands and preparation methods.
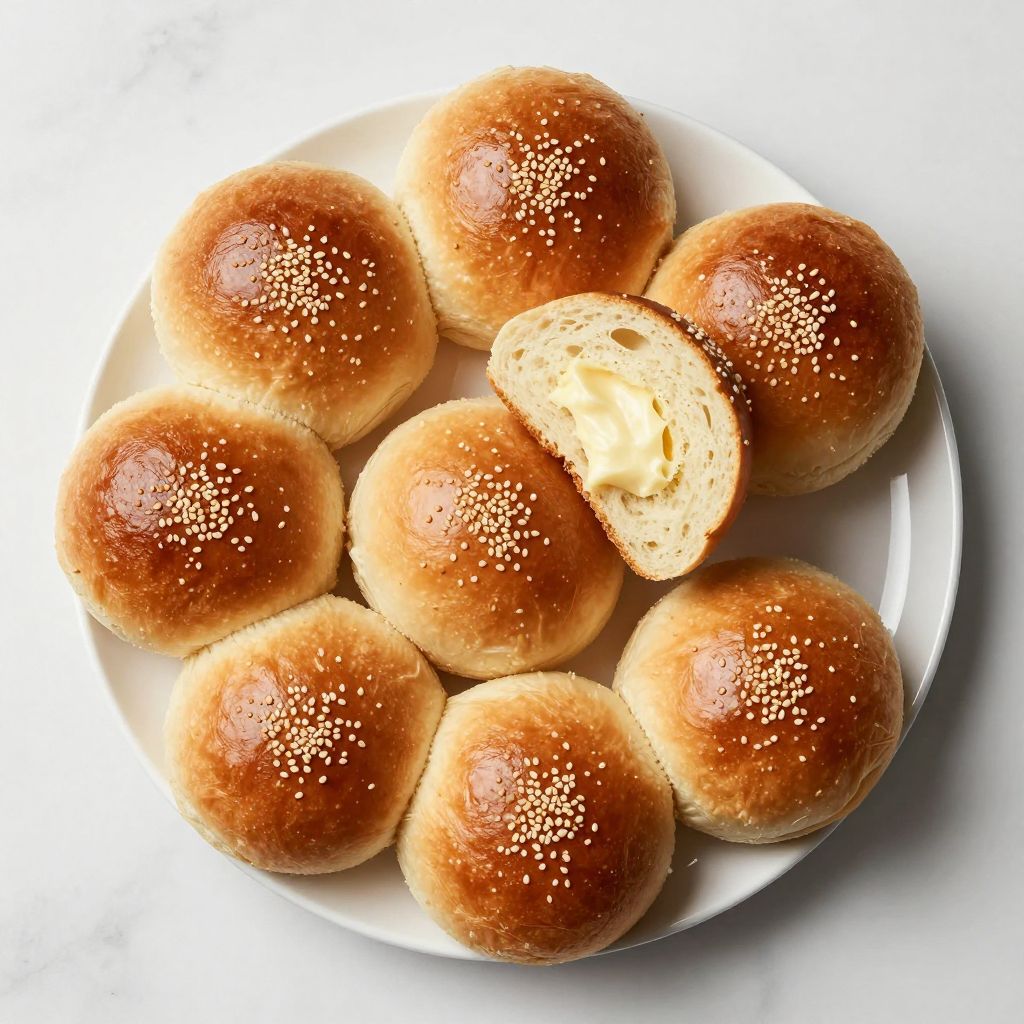
Sourdough Hamburger Buns
Ingredients
Equipment
Method
- Combine 500g bread flour, 350g water at 75 to 80°F, 100g active sourdough starter, and 5g sugar in a large mixing bowl and mix for 3 to 4 minutes until a shaggy dough forms.
- Cover and let the dough rest (autolyse) for 30 minutes at room temperature.
- Sprinkle 10g salt and 7g instant yeast over the dough and mix on medium speed for 5 to 7 minutes (or knead by hand for 10 minutes) until smooth and elastic.
- Place the dough in a lightly oiled bowl and bulk ferment at room temperature (around 75°F) for 4 to 6 hours, performing stretch and folds every 30 minutes for the first 2 hours.
- Turn the dough onto a floured surface, divide into 8 equal pieces (about 110g each), and shape each into a tight ball.
- Place shaped buns seam-side down on a parchment-lined sheet, cover, and cold ferment in the refrigerator for 8 to 12 hours.
- Remove the buns from the refrigerator and let them rest at room temperature for 45 to 60 minutes while preheating the oven to 450°F (preheat Dutch oven inside for at least 30 minutes if using).
- Brush each bun with egg wash (1 egg beaten with 1 tablespoon water) and sprinkle with sesame seeds or everything bagel seasoning.
- Make a shallow slash on the top of each bun, then bake covered in a preheated Dutch oven at 450°F for 15 minutes (or bake on a sheet pan with steam by spraying water twice during the first 10 minutes).
- Remove the lid and bake for an additional 8 to 12 minutes at 450°F until deep golden brown and the internal temperature reaches 205 to 210°F. Cool completely on a wire rack before slicing.
Notes
Frequently Asked Questions
Can I make these without a stand mixer?
Yes, absolutely. Mix the initial dough by hand for about 5 minutes, then after the autolyse, knead by hand for 10 to 12 minutes until the dough becomes smooth and elastic. Hand-kneading takes more effort but produces identical results and many bakers prefer the tactile feedback.
What if my sourdough starter is very active and bubbly?
If your starter is extremely vigorous, reduce the amount to 80g and use it at its peak (right when it stops rising and before it collapses). You can also shorten the bulk fermentation to 3 to 4 hours, watching the dough closely rather than following exact timings.
Can I skip the overnight cold fermentation?
You can, but I don’t recommend it because cold fermentation develops the sourdough flavor and creates a more tender crumb. If you’re short on time, reduce bulk fermentation to 8 hours and final proof to 2 to 3 hours at room temperature, accepting a milder flavor profile.
Why do my buns turn out gummy inside?
Gumminess usually comes from slicing too soon after baking or under-baking. Make sure the internal temperature reaches 205 to 210 degrees Fahrenheit and cool the buns completely on a wire rack for at least 1 hour before cutting.
Can I use this dough for hot dog buns instead?
Yes, this dough works beautifully for hot dog buns. Instead of shaping into round buns, shape into 8-inch oblong logs using the same technique, and reduce baking time to 15 to 18 minutes total. The fermentation times and temperatures remain identical.
What’s the difference between this recipe and a regular sourdough bread recipe?
These buns use a higher hydration (70 percent versus 80 to 85 percent for traditional loaves) and more gentle shaping to create a softer, more tender crumb without the thick, chewy crust of artisan loaves. The added instant yeast also ensures reliable rise compared to pure sourdough, which depends entirely on wild yeast strength.
Final Thoughts
Making sourdough hamburger buns at home is far simpler than many bakers assume, and the flavor payoff is enormous. Your family and friends will genuinely notice the difference the moment they bite into a burger on one of these tender, tangy buns.
Start with this recipe, master the basic technique, and then experiment with variations and toppings. Once you realize how straightforward it is to bake better buns than any bakery offers, you’ll never go back to store-bought again.
Explore More Sourdough Recipes
If you loved making these buns, explore more sourdough creations to expand your baking skills and impress your table.
Try our sourdough baguette recipe for a classic French-style loaf with crispy crust and open crumb, or dive into our King Arthur sourdough recipe for a traditional, time-tested approach to naturally leavened bread.